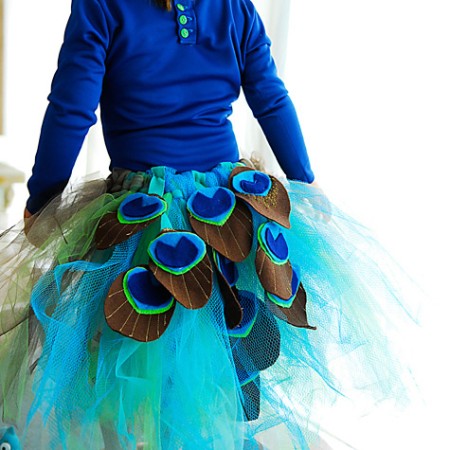
As the chilly winds of October blow in, so does the anticipation of Halloween. Among the pantheon of iconic Halloween symbols, witches and their defining witch’s hats stand tall. Now, imagine combining the allure of these mystical beings with the pride of creating a DIY felt witch hat. The appeal of store-bought hats fades when you can tailor one precisely to your taste. As you dive into this journey, not only do you celebrate the spirit of Halloween, but you also craft a classic costume piece that becomes an extension of your personality. A DIY approach ensures that this Halloween, your witch’s hat will be brimming with charm and a sprinkle of magic unique only to you. Need a different costume idea? Try a DIY Peacock Costume, some No Sew DIY Fairy Wings or DIY The Birds Costume.
There is no free pattern in this tutorial. With a little math you’ll be able to make your own pattern and different sizes of hats to suit the needs of your little witch.
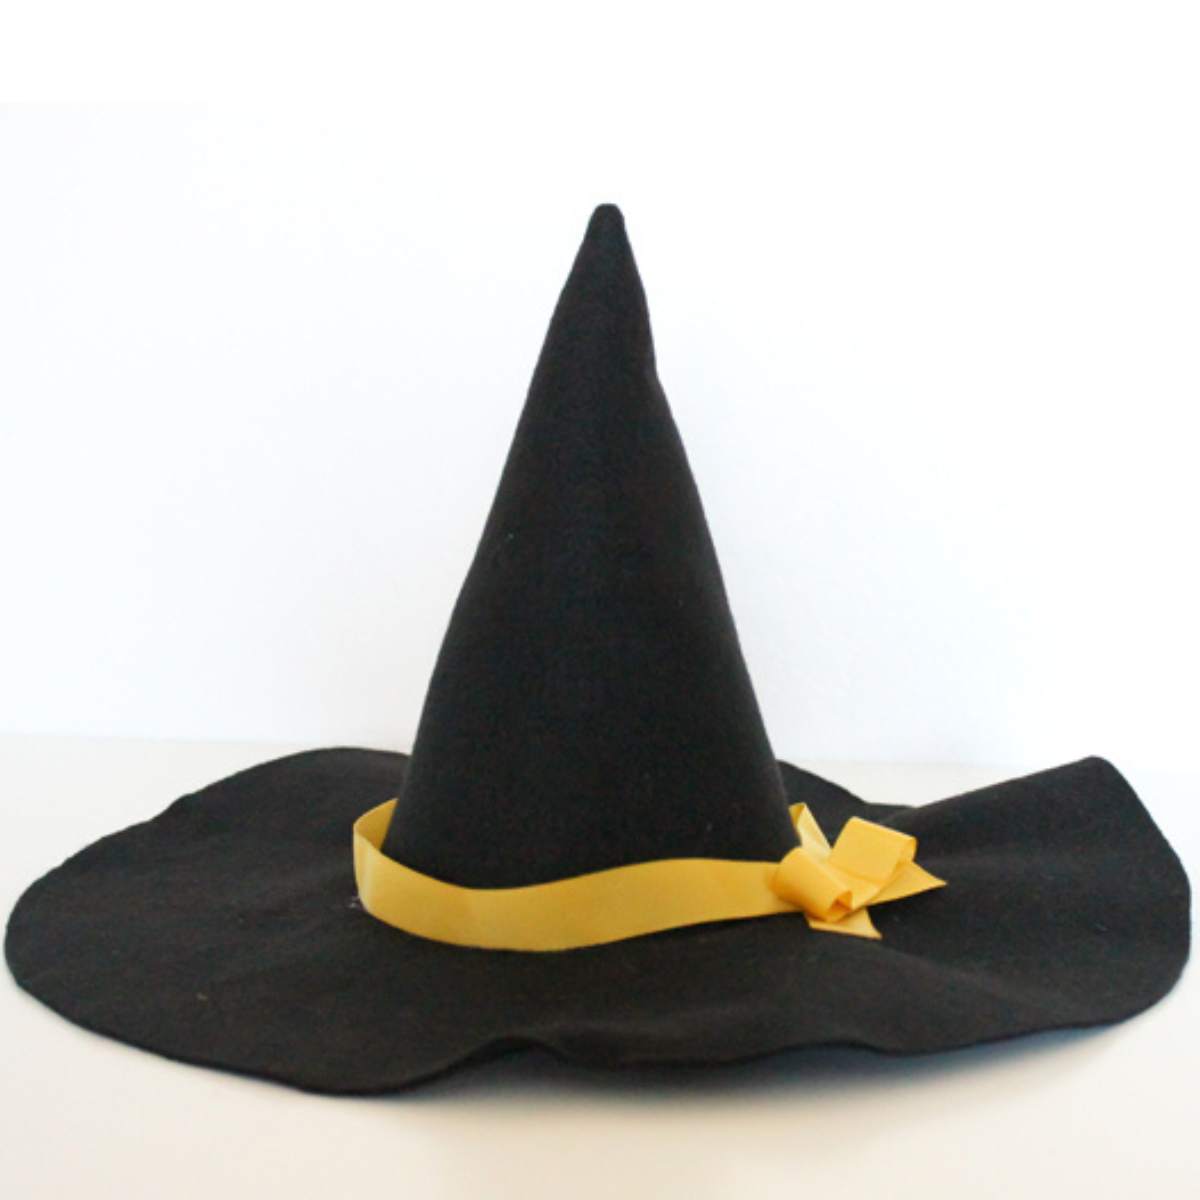
🎃 Delia Creates has an awesome Witches Hat tutorial (see photo abo e). She shows you how to make a witches hat in any size! This looks so quick! My daughter wants to be a witch this year so this tutorial is perfect timing! Make sure you check out her Mini Witch Dress tutorial or her No-Sew Spider Web Cape Tutorial!
Materials: Gathering Your DIY Witch Hat Supplies
Embarking on the magical journey of how to sew a witch’s hat starts with gathering the right ingredients. Think of it as brewing a potion; each component has its role in ensuring the final outcome is spellbinding. Shop for your supplies at Hobby Lobby, Michael’s or your local craft store. You could also find these things online. Here’s a curated list of felt hat supplies you’ll need:
- Fabric: Heavy duty black felt. I prefer wool felt. You can choose any felt color but black is the most traditional for this hat. Create your hat pattern (see below) to determine how much fabric you’ll need. The great thing about felt is you don’t have to worry about the raw edges fraying.
- Thread: Black or matching your chosen fabric.
- Measuring Tape: Essential for getting the right fit.
- Sewing Machine: Because even in the magical realm, some modern tools can be handy.
- Fabric Scissors: Sharp ones, to cut through the fabric with ease.
- Pins: For holding the fabric pieces together as you sew a witch hat.
- Pattern Paper: Useful for drafting the shape of your hat before cutting the fabric.
- Hot Glue: If you aren’t sewing, use a hot glue gun and a thin line of glue in all the places the instructions tell you to sew. You could also use fabric glue though that takes longer to set.
With these materials at your disposal, not only will you master how to sew a witch’s hat, but you’ll also have a cornerstone for your Halloween costumes. So, ready your sewing station, because it’s time to stitch some enchantment!
More Easy Halloween Sewing Projects
Whether you want to make your dog a DIY Dog Superhero Cape or whip up a cute little DIY DIno Tail, I’ve got the sewing tutorials for you!

Basic Hat Construction: Crafting the Magical Silhouette
Creating the basic structure of your DIY felt witch hat is like the initial stages of a spell. It sets the foundation upon which the magic unfolds. Here’s a breakdown of how to make this cute costume piece that stands tall and proudly:
- Draft the Pattern: See the pattern drafting section below if you need help.
- Cut the Fabric: Using the drafted pattern, cut out the fabric for both the cone and the brim. You will have 2 felt pieces, once cut.
- Sew the Cone: Fold the cone piece with the right sides together. Stitch along the straight edge, forming a cone shape. This is the pointy top of your witch costume hat.
- Attach the Brim: Once the cone is ready, align the base of your cone with the inner circle of the brim. Make sure your right sides are together. Pin them together, and then stitch around the circumference. Turn the cone right side out. Use something pointy to push out the tip of the hat.
- Finishing Touches: Hem the outer edge of the brim to give it a neat finish, if you want. It’s not really necessary with felt. At this point, feel free to add any embellishments, like ribbons, lace, or even some faux spider webs for a spooky touch!
And there you have it! Your witchy hat is complete. Pair it with your witchy ensemble, and you’re all set to be the star of any Halloween gathering. With a bit of craftiness, how to make a witch’s hat becomes less of a mystery and more of a fun project. This is one witch costume accessory that will leave a bewitching impression wherever you go!
How To Draft a Witch Hat Pattern
Halloween is always around the corner are you ready to make your handmade felt witch hat? Let’s draft the pattern for this witchy accessory. You can make this any size. Make a tiny witch hat for a doll, toddler hats or hats for adults. All you need to know is the circumference of your head, or the head the hat is for. This will seem a lot more confusing than it actually is! If this tutorial doesn’t make sense, take a look at Delia’s tutorial for more visuals.
Base of the Hat: Drawing The Brim
For the brim of the hat, you’ll want to decide how wide you want it. Once you’ve decided, it’s time to create the brim pattern.
- Measure the circumference of your head and add an ½-inch seam allowance.
- Using a compass or a string and pencil, draw a small circle with that circumference on a piece of paper.
- Around the first circle, draw a larger circle. This larger circle will dictate how wide the brim of the hat is. Remember, the difference between the two circles is the width of the brim. Cut out your brim pieces on regular paper or freezer paper.
Top of the Hat: Drawing The Cone
The top of the hat is essentially a cone. Drafting the cone pattern is like geometry class but way more fun!
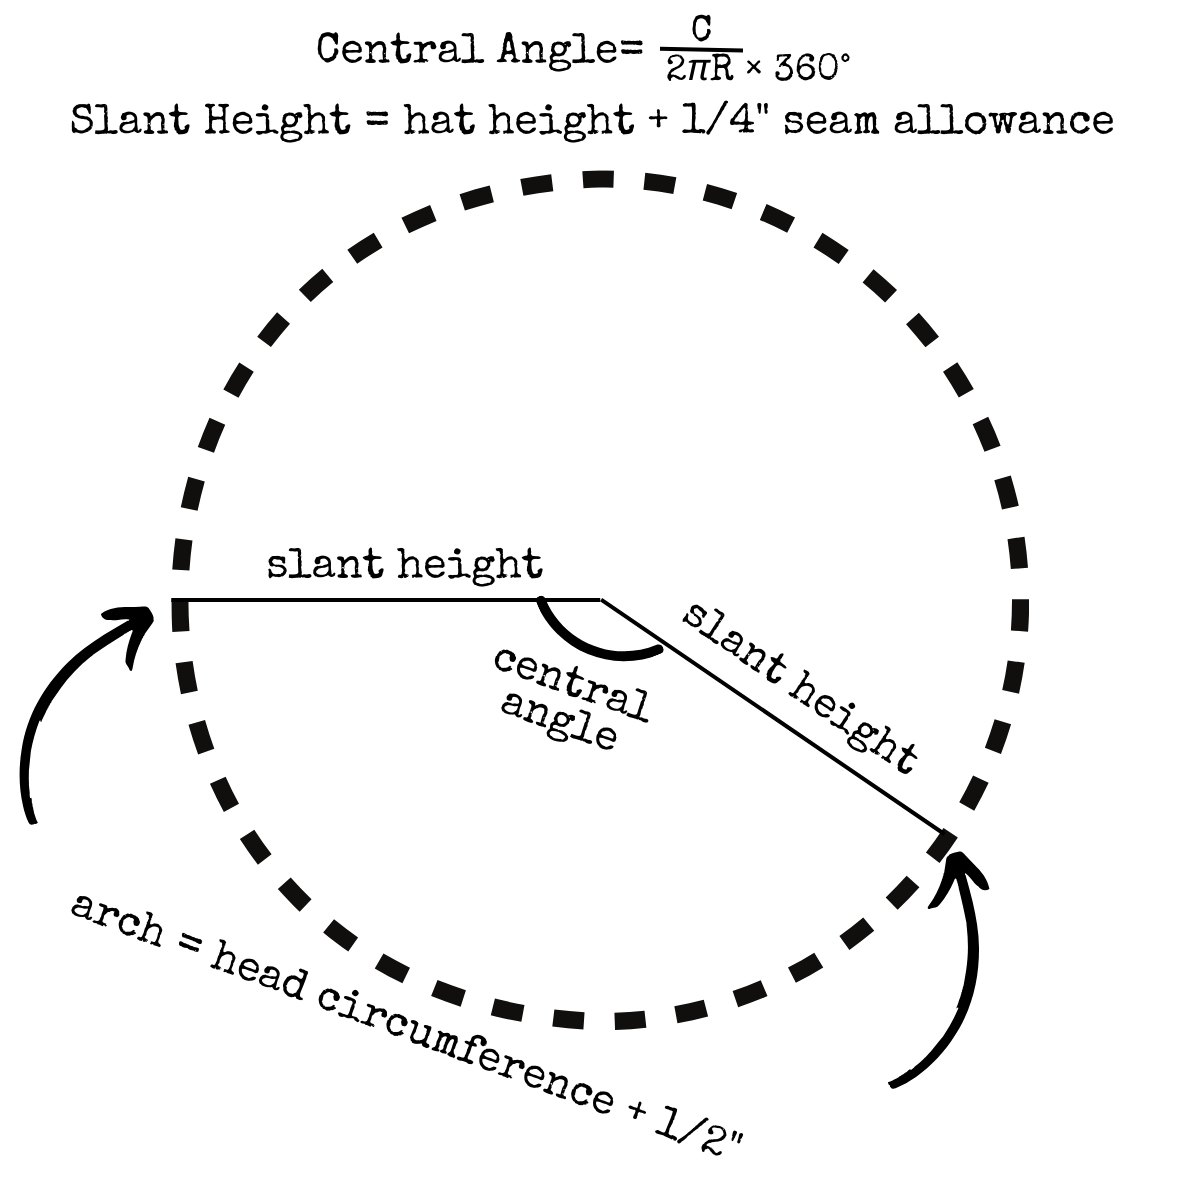
- Draw a Full Circle: Begin by drawing a full circle on a sheet of paper or a piece of cardboard. Use a compass or a string attached to a pencil for this. The radius for this circle is the slant height (l) of the cone. This circle represents the “mother circle” from which our cone’s sector will be extracted.
- Find the Central Angle of the Sector: To determine the angle of the sector we’ll need to cut out, use the formula in the image below. Where C is the arc length (equal to the cone base’s circumference) and R is the radius of this full circle (equal to the slant height). The result will give you the angle in degrees that corresponds to the cone’s base circumference.
- Draw the Sector: Start at the center of the circle. Use a protractor to mark the calculated central angle. Draw two straight lines from the center of the circle to its edge to define the sector. The arc of this sector should be equal to the circumference of the cone’s base (C). This arc length ensures that when you roll your sector into a cone, the base will have the desired size.
- Cutting: Use scissors to cut out the sector. Keep in mind that the larger the central angle, the wider the base of the cone, and the shorter its height. Conversely, a smaller angle results in a taller cone with a narrower base.
Now you have your own witch hat pattern to make a proper witch hat!
FINAL TOUCHES: ADDING THE WITCHY PIZZAZZ TO YOUR HAT
Giving your DIY witch hat the final touches is like sprinkling a potion with its last magical ingredient. It’s the details that will elevate your hat from basic to bewitching!
- Ribbons and Laces: Add a silky black ribbon or some vintage lace around the base of the cone, letting the ends cascade down. Knot or bow it to the side for an asymmetrical allure.
- Buckles and Broomstick Badges: Channel the classic witch aesthetic by affixing a faux buckle to the front of the hat. A hat buckle is a traditional way to finish the hat. Or get creative with some broomstick-shaped pins or badges to pay homage to a witch’s favorite mode of transport.
- Mystical Veil: Drape a light, gauzy fabric from the hat’s tip, allowing it to float behind you. This touch adds an ethereal and mysterious vibe, perfect for those wanting a more enchanting look.
- Feathers and Faux Gems: Adorn the base or the tip with some dark feathers for a dramatic flair. Alternatively, glue on some faux gemstones or sequins for a sparkle that captures the night’s enchantment.
- Distressed Look: If you’re going for an ancient or worn-out witch vibe, gently distress the edges of the hat’s brim with scissors. A light sandpaper rub can also give it that ancient, worn-out texture.
- Glowing Edge: For those venturing into the night, adding a thin strip of glow-in-the-dark paint or adhesive glow strips to the brim will make your hat—and you—stand out in the moonlight.
Remember, the magic is in the details. Each added touch will make your homemade witch hat unique, reflecting your personality and style. Whether you lean towards the mysterious, the elegant, or the downright spooky, these final touches will ensure your hat is truly spellbinding this Halloween!