When you think of DIY fairy wings, images of intricate stitching, tricky patterns, and endless hours at the sewing machine might flood your mind. But what if there’s a whimsical shortcut? Make your little girl (or yourself) some faerie wings without sewing! Need things to pair with your cellophane fairy wings? Make a Beautiful Butterfly Twirly Skirt, or make this Easy DIY Fairy Wand Tutorial.
Whether you’re gearing up for a magical play date or scouting out a great project for a rainy day, this guide is about to become your fairy godmother. With simple craft materials, you’ll soon be fluttering around with your own wings, minus the sewing saga. Let’s spread those wings and fly into a world where crafting meets simplicity, and imagination reigns supreme.
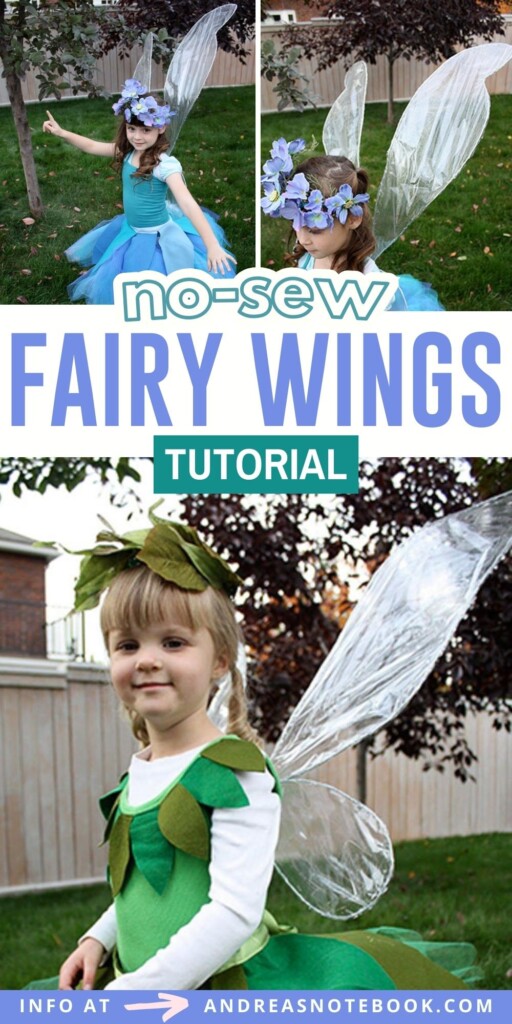
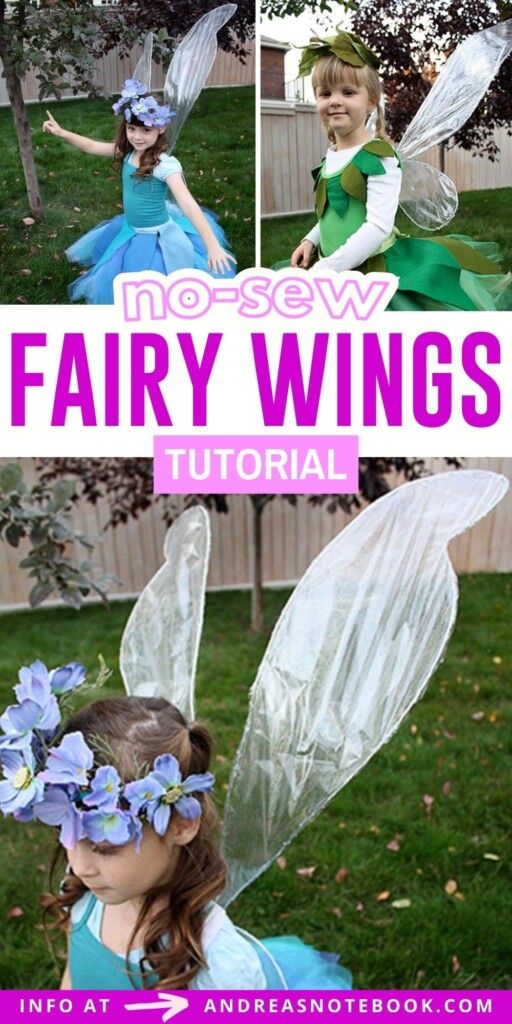
Want to know how to make no sew fairy wings? Look no further! Kalleen from At Second Street is here to share her No Sew Iridescent Fairy Wings Tutorial!
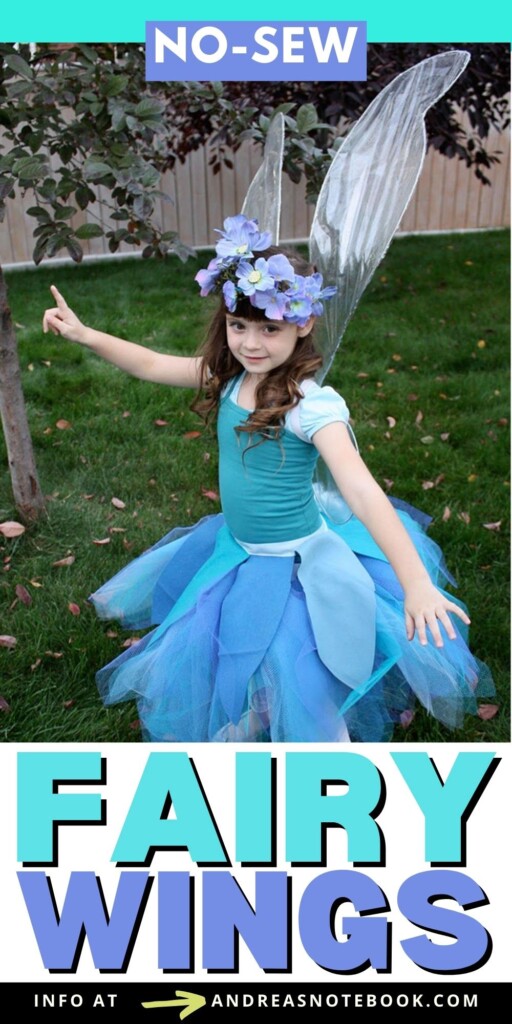
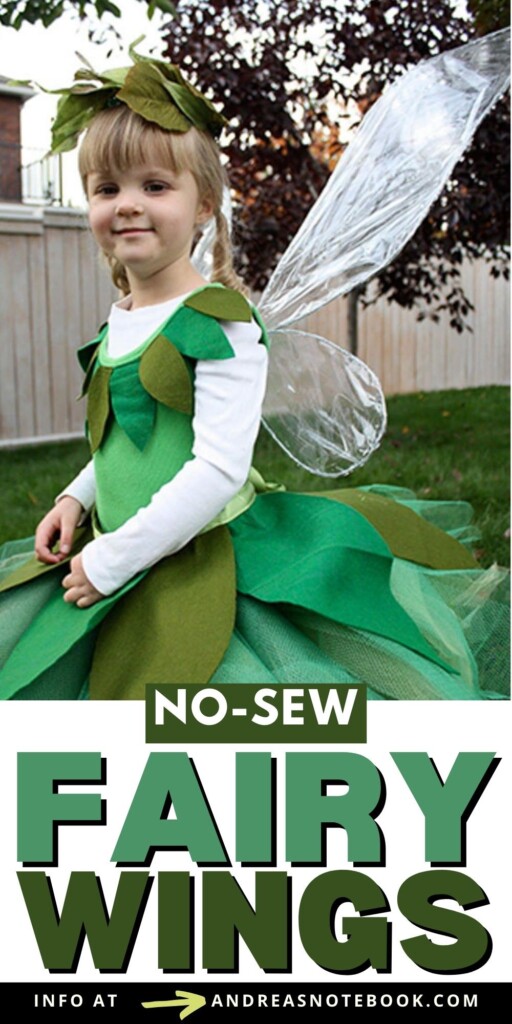
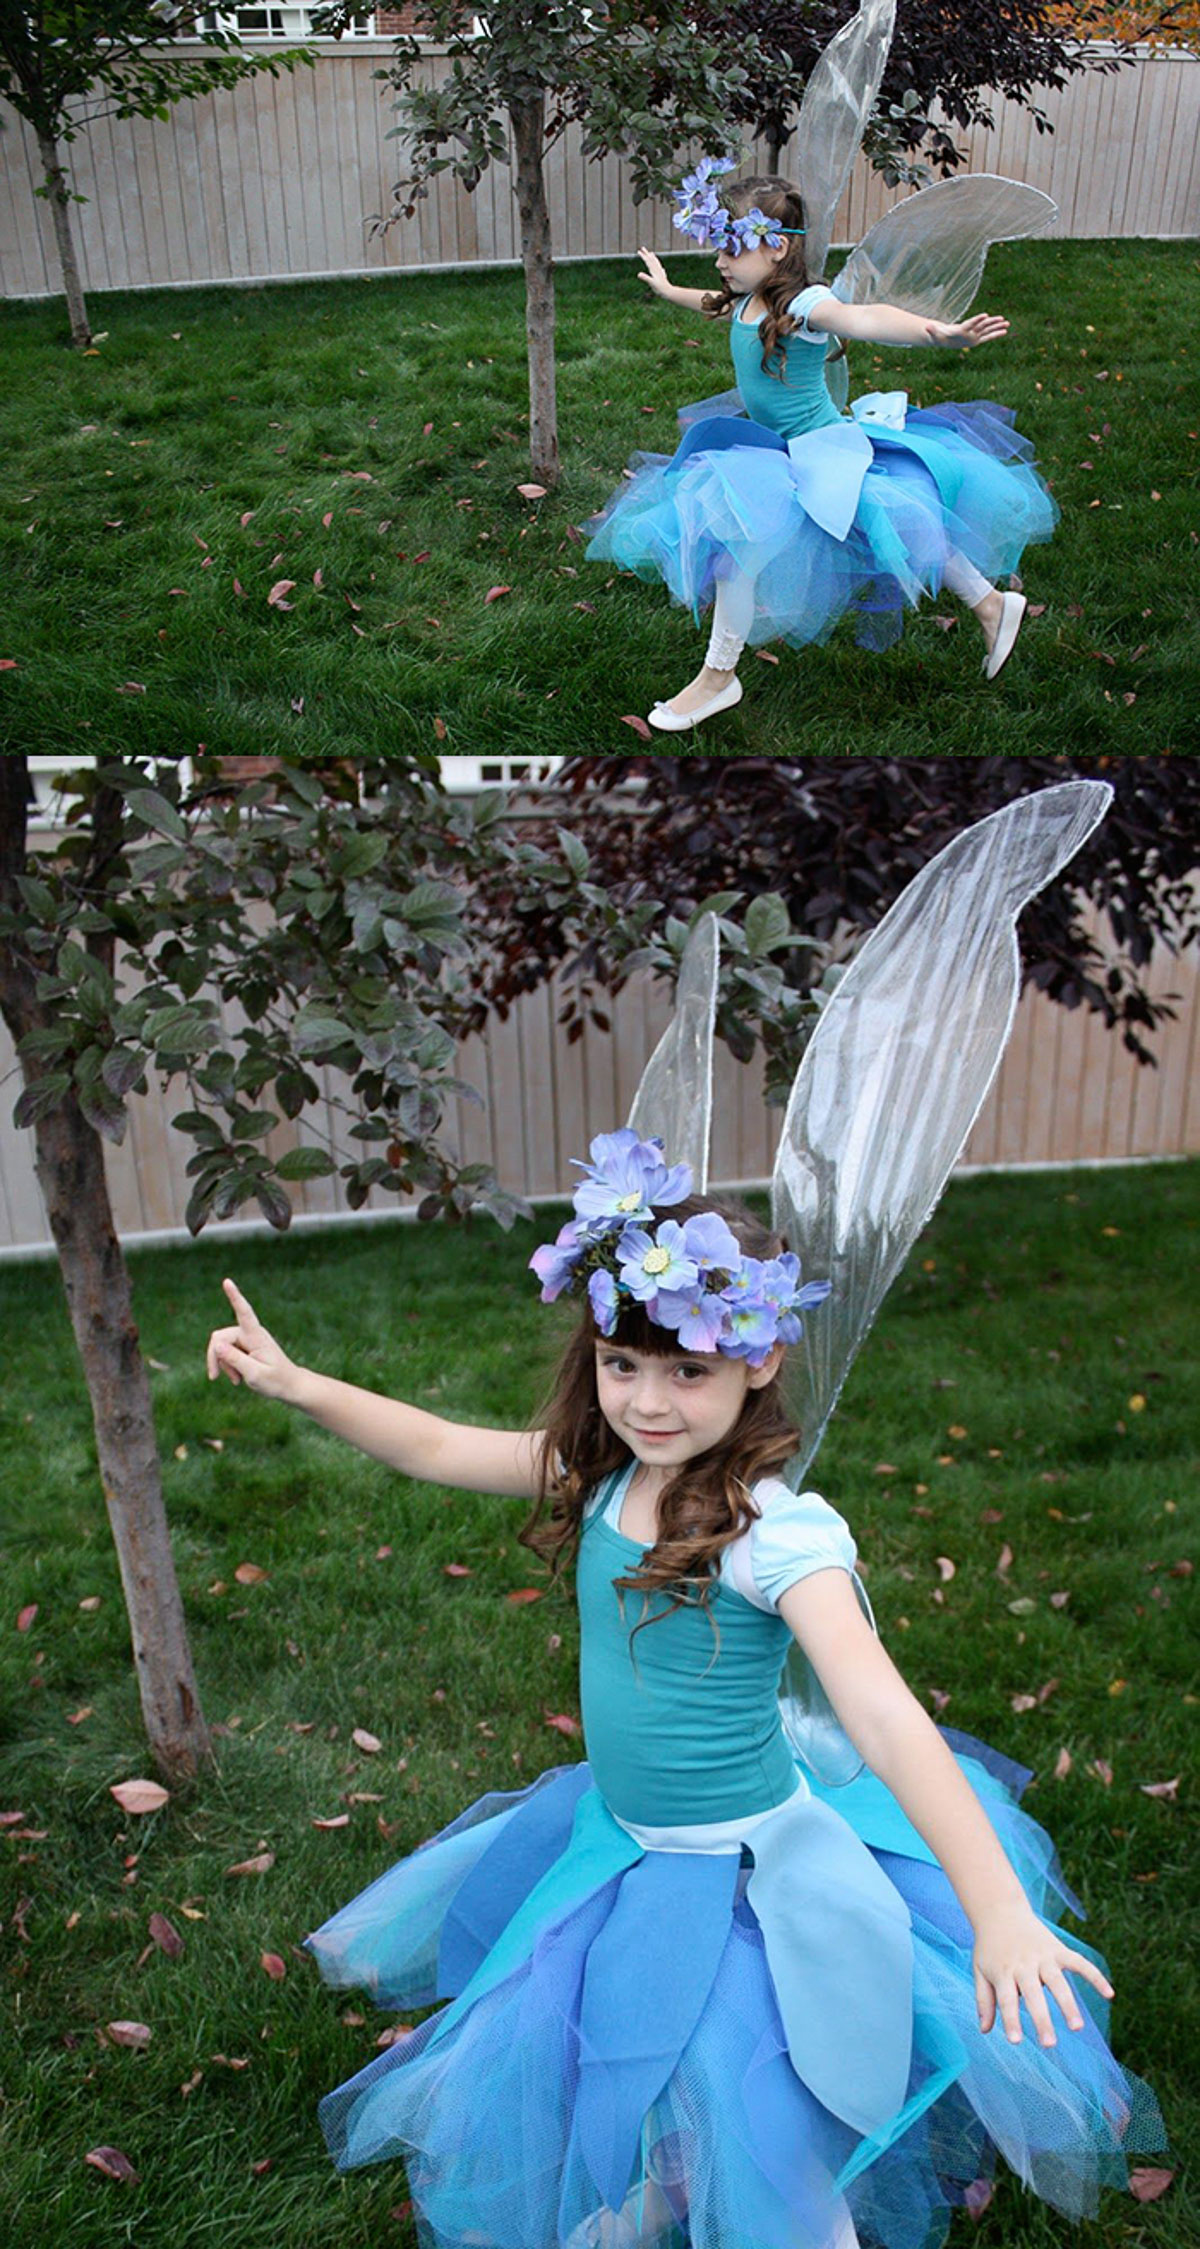
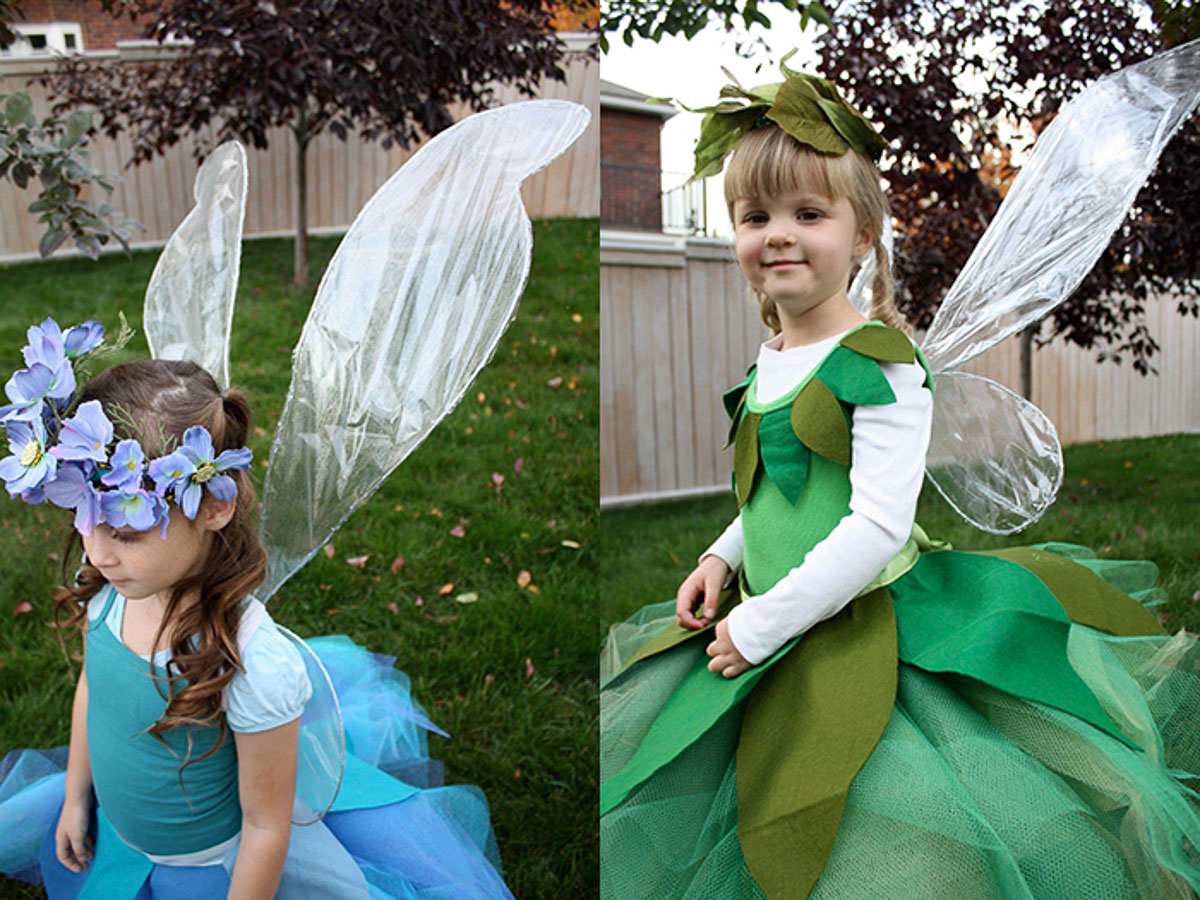
I know you can buy wings for pretty cheap these days, but I’m picky and I wanted something more realistic. Something more Tinker-bell like and not so much butterfly. This is what I came up with for our costumes last year.
10 Costumes That Need Wings
Wings: they’re not just for birds and planes anymore. When October looms, or cosplay calls, you might find yourself wishing you had a pair sprouting from your back. And who could blame you? They’re the crowning glory to countless iconic looks. Need inspiration? Here are 10 costumes that soar (pun intended) with the addition of wings:
- The Classic Fairy: Whether you’re a Tinkerbell or a woodland nymph, DIY fairy wings make the ensemble.
- Angelic Presence: Don those beautiful fairy wings and glide into any gathering with a heavenly vibe.
- The Monarch Butterfly: A butterfly costume is all about elegance. But remember, it’s the wings that catch the eye.
- Lady of the Bugs: A ladybug look isn’t complete without spotted wings. You can also use this DIY Ladybug Wings tutorial for a totally different way to make wings.
- The Night’s Bat: Flit mysteriously around with wings fit for the creature of the night.
- Mythical Dragon: Unleash your inner dragon with grand wings that intimidate and captivate. Pair with this adorable DIY Dragon Tail Tutorial.
- Eerie Fallen Angel: Dark, majestic wings speak of a heaven-haven’t been, making it a Halloween favorite.
- Firebird Phoenix: Rise from the ashes with blazing wings fit for this legendary creature.
- Majestic Pegasus: Channel this mythical horse, and let those wings help you gallop to new heights.
- Transparent Sprite: With cellophane wings shimmering, embody the spirit of air and light.
So, this year, let your imagination take flight and elevate your outfit with the perfect pair of wings! It’s time to make that grand entrance.
More Easy DIY Costume Tutorials
Gather Supplies:
Whipping up beautiful wings that shimmer in the twilight without a needle and thread might sound like pure sorcery. But hold onto your pixie dust because the magic truly lies in the craft supplies you choose.
For a flight into the fantastical world of no-sew fairy wings, ensure your craft room (or that chaotic craft drawer we all have) is stocked with the following essentials:
- Solid Galvanized Wire: This forms the sturdy backbone of your wings. Lightweight yet durable, it’s the secret to wings that stand tall but don’t weigh you down. I bought my wire at Walmart. I got the roll for $3.50. I was able to make three sets of wings and have a ton left over. You could use a wire hanger, but for this price why mess with that.
- Pliers or similar tool: To mold and bend the wire into ethereal wing shapes.
- Electrical tape or duct tape: For securing wire ends, ensuring they don’t make surprise appearances.
- Hot glue gun and glue sticks: The magic wand in the world of no-sew projects, this tool attaches the sheer fabric to your wireframe effortlessly.
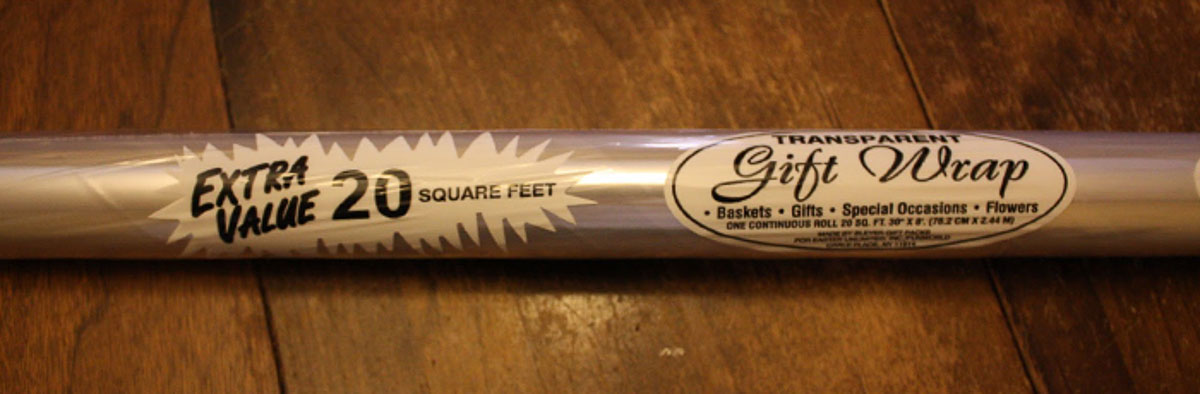
- Transparent gift wrap: The canvas for your wings. It captures light beautifully, making your wings shimmer and shine.
- Optional glitter paint: To add that whimsical sparkle.
- Paint brush: A trusty sidekick to the glitter paint, helping you paint on the glam.
- Ribbon: Perfect for additional embellishments or tying around the middle for added flair.
- Elastic band: Ensures your wings stay snugly in place as you flutter about. You can use ½″ or 1″ width. Length varies.
All of these craft supplies should be available at your local craft store. You can also buy any of them online.
Contemplating Wing Shape
Creating DIY fairy wings? The first thing on your checklist should be shape. That’s right! Before you dive deep into the magical realm of fairy creation, the wing shape dictates the vibe. Think about it: Are you a gentle flutterer or a zippy zoomer?
- Butterfly Wings: Inspired by nature’s floating masterpieces, these are defined by their delicate shape. Perfect for fairies that love a gentle float amidst garden blooms.
- Dragonfly Edges: Opt for a design with sharper edges of the wing. It screams speed and precision! Dragonflies zip and zap, and if that’s your fairy persona, let those wings do the talking. Then pair them with this cute DIY Dragon Tail.
But wait! Before sketching your wing pattern, a pro tip: measure against your back. It’s the real secret behind wings that look like they naturally sprouted overnight. The lower wings should align nicely near your waist, and the upper wings? Well, they should be proud, but not knock over vases.
Crafting your own fairy wings is more than just a fairy costume project. It’s an exercise in embodying nature. Whether channeling the gentleness of a butterfly or the agility of a dragonfly, your wire wing frame will be the canvas of your fairy tale dreams. Happy crafting!
Instructions:
It’s time to start making a pair of fairy wings. It should take you about 15-30 minutes to complete these DIY fairy wings (or DIY butterfly wings?). It’s a simple project that is a lot of fun and will be done in no time! The first time you make them they’ll take a little longer but by the second pair of wings you’ll be a pro!
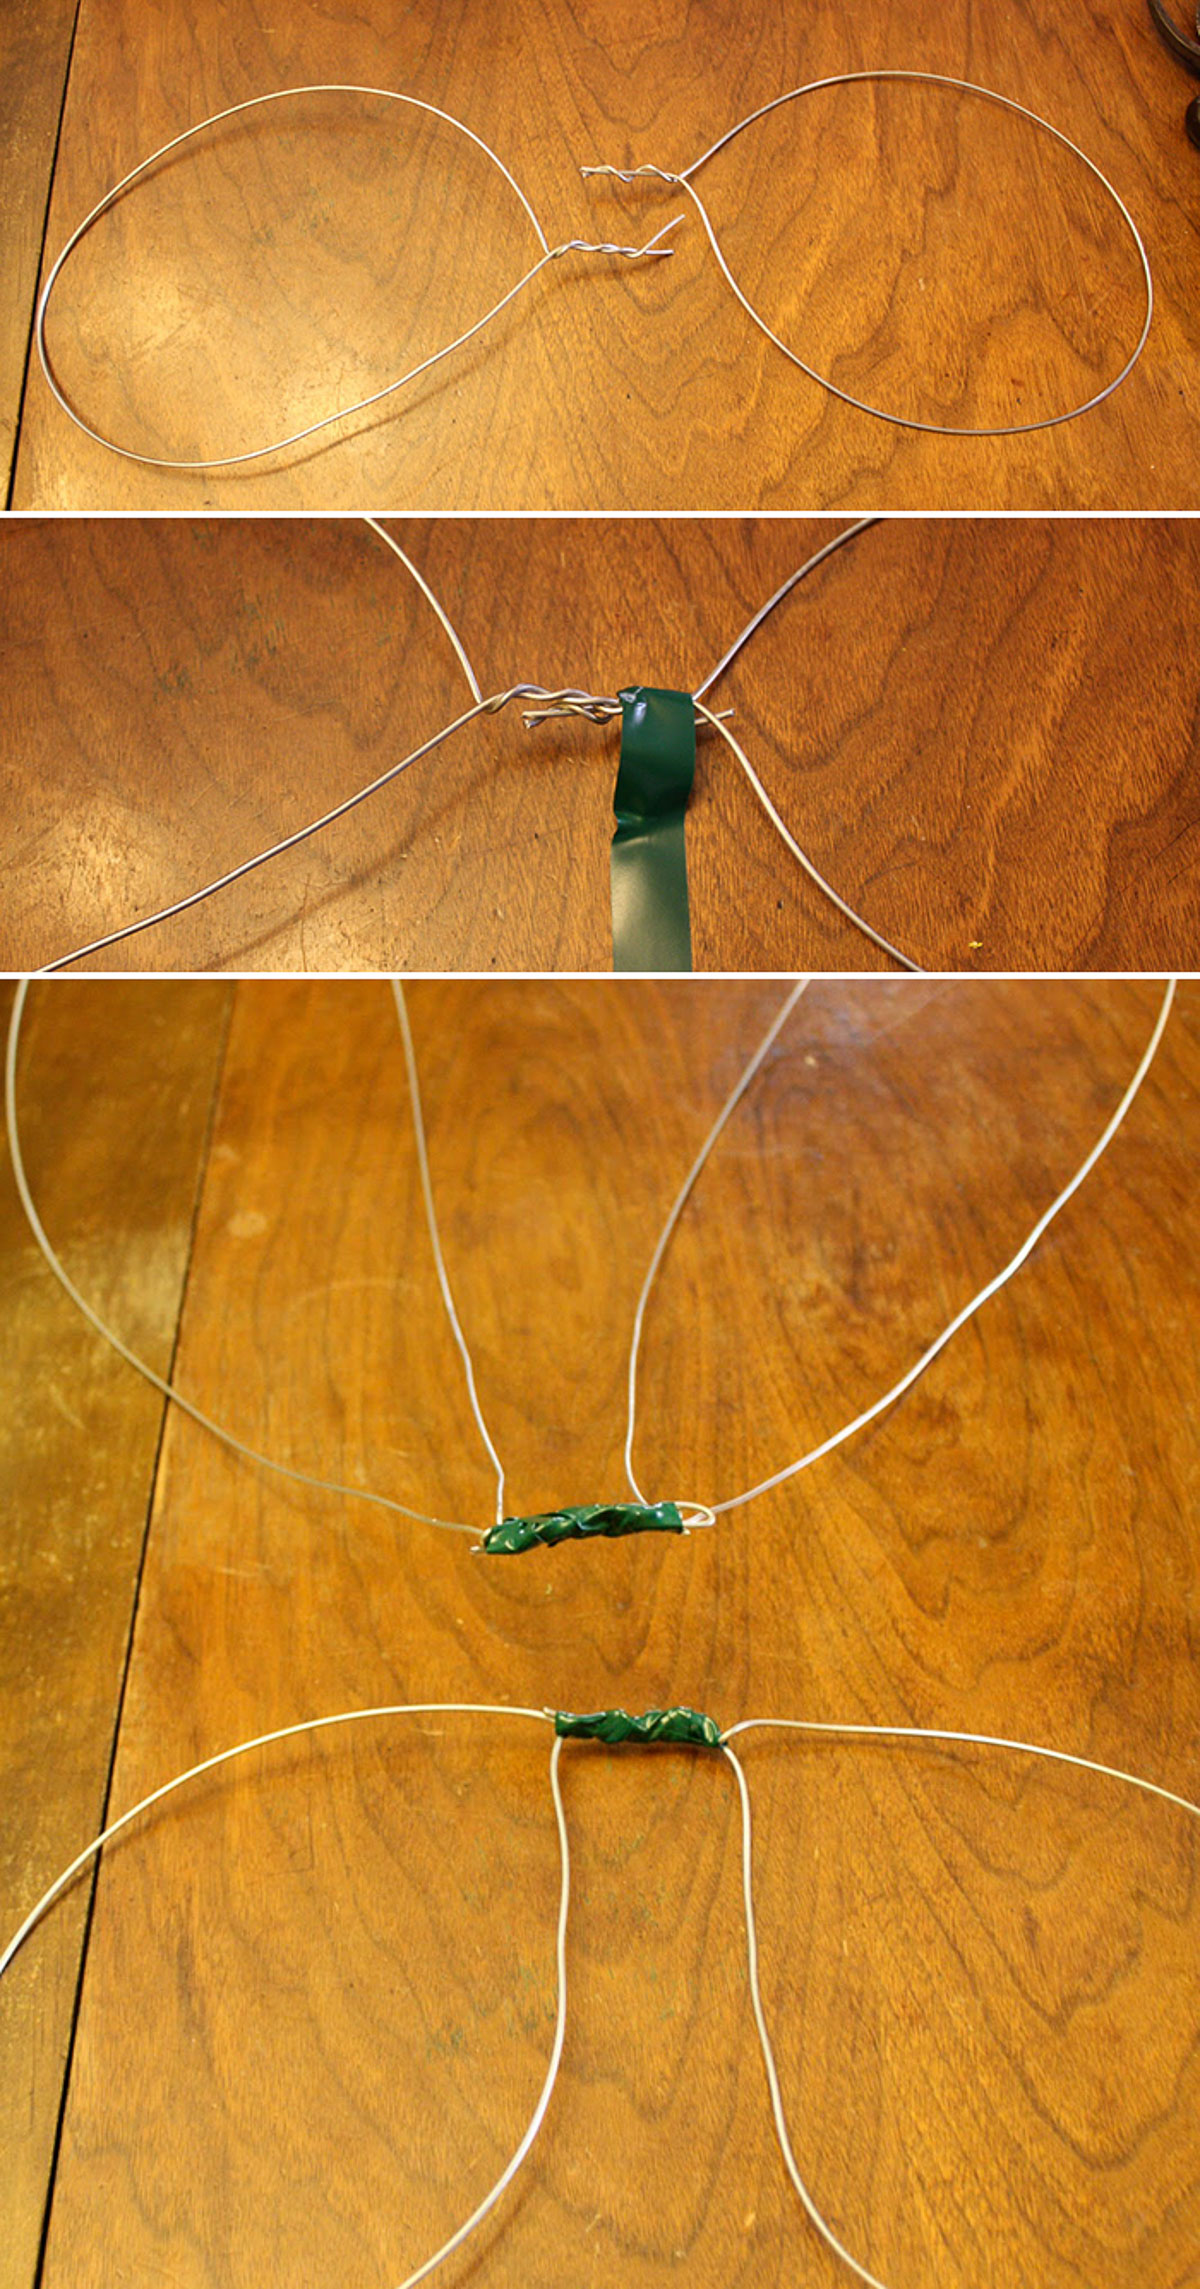
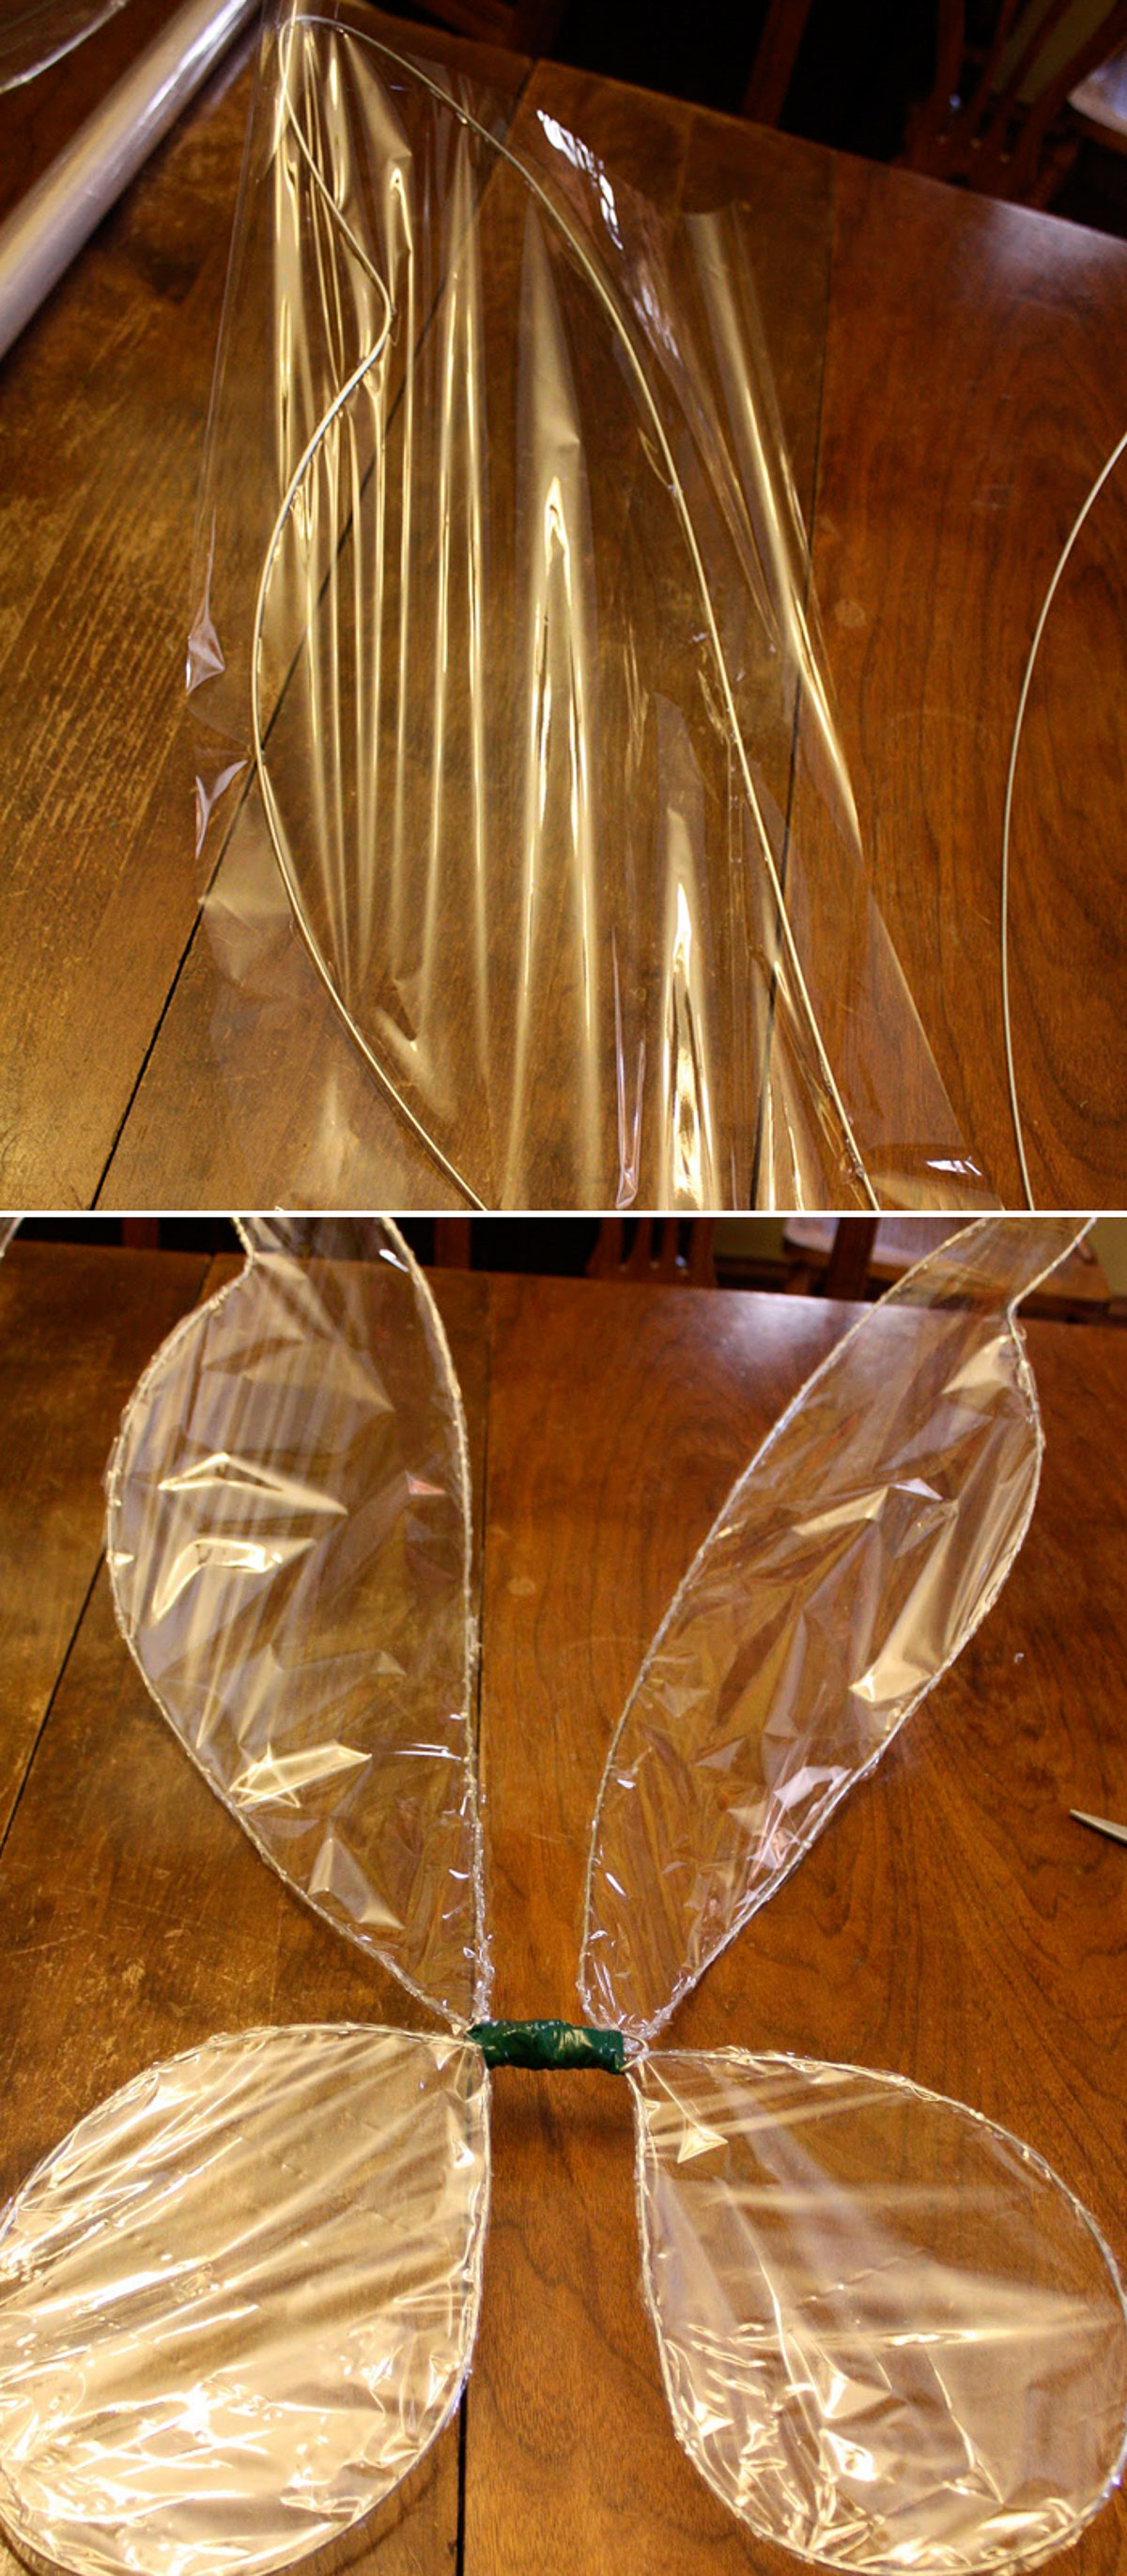
Step 1: Start by cutting four pieces of wire. Two pieces of the same length for your top wings and two of the same length for the bottom wings. The longer the wire is the bigger the wing it will make.
Step 2: Next step, cross over the ends of the wire and twist them. You may need pliers to help. After twisting the ends, form the wire into a shape you like. I would have a little bit of clear image of the shape you want in front of you before you start. I googled fairy wings and found a few shapes I really liked. After shaping the wire wrap the twisted ends together with tape. Then wrap the top and the bottom pieces together with tape. It should feel sturdy when you are done.
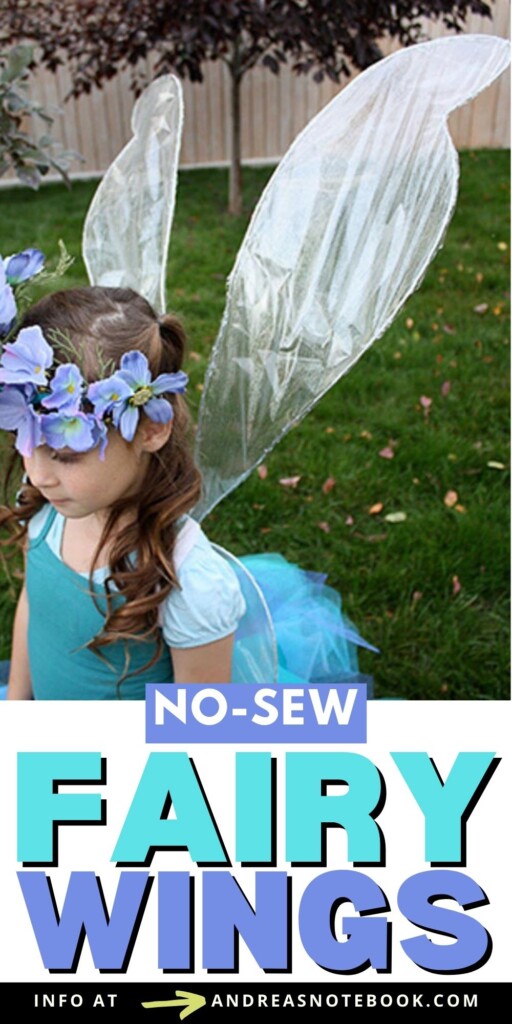
Step 3: Time to cover them in cellophane gift wrap. I bought mine at the dollar store and had enough in one roll to cover all three sets of wings.
Cut a piece of cellophane just larger than one wing.
The wrap is attached to the wing with hot glue. Run a small bead of hot glue all the way around one side of the wing. Then lay it on the cut piece of wrap. Trim the edges and repeat on the other side of the same wing. Then repeat the same process on all four wings.
Step 4: When I was finished I painted on some silver glitter acrylic paint. I tried to use strokes that simulated fair wings. You can skip the paint, I like the clear iridescent look as well.
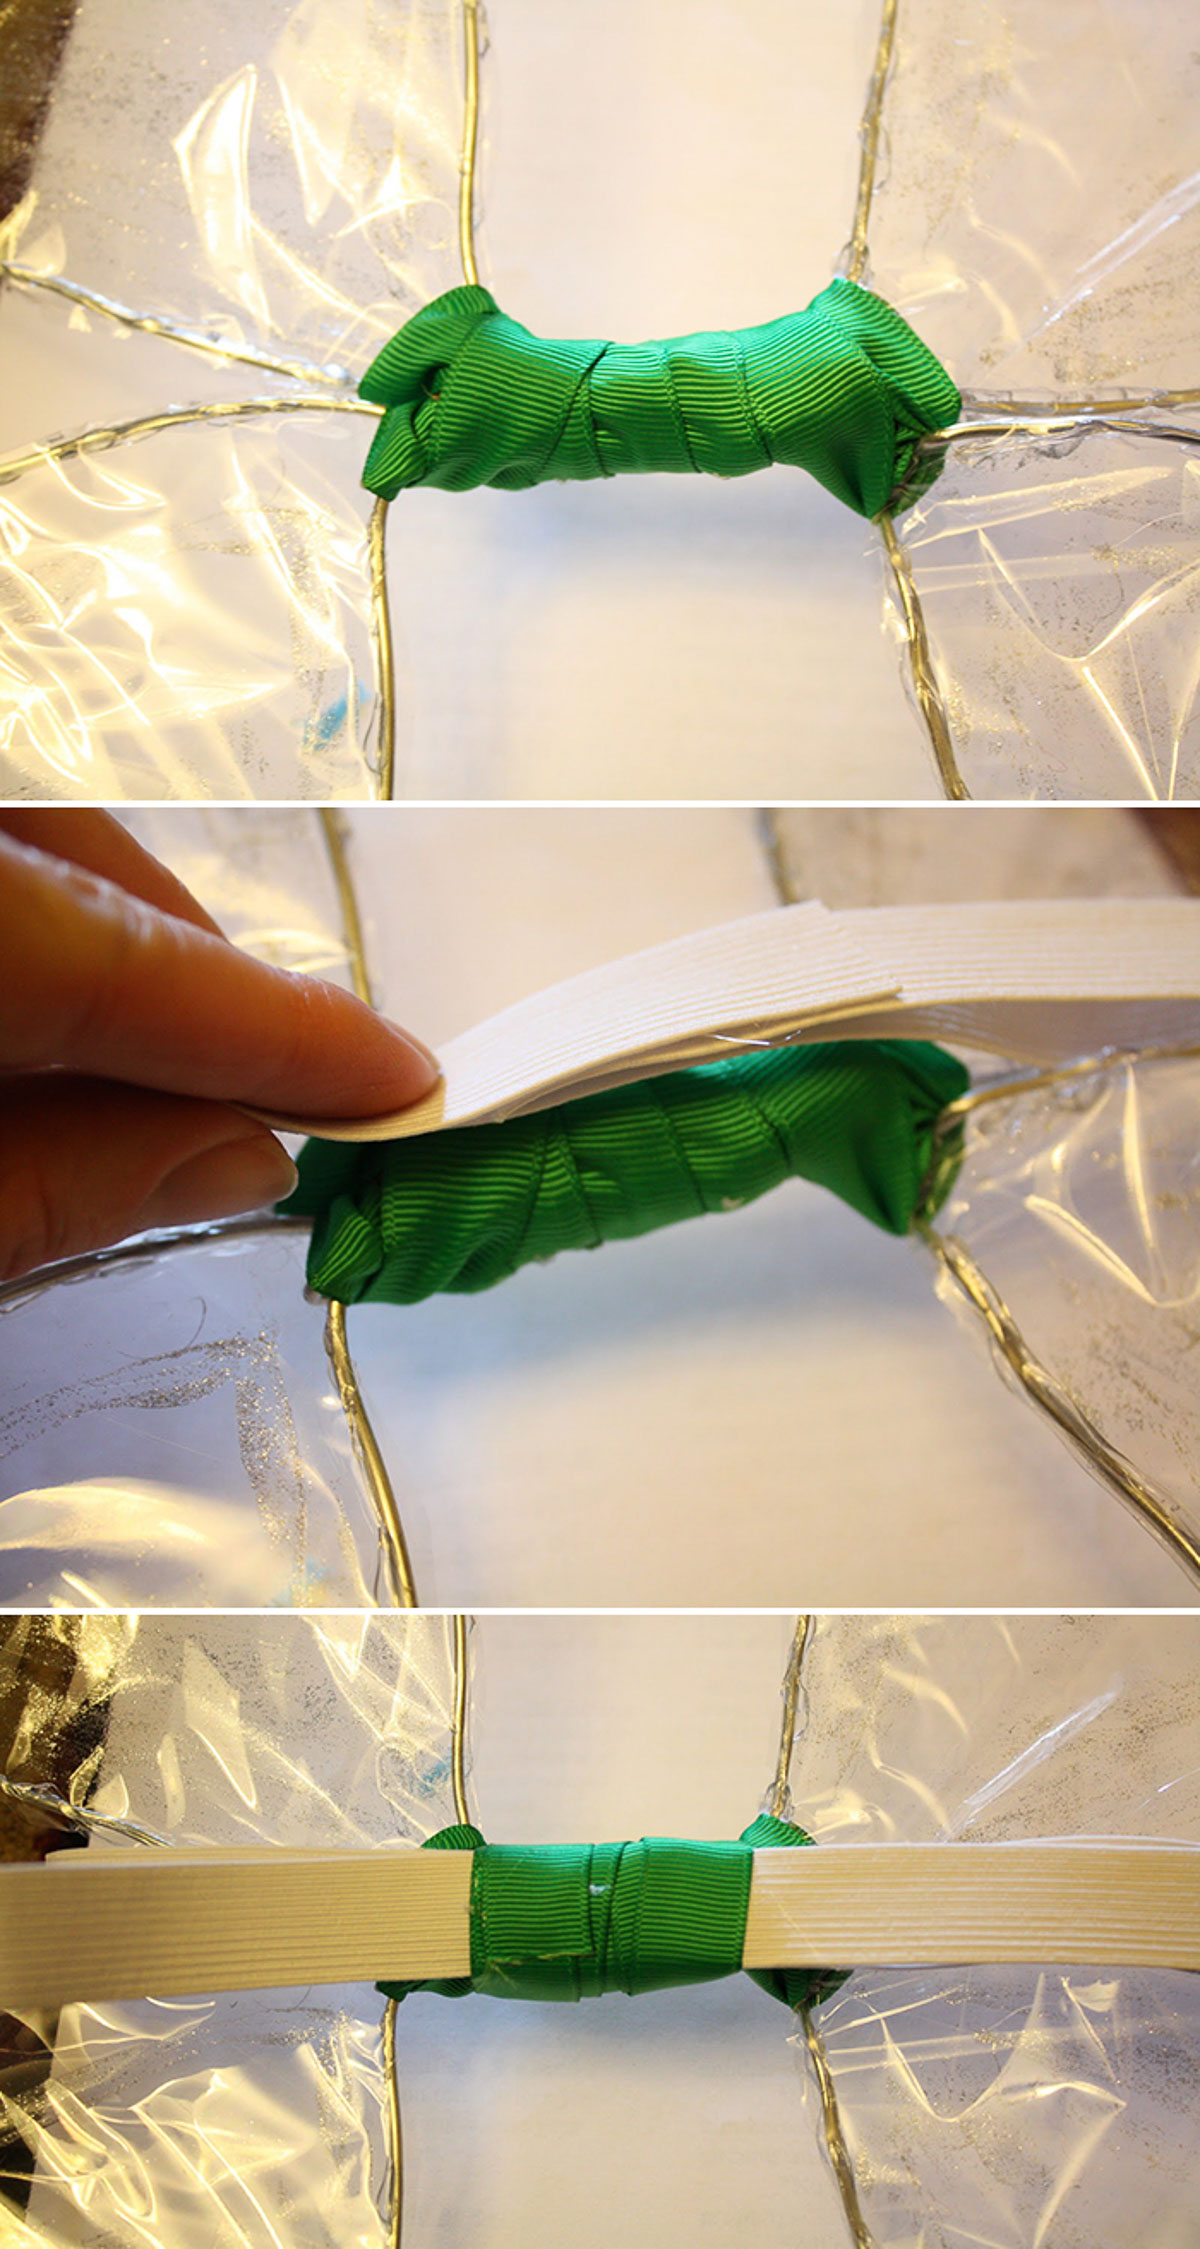
Step 5: Next, I wrapped the center in ribbon. I measured a strip of elastic to wrap around the shoulders and glued it to the center. Then I reinforced with another wrapping of ribbon and glue.
That’s it, that’s the finished look! The iridescent wing are ready to wear.
Comments & Reviews
Cathy says
thanks! these patterns and ideas are terrific!!
Rita G says
Thank you, this was very helpful! My wings came out beautiful!! 🙂
N. says
Does the cellophane tear easily?
M says
I’m wondering if you can use a shrink wrap on the wings… any thoughts?
adry says
precioooso!!! en español por favor
Shelly says
Made these for Halloween and the kids haven’t stopped wearing them.
mable says
Whether you’re a seasoned snowboarder or a complete beginner, slope 3 offers something for everyone.