
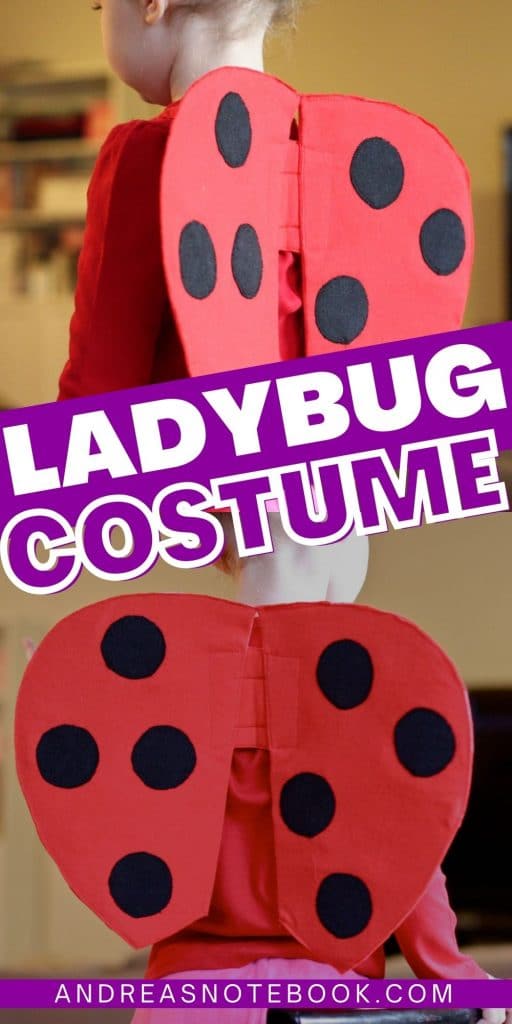
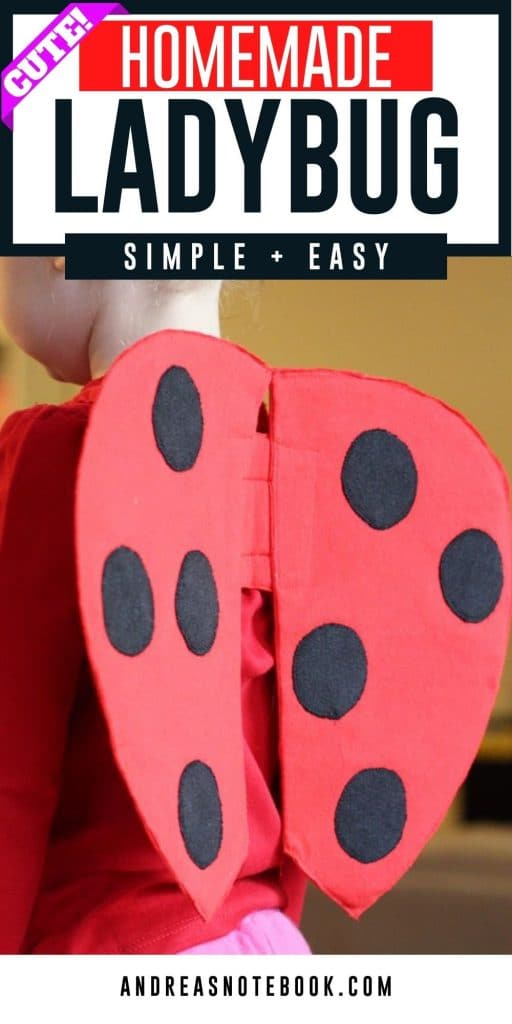
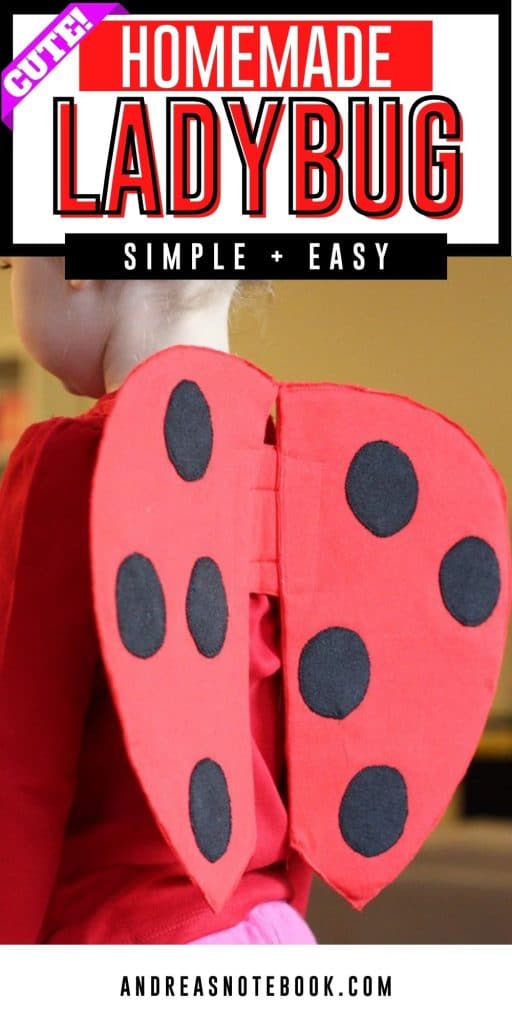
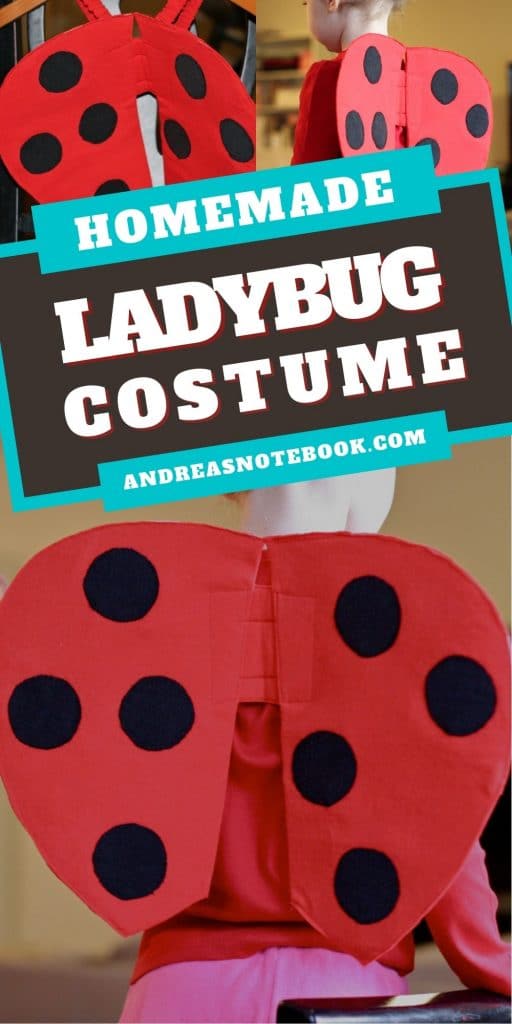
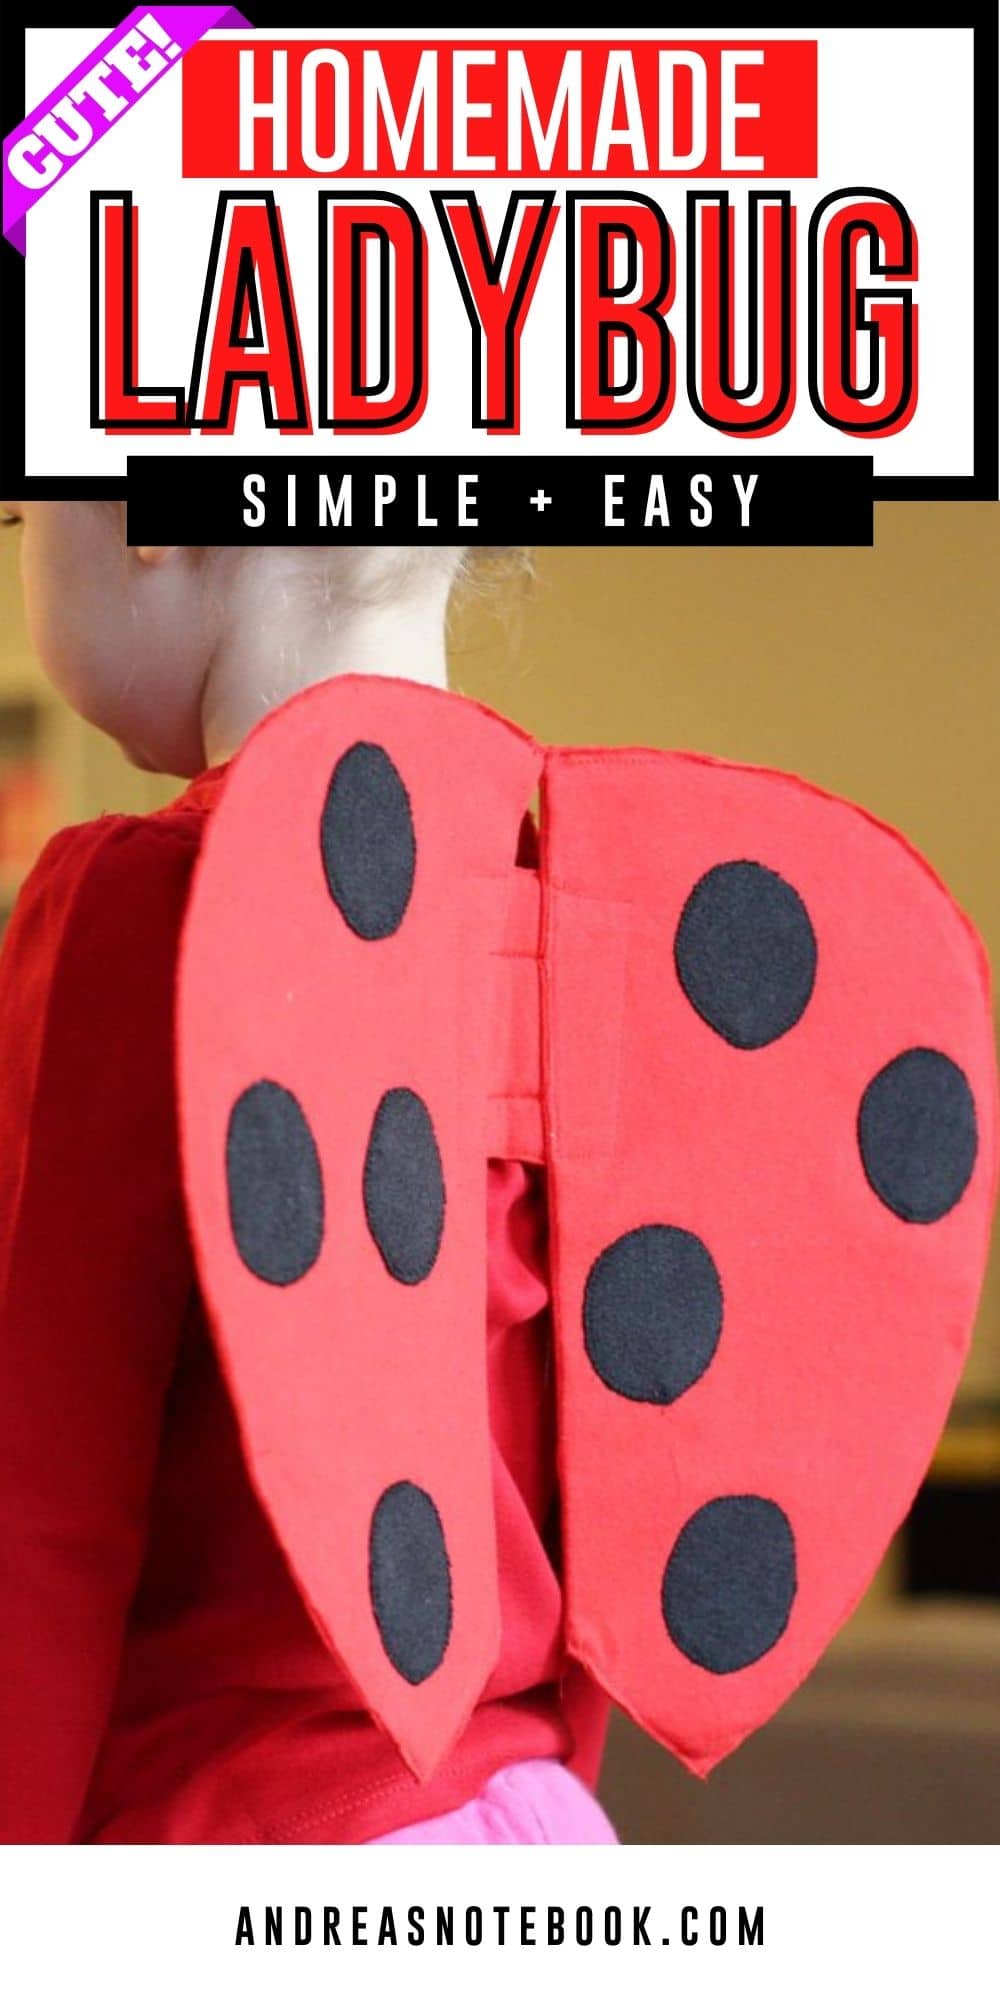
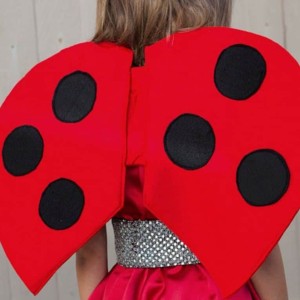
A ladybug costume is a staple in an preschooler’s dress up box. These homemade DIY ladybug wings are easy to make. Your little Ladybug Girl fan will love fluttering around in a DIY ladybug costume because you made the bug dress up wings.
Are you buzzing with excitement for the upcoming festivities and looking to stand out with a unique homemade costume? Let’s talk about one of the cutest insects – the ladybug! With its iconic bright red wings dotted with black spots, the ladybug has always been a favorite for costume enthusiasts. But instead of breaking the bank or sifting through countless store aisles, why not take a hands-on approach?
Dive into our DIY ladybug wings guide and create an ensemble that will flutter with charm. The best part? This easy ladybug costume can be whipped up in no time, making it perfect for those last-minute costume scrambles. Let your creativity fly, and you’ll soon have wings that make you the talk of the town. Whether you’re dressing up your little one or stepping into the spotlight yourself, this diy ladybug costume tutorial is your ticket to crafting magic. Ready to embark on this delightful DIY journey? Let’s get crafting!
My daughter changed her mind about her Halloween costume 3 days before Halloween. I searched for ladybug costume ideas and came up with a few cute examples. I couldn’t find anything that was quick and easy and used what I had around the house so I invented my own bug dress up wings.
Make one of these Silly Halloween Treats for Halloween lunch, Halloween dinner or Halloween dessert.
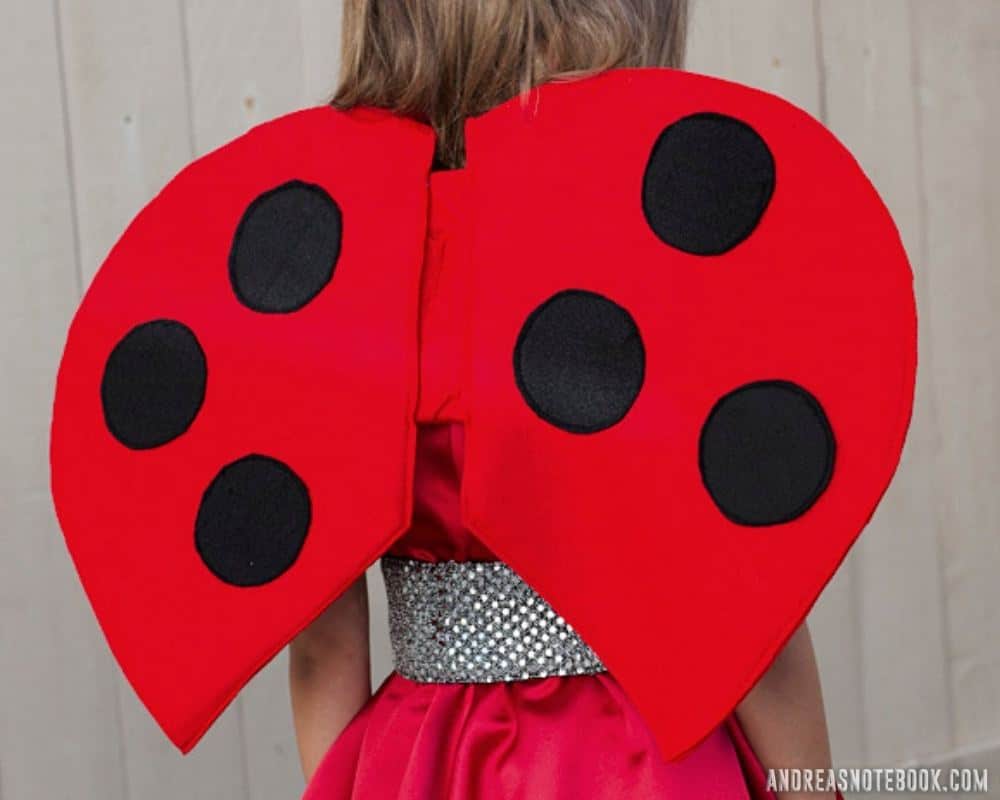
These wings ended up being a dress up box staple for years for my kids. One year I made what my daughter called a fancy ladybug costume because we made a shiny fancy dress to go with the homemade bug wings. But you can wear it with a red or black shirt paired with black pants or black tights, as well.
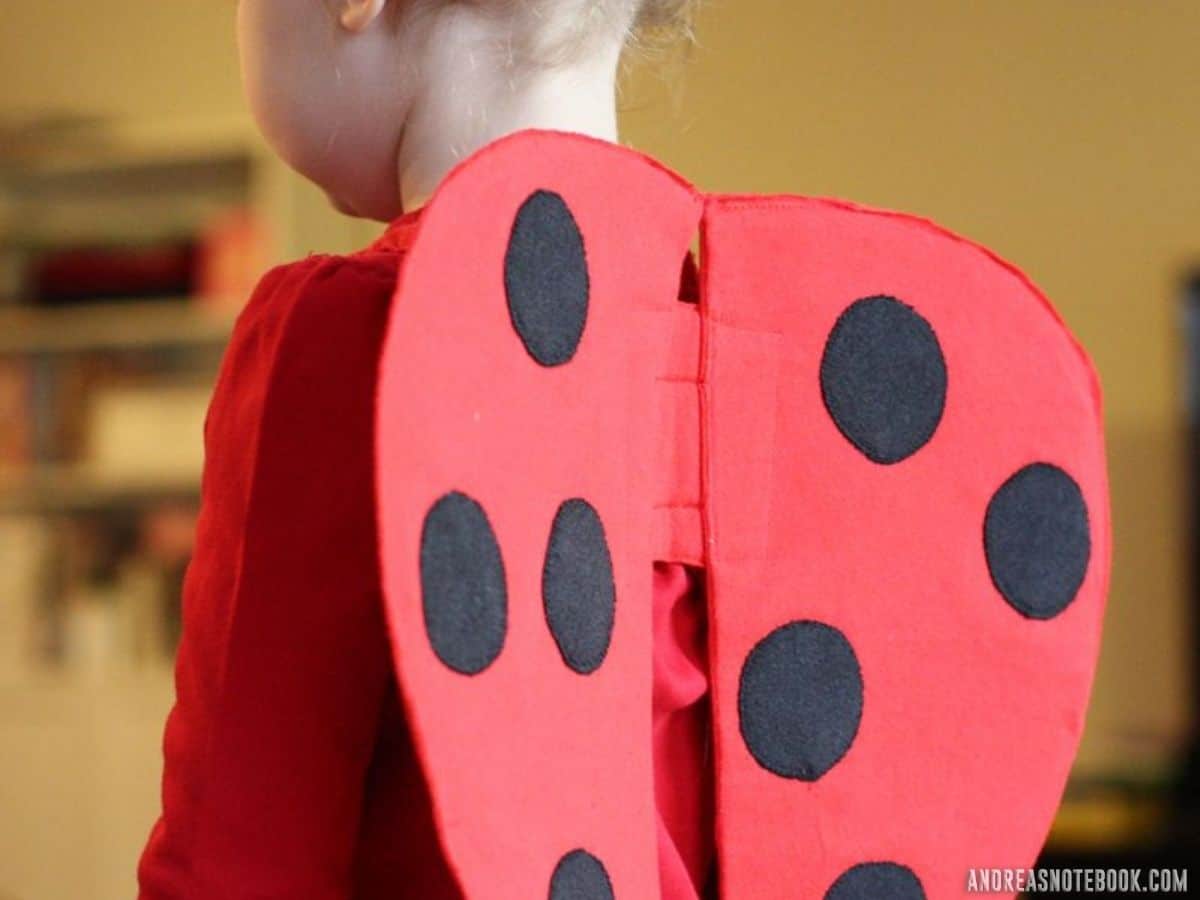
This method could be used for any type of dress up wings and took less than an hour to make. Most of the materials were repurposed. Pair it with a headband with pipe cleaners and pom poms for antenna.
Ladybug Costume Supplies:
Dig into your craft supplies and crafty tools! This is a sewing tutorial but you can try it with hot glue if you’re in a pinch to make a DIY miraculous ladybug costume!
- 1 old red t-shirt (or red knit, felt or fleece fabric)
- 1 small piece of black fabric (or old black t-shirt or black fleece for the black circles)
- 28″ of ½″ elastic
- Old cereal box
- Heavy stabilizer, or something equivalent.
- Wonder Under or Flexi Fuse for appliqué
- (optional): skip sewing and use a hot glue gun

More Bug Costumes You Might Love
Ladybug Cover for Front Baby Carrier: This is perfect for dressing up a baby! You can carry them in your Baby Bjorn or front carrier and they’ll still be your little ladybug girl.
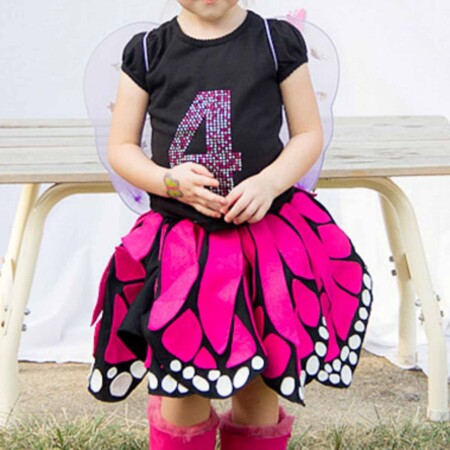
Butterfly Twirly Skirt: This is absolutely ADORABLE! Stop what you’re doing and make this!
Bumble Bee Costume: WOW. This is the sweetest bumble bee costume I’ve ever seen!
How To Make Homemade Ladybug Wings
This step-by-step tutorial will result in a quick and easy DIY lady bug costume. You can use this tutorial to make butterfly wings as well. It makes a quick and dirty Halloween costume idea. Pair with a tulle tutu (make with red tulle or black tulle) for a fun, pretty ladybug costume costume that’s so much fun. To print the instructions, scroll down to the instruction card and click the print button.
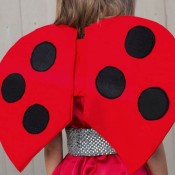
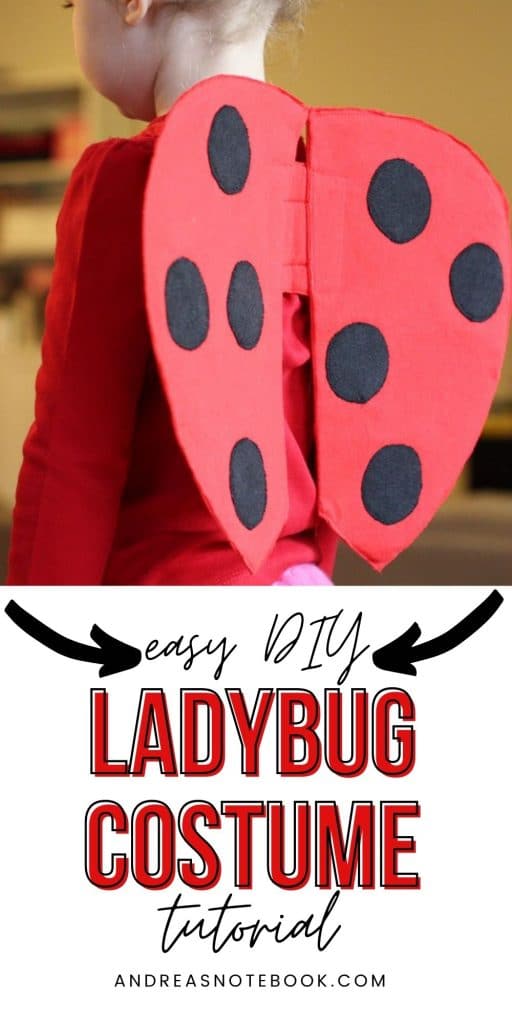
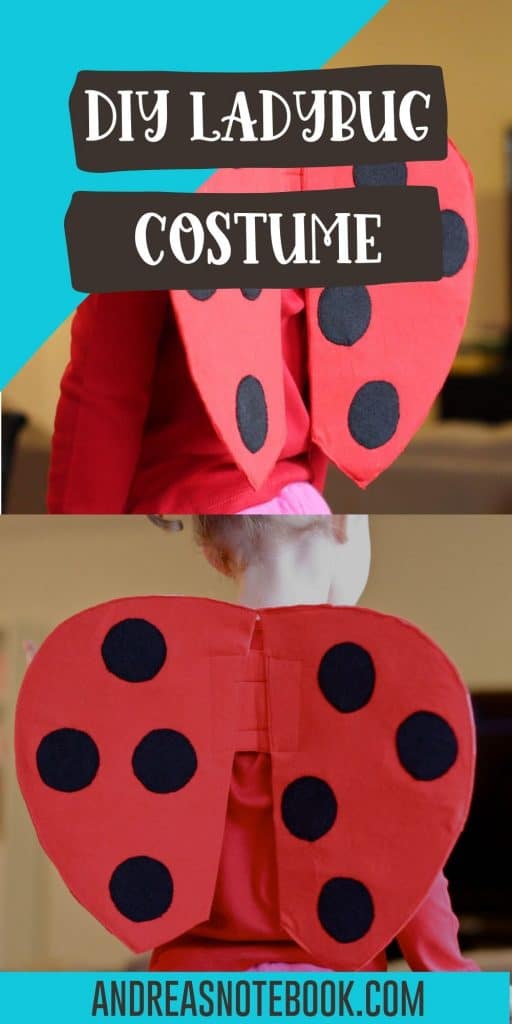
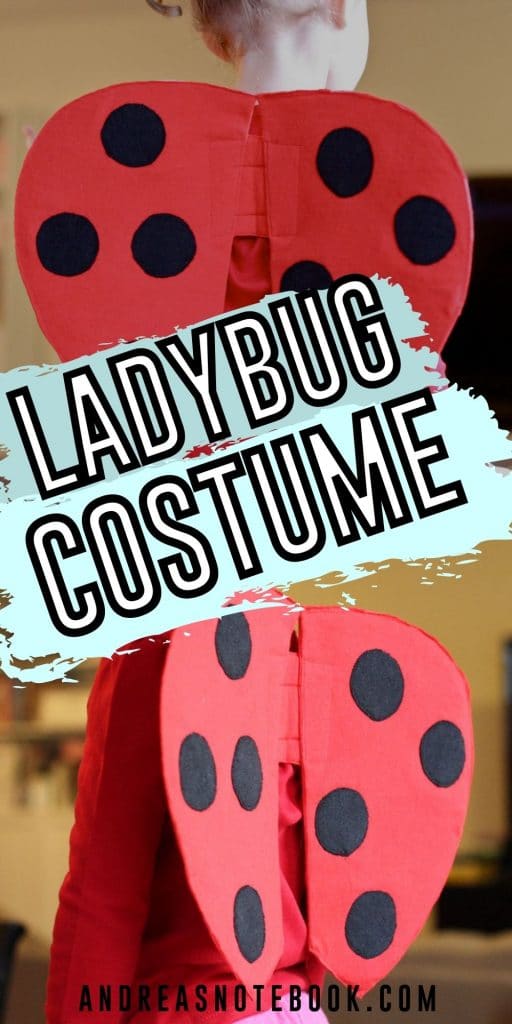
- Trace the shape of the wings onto the cereal box. Cut out one wing then use that as a template to trace the other wing so they are exactly the same shape.
- My wings were basically a semi-circle with a bit of a change up at the bottom. You could use a plain semi-circle and be just fine though.
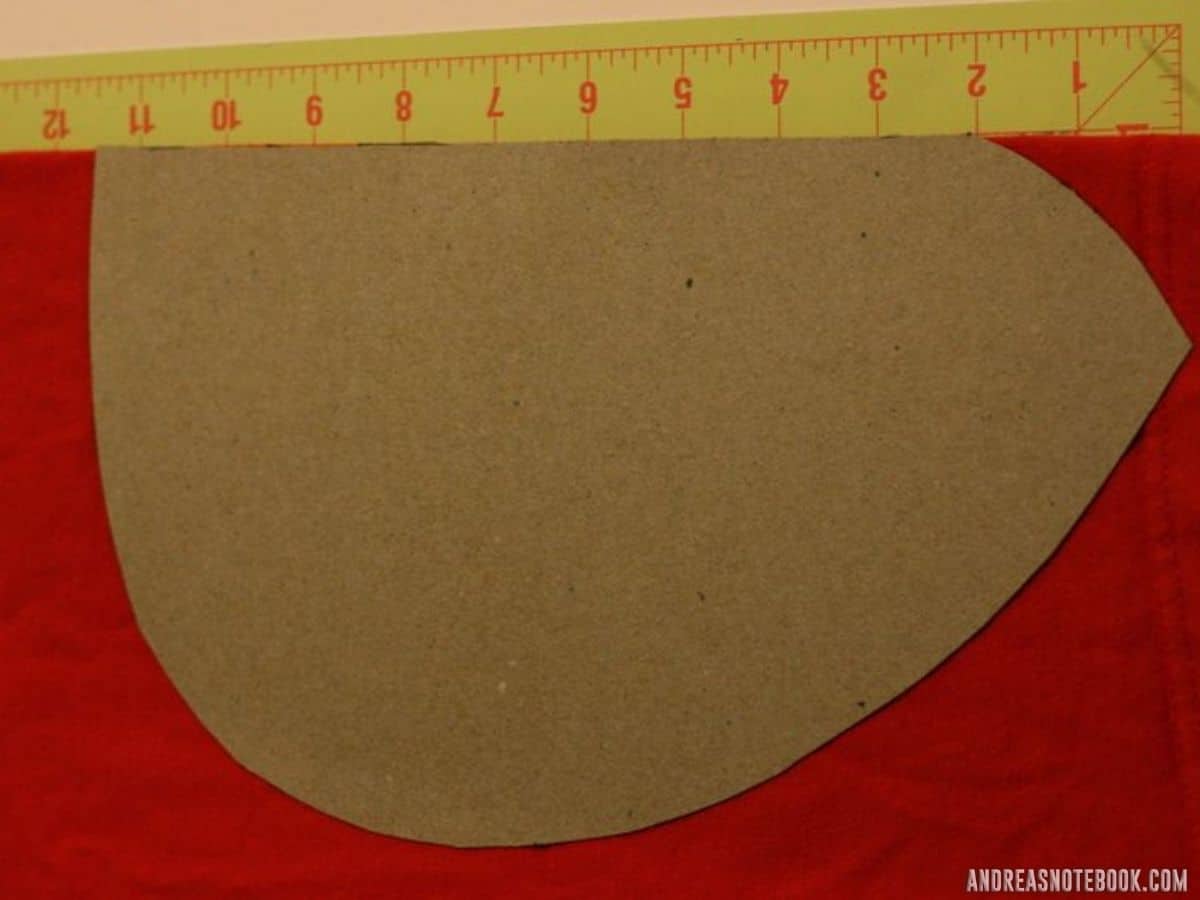
3. Then use your cardboard as a template for your fabric. Using a pen (a fabric pen is preferred but it really doesn’t matter) trace the shape of your wings onto your fabric. I used a men’s XL t-shirt and had plenty of fabric. I put the template’s straight edge on the fold so I only had to make one cut for each wing.
4. DO NOT CUT ALONG YOUR MARKED LINE! Cut at least a half an inch around your marked line. You will be sewing directly on that line you drew.
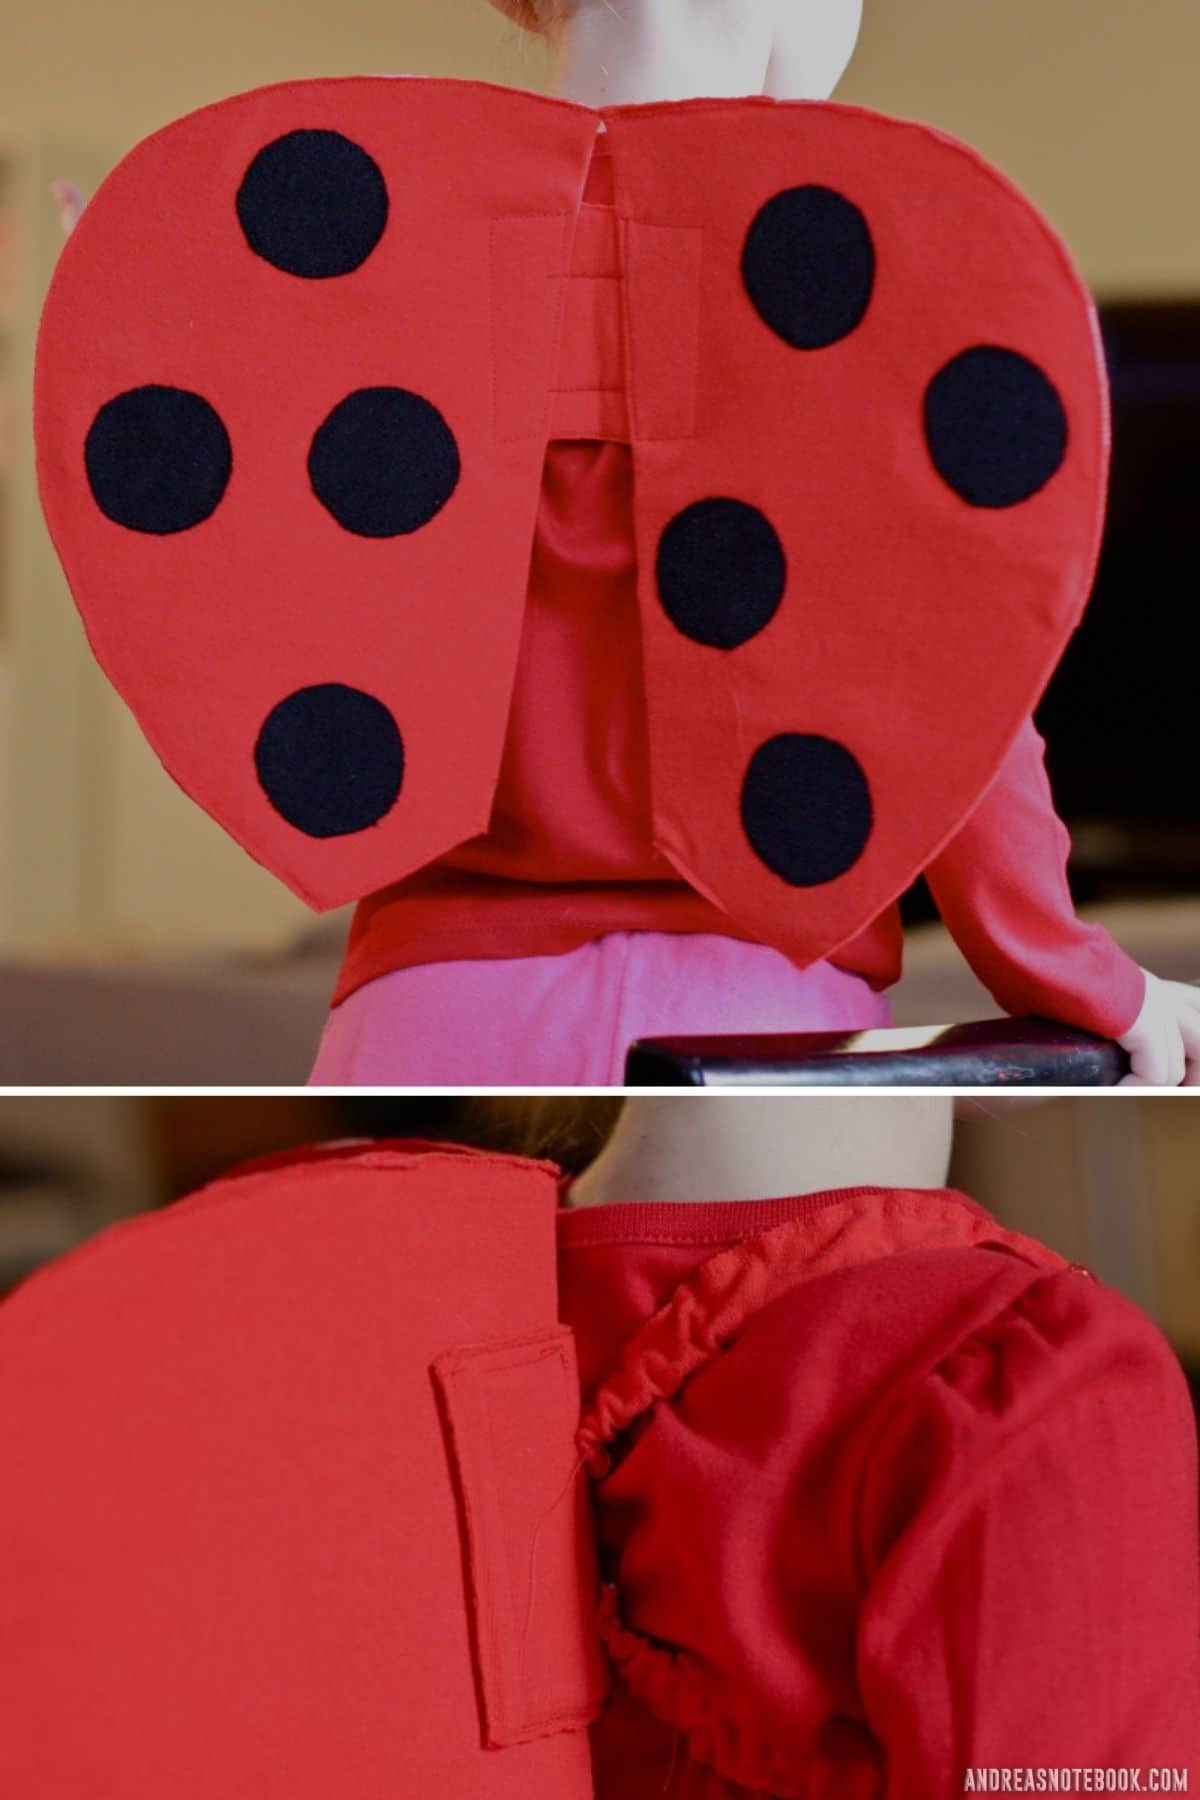
5. Trace 8 small circles onto your wonder under. I used a kids’ cup as my template. Iron the wonder under onto your black fabric. Cut out the circles and iron them on your red wing fabric. Note: The first time I did this I was not paying enough attention and put the dots on the front of one of the ladybug costume wings and the back of the other. Oops. Pay attention.
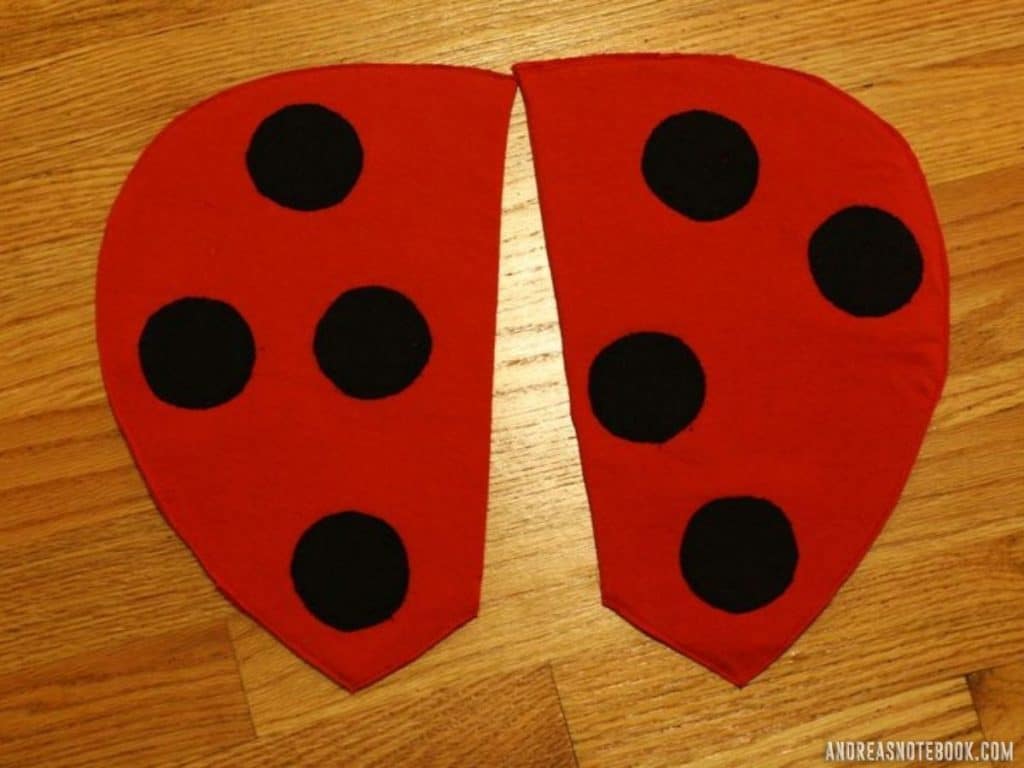
6. Sew around the edge of the circles with a zigzag stitch. I recommend using a tear away stabilizer on the back of the fabric if you are using knits to prevent puckering. If you don’t have a stabilizer any old scrap of fabric will work. Just cut out a piece a bit larger than your circle and put it on the underside of the fabric.
7. Next, fold the wing fabric, wrong sides together and put the cardboard sandwiched in between. I sewed the wings up around the edges, sewing on my marked line) and then trimmed the fabric.
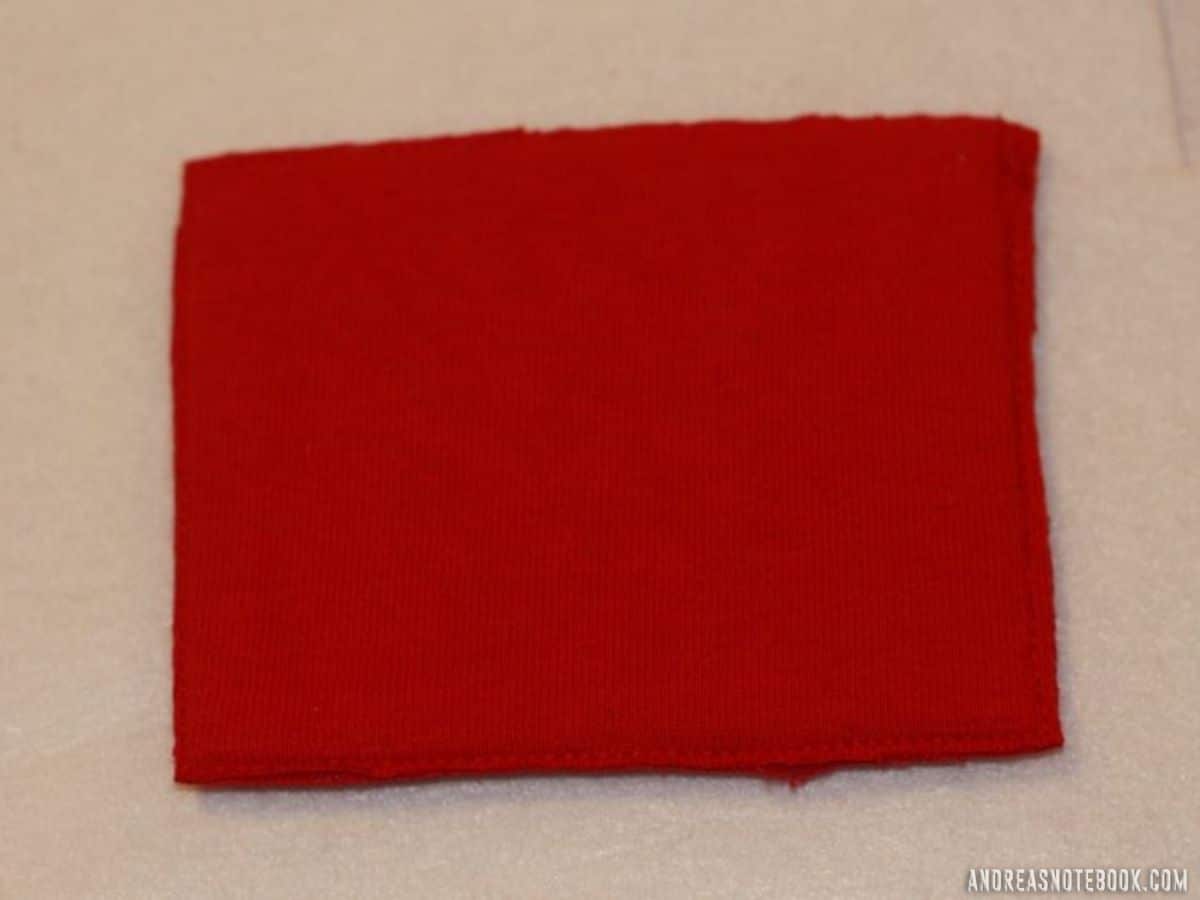
8. Next cut 2 rectangular pieces of the red fabric and 2 pieces of the heavy stabilizer. In a pinch, lightweight cardboard could work instead of the stabilizer. It won’t be as flexible but it will keep the wings from sagging. In reality, no kid would know the difference.
9. Put the stabilizer in between the red fabric and sew around the edges. Trim the edges close to the seam.
10. Next cut the elastic into two 14″ pieces. I made a casing for my elastic but that isn’t necessary.
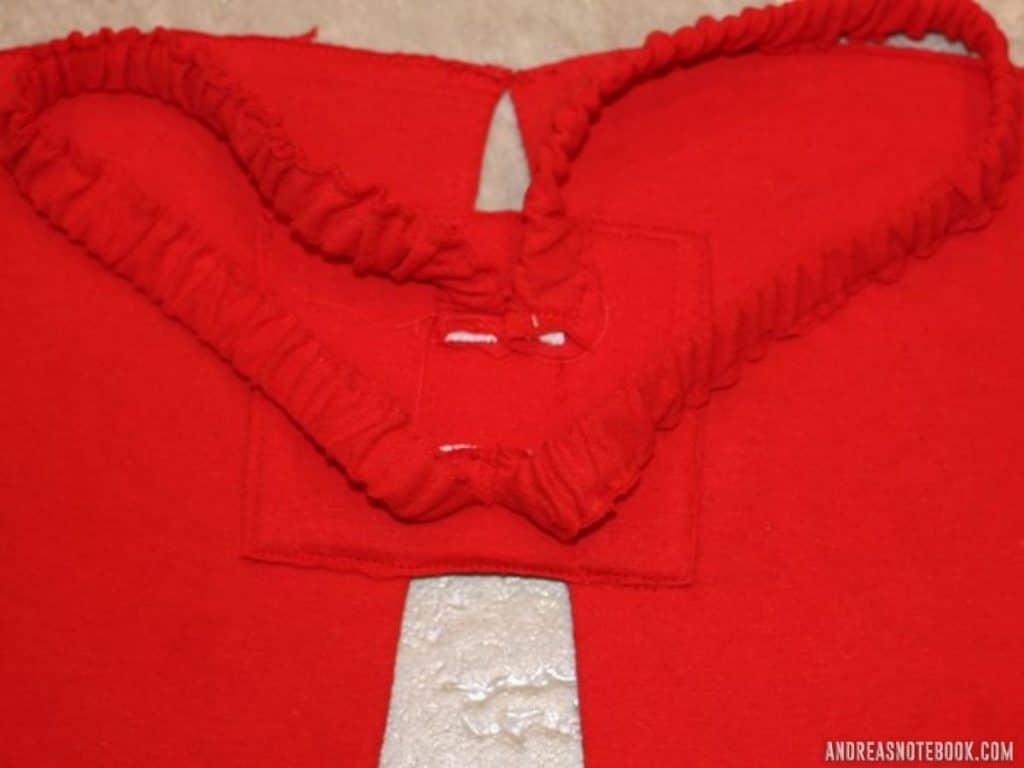
11. Now lay the homemade ladybug wings down, dot side down and place this connector piece in between them where you want. Position the elastic and then sew it all together. This is how I placed mine.
That’s it! You’re done. Now you have DIY ladybug costume wings!
DIY Ladybug Wings
Supplies
- 1 old red t-shirt or red knit, felt or fleece fabric
- 1 small piece of black fabric or old t-shirt or sweater
- 28 inches ½" elastic
- 1 Old cereal box
- Heavy stabilizer, or something equivalent.
- Wonder Under or Flexi Fuse for appliqué
Instructions
- Trace the shape of the wings onto the cereal box. Cut out one wing then use that as a template to trace the other wing so they are exactly the same shape. My wings were basically a semi-circle with a bit of a change up at the bottom.
- Use your cardboard as a template for your fabric. Using a pen (a fabric pen is preferred but it really doesn’t matter) trace the shape of your wings onto your fabric. I used a men’s XL t-shirt and had plenty of fabric. I put the template’s straight edge on the fold so I only had to make one cut for each wing.
- DO NOT CUT ALONG YOUR MARKED LINE! Cut at least a half an inch around your marked line. You will be sewing directly on that line you drew.
- Trace 8 small circles onto your wonder under. I used a kids’ cup as my template. Iron the wonder under onto your black fabric. Cut out the circles and iron them on your red wing fabric. Note: The first time I did this I was not paying enough attention and put the dots on the front of one of the wings and the back of the other. Oops. Pay attention.
- Sew around the edge of the circles with a zigzag stitch. I recommend using a tear away stabilizer on the back of the fabric if you are using knits to prevent puckering. If you don’t have a stabilizer any old scrap of fabric will work. Just cut out a piece a bit larger than your circle and put it on the underside of the fabric.
- Next, fold the wing fabric, wrong sides together and put the cardboard sandwiched in between. I sewed the wings up around the edges, sewing on my marked line) and then trimmed the fabric.
- Next cut 2 rectangular pieces of the red fabric and 2 pieces of the heavy stabilizer. In a pinch, lightweight cardboard could work instead of the stabilizer. It won’t be as flexible but it will keep the wings from sagging. In reality, no kid would know the difference.
- Put the stabilizer in between the red fabric and sew around the edges. Trim the edges close to the seam.
- Cut the elastic into two 14″ pieces. I made a casing for my elastic but that isn’t necessary.
- Now lay the wings down, dot side down and place this connector piece in between them where you want. Position the elastic and then sew it all together. This is how I placed mine.
Love This Project?
Make sure to share it with me on Instagram @andreasnotebook and follow on Pinterest @andreasnotebook for more!
Comments & Reviews
Ladybug says
Very cute
Meegan says
That. Is. So. CUTE!!!!!!! I love it! What a great job you’ve done!!!!
Briana says
This is a great site! Thank you for sharing! 🙂 I am making my daughter a Ladybug Girl costume for Halloween this year, and was wondering some things about the wings you made here. They look fantastic! When you stitched the wings onto the stabilizer/connector piece, did you hand stitch them? The lines of stitch almost look like they were done with a machine, but I am not sure how. Have you ever sewn through paperboard or corrugated cardboard with a machine? And… you mentioned a more recent costume you made used felt for the wing fabric. Did you have any problems sewing felt on your machine, or do you think using fabric glue to attach the felt to the paperboard would work? Thanks so much for your tutorial… just trying to figure out the details. 🙂
Andrea @ The Train To Crazy says
Yes, this is all machine stitched! I cut the cardboard a bit smaller so I didn't sew it much but your machine will sew through a thinner cardboard. If you have a thicker cardboard just cut the cardboard a bit smaller so it doesn't get sewn.
YES! You can definitely sew felt in your machine!
Mandy says
Loved it. Well loved and well used at home now.
Ragretheable says
You are so clever, my daughter loves to play geometry dash so she loves rockets like in this game. Is there any way to do the same?