

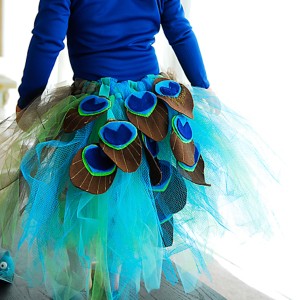
Looking for a standout Halloween look? Try a DIY peacock costume. Our step-by-step tutorial will guide you through the process of crafting an impressive peacock look. From creating the peacock tutu to attaching the iconic feathers, we break it down for you. This peacock Halloween costumes DIY is easy to follow. Perfect for parties or trick-or-treating, you’ll surely grab attention. Say goodbye to last-minute store-bought outfits and hello to a unique favorite costume.
Make an easy do-it-yourself (DIY) peacock costume with this easy tutorial. This cute DIY peacock tutu is perfect for any age! Dress them up in an adorable tutu costume that they can play with 365 days a year.
Thanks to Shwin & Shwin for providing this Halloween tutu tutorial. What a beautiful peacock costume! If you’re looking for sewing patterns she’s got a great selection!
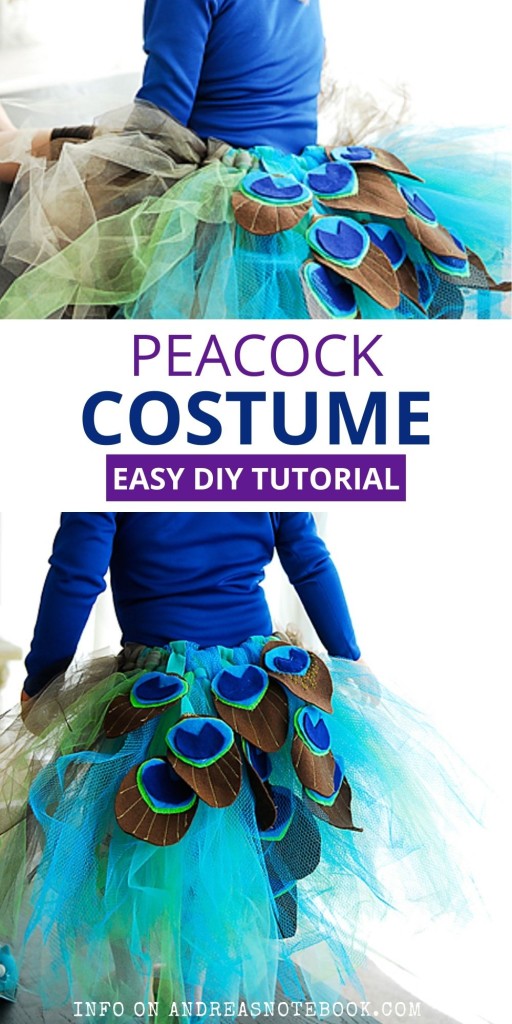
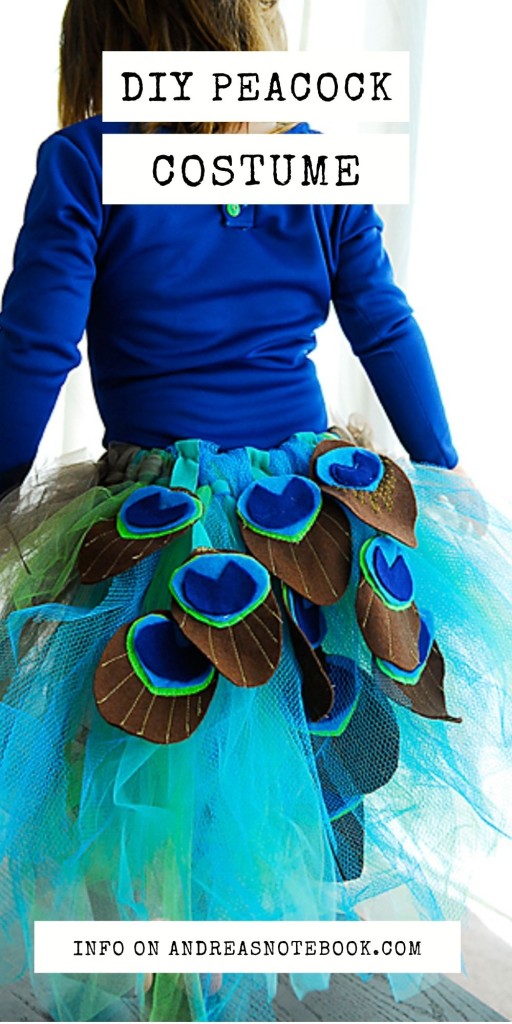
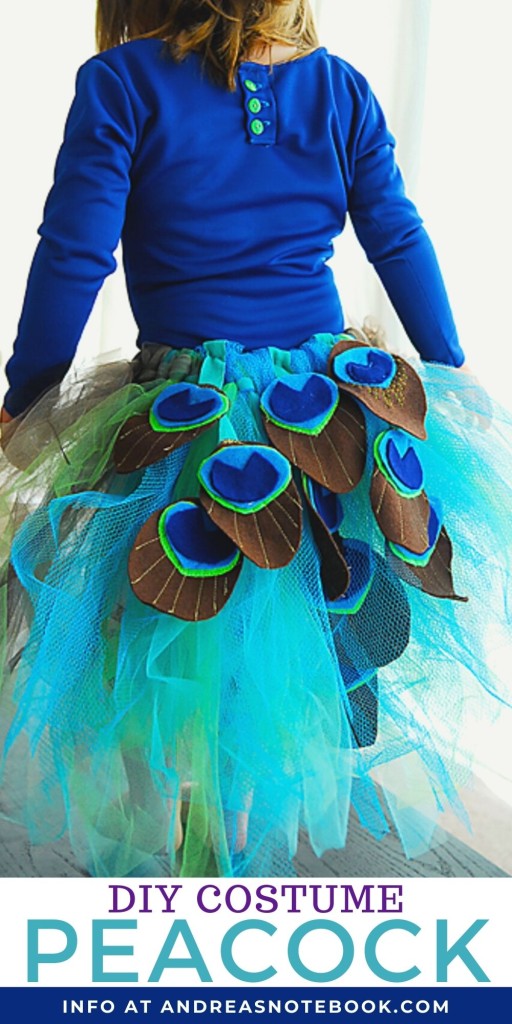
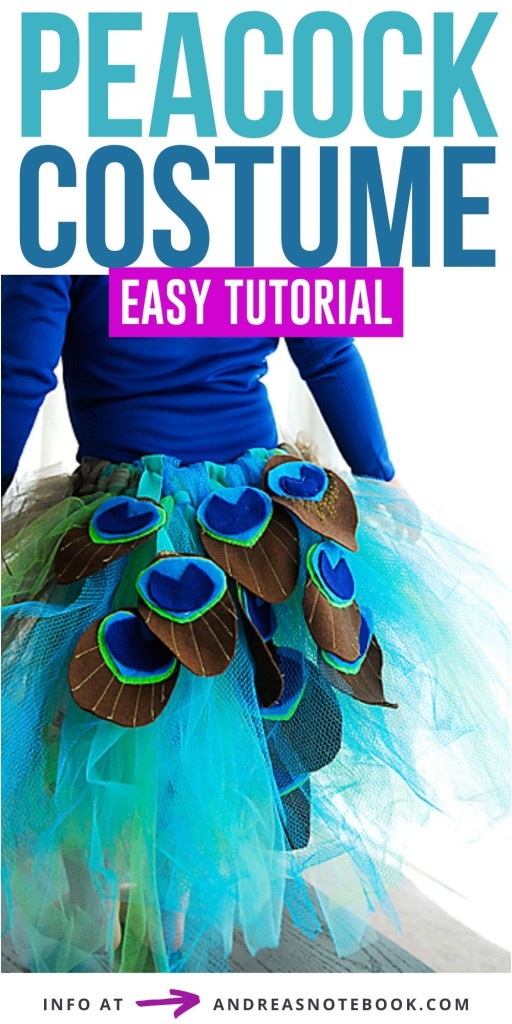
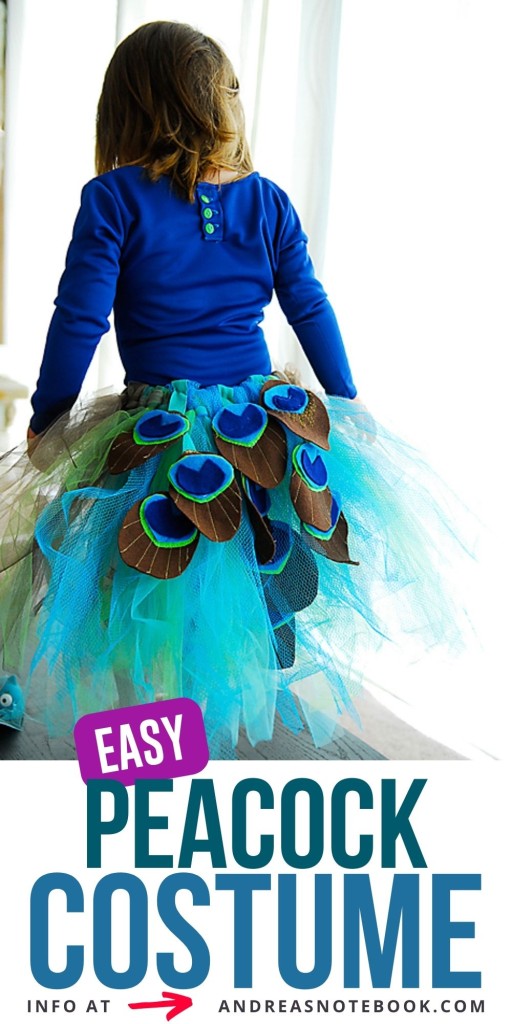
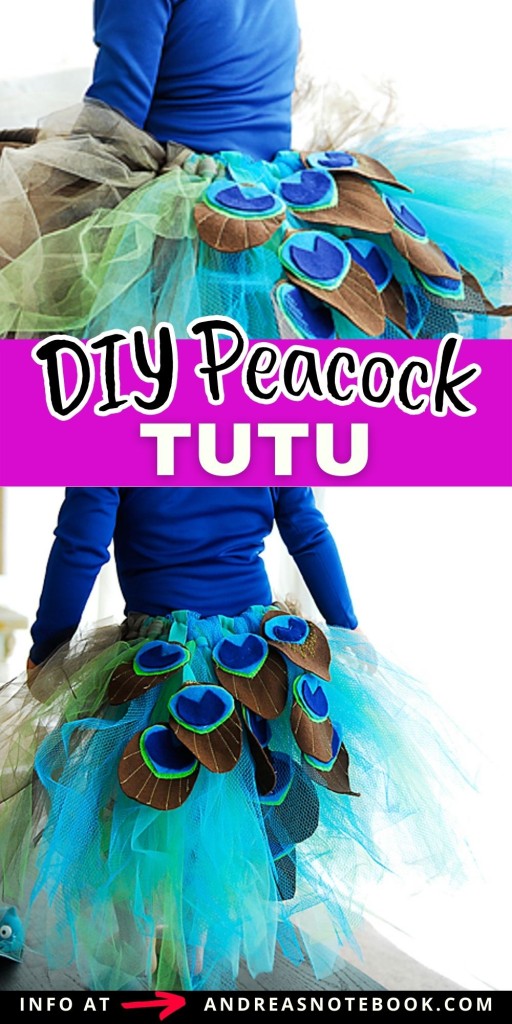
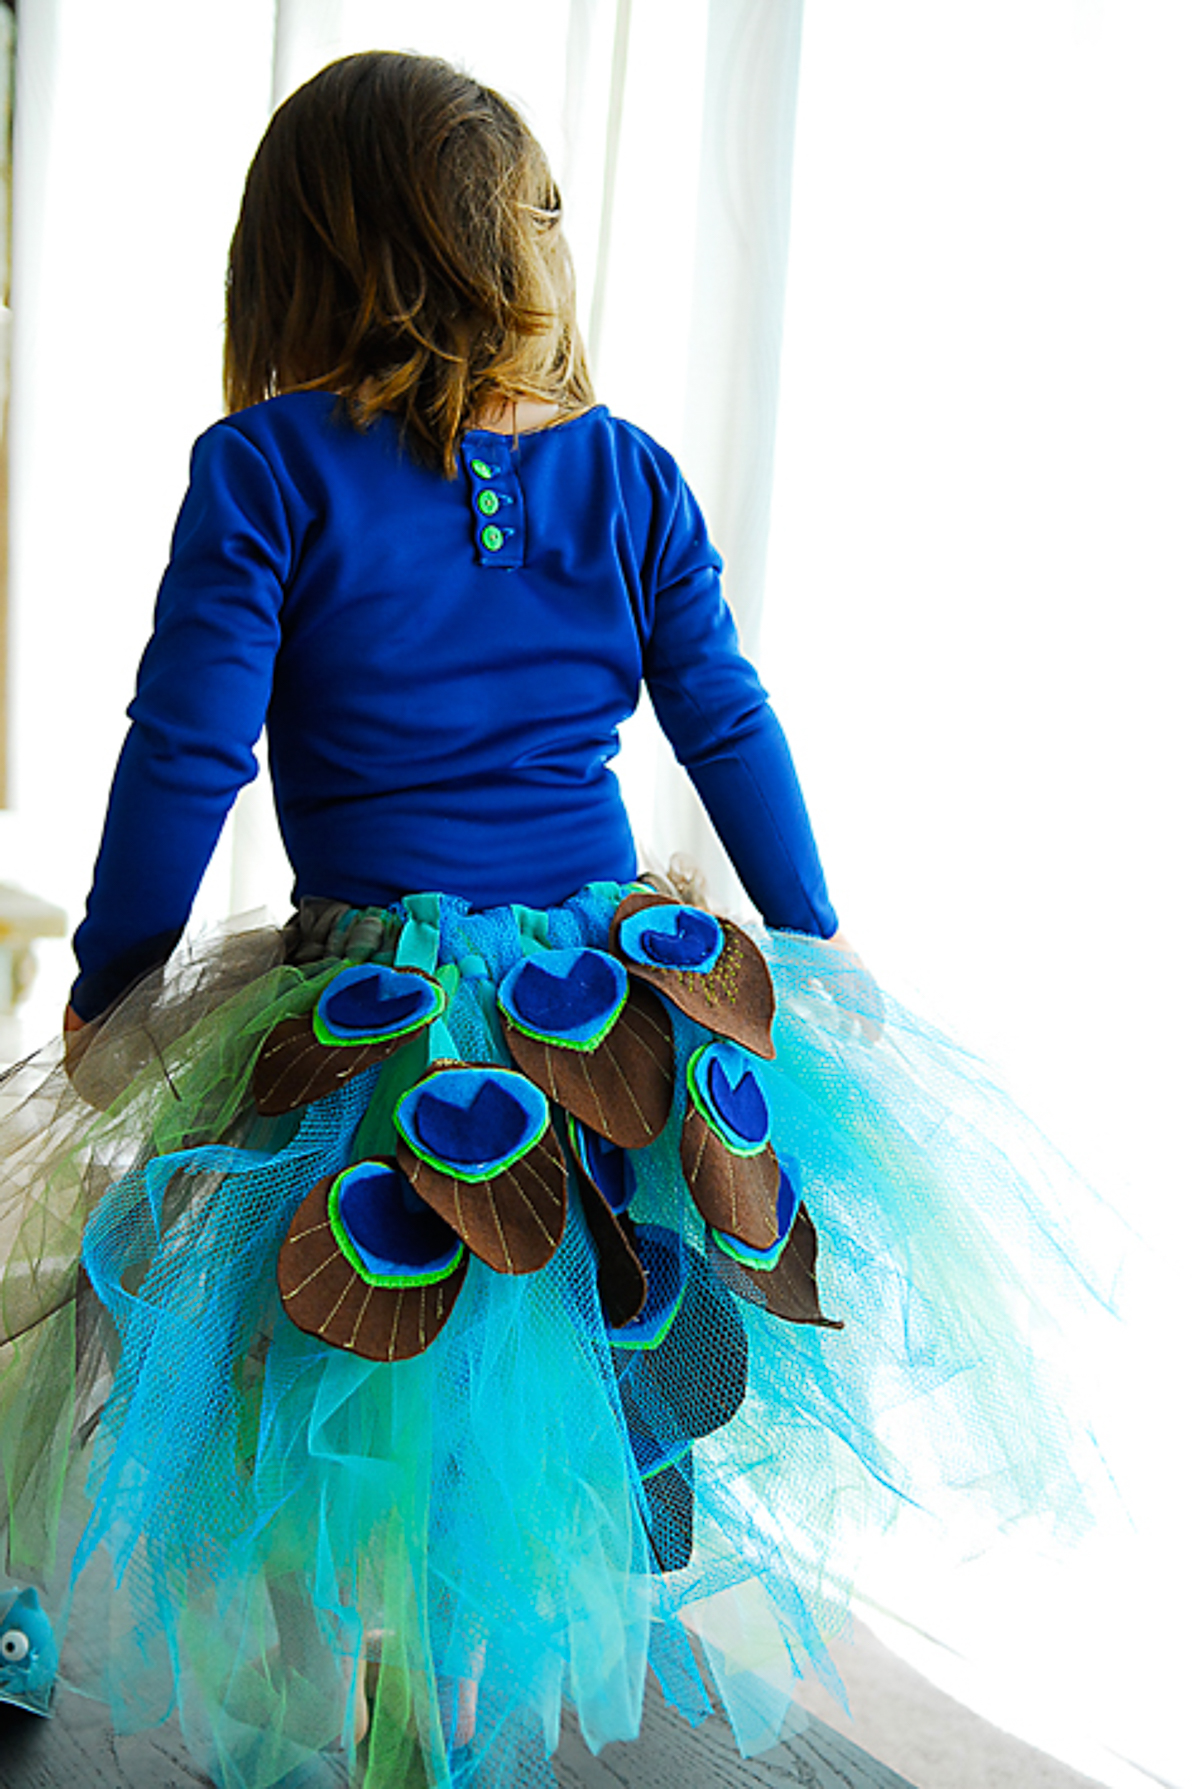
With fun, bright colors and a scattering of felt peacock feathers down the back, this tutu is sure to impress. The homemade peacock costume tutu is nice and full in the back and bare in the front to mimic the look of a real peacock.
Why You’ll Love This Peacock Costume Tutorial
- Easy: This tutorial involves basic sewing and cutting skills.
- Fast: This whole costume can be made in less than an hour.
- Show Stopper: Your little peacock will love it and everyone will comment on how cut it is. As far as DIY costumes go, this is surely going to impress! Your little girl (or yourself) will get lots of compliments.
- Long Lasting: This costume will be worn a lot longer than most Halloween costumes! Expect this one to be a daily staple for a while! It will be one of her favorite costumes in her toy box.
Supplies:
Gather your supplies for this dress-up costume. Most of these are easily available in your local craft store or fabric store. You can even find most of it in big box stores like Walmart.
- Rolls of Tulle: Royal Blue Tulle Spool,, Teal Tulle Spool, Lime Green Tulle Spool, Brown Tulle Spool
- Craft Felt: Brown, green, blue and navy felt. Or buy an assorted pack of felt.
- Waistband Elastic: ¾″ non-roll elastic for the waistband
- Ribbon: any color coordinating with tutu. ½″ is best.
- Thread
Or skip making your own and Natural Peacock Tail Feathers to sew onto the tulle tutu. The size of feathers should be small.

DIY Peacock Tutu Tutorial
These instructions for the peacock Halloween costume are for making the peacock feathers. I’ve included a link to show you how to make the tutu. This is a sewing material but you can also use a hot glue gun to secure the feathers.
Step 1: Make a DIY Tulle Tutu Skirt
Making a tutu skirt from rolls of tulle is a fantastic costume idea and easier than you’d think. Whether it’s for a ballet recital, Halloween, or just fun dress-up, here’s how to get started:
- Piece of Elastic: First, measure the waist and cut the elastic about 2 inches shorter than the waist measurement. This ensures a perfect fit when worn.
- Desired Length: Decide how long you want the tutu to be. This will determine the length of the tulle strips you cut.
- Cut the tulle into strips. Depending on the desired length, you might want them about twice the final length of the tutu to account for folding.
- Tulle Strips: After cutting, take each strip, fold it in half, and loop it around the elastic. This process involves slipping the folded end beneath the elastic, then drawing the loose ends through the folded section. Pull tight to create a knot.
- Continue tying the tulle strips to the elastic until the entire waistband is covered.
- Once all the tulle is attached, secure the ends of the elastic together. You can sew or tie them for security.
Voilà! You’ve crafted a beautiful tutu skirt that’s ready for twirls and fun. Whether part of a costume or just a fun accessory, tulle skirts add a touch of whimsy to any occasion.
I prefer the kind of tutorial where you knot strips of tulle around the elastic band. Only put the tulle in the back of the band leaving the front empty at the waist. I did brown and tan strands on the sides and then it faded to blue and green in the middle. I did this to closely mimic the peacock feathers.
Need photos? Try this tutorial.
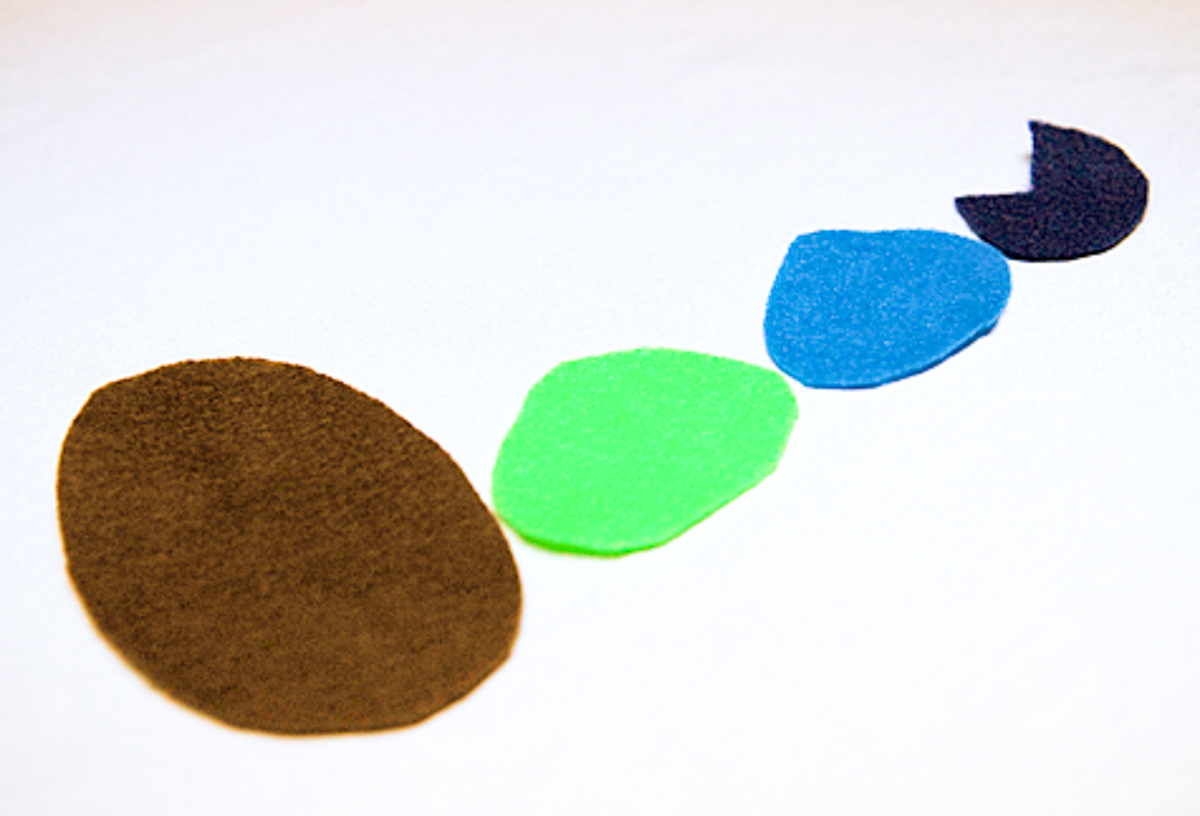
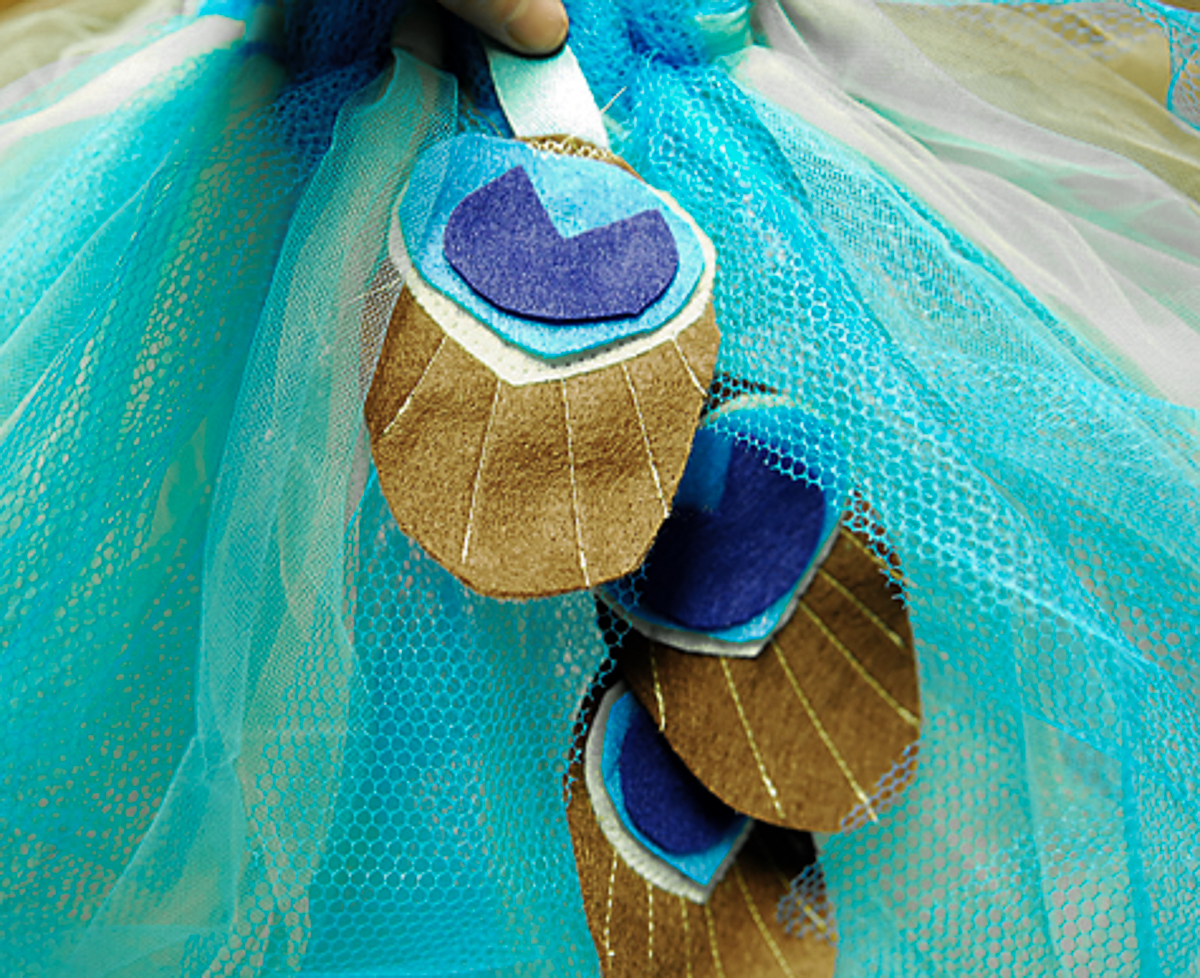
Step 2: Make Felt Peacock Feathers
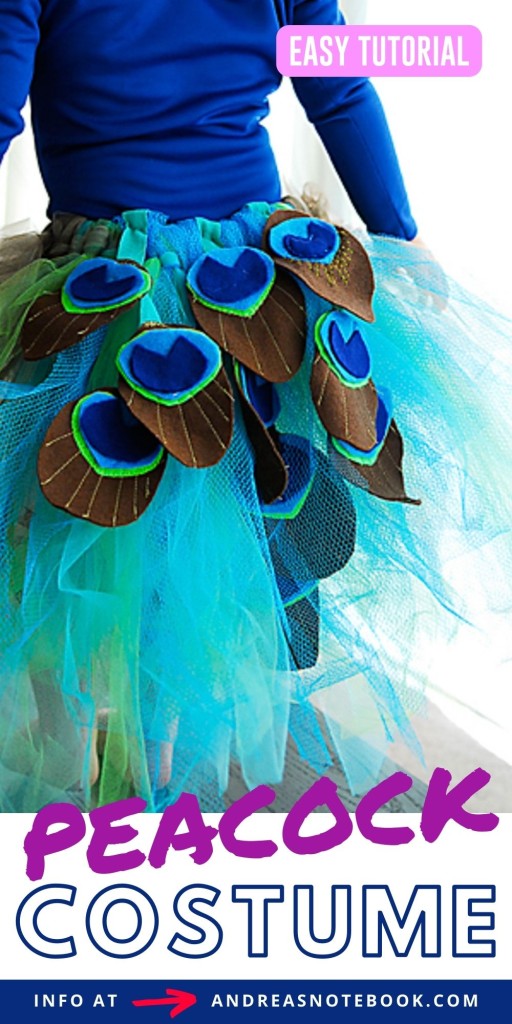
Cut out the base of the feather in brown felt and then cut out the shapes for the “eye” looking part of the feather. I used lime green, teal and royal blue felt for the pieces. I like the look of the fun bright colors.
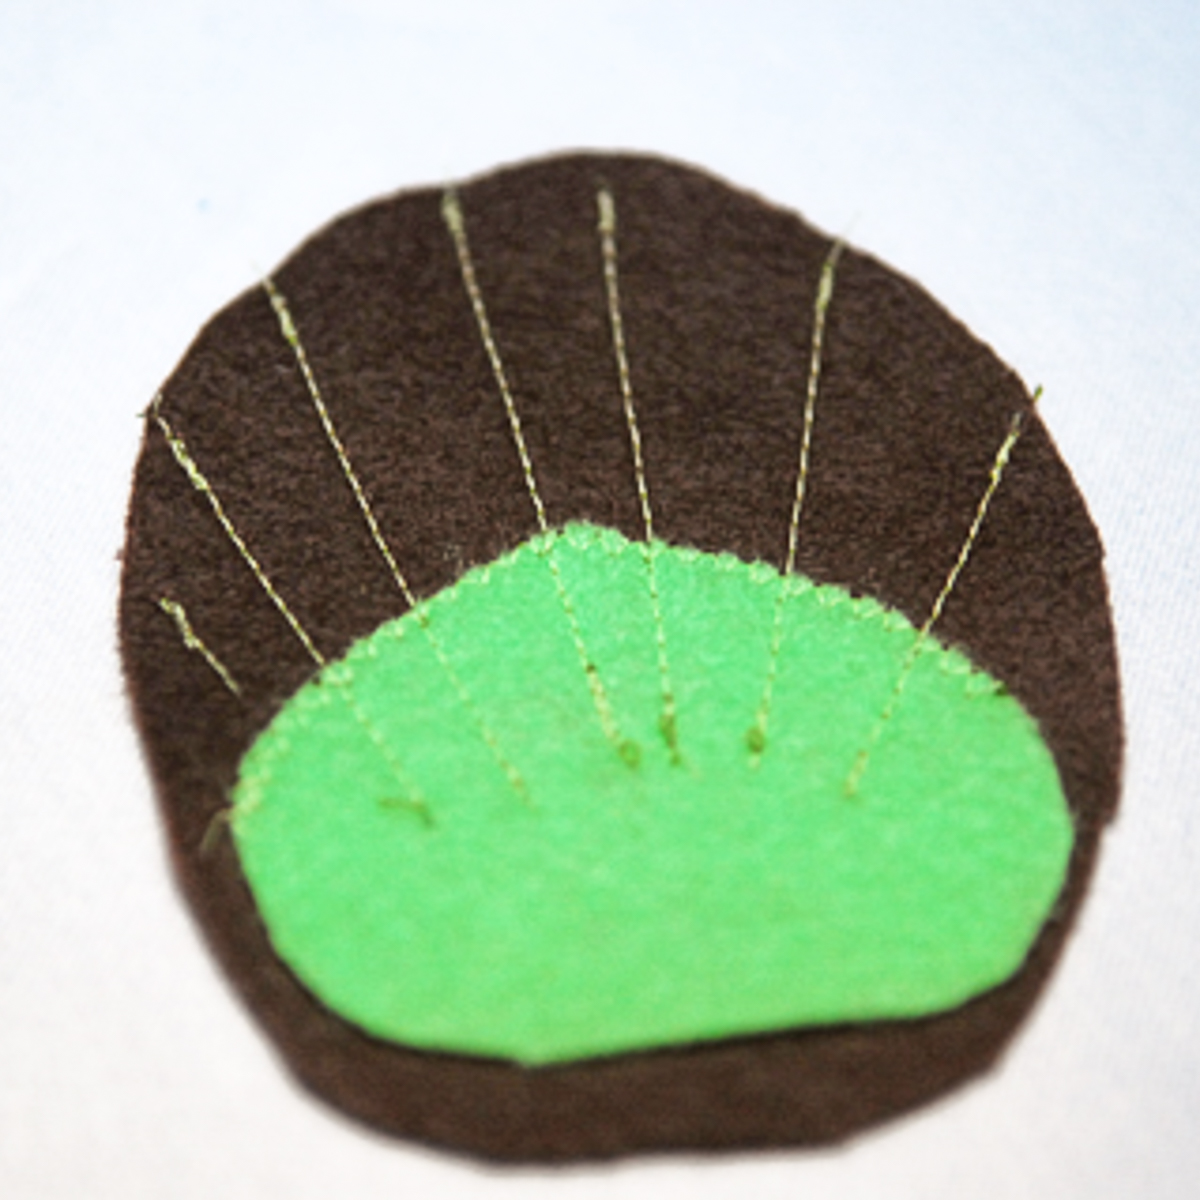
Pull out the sewing machine or hand stitch, if you prefer. Stitch the feathers. Sew the green piece to the brown piece by sewing around the edge, and then sewing lines outward for detail on the feather.
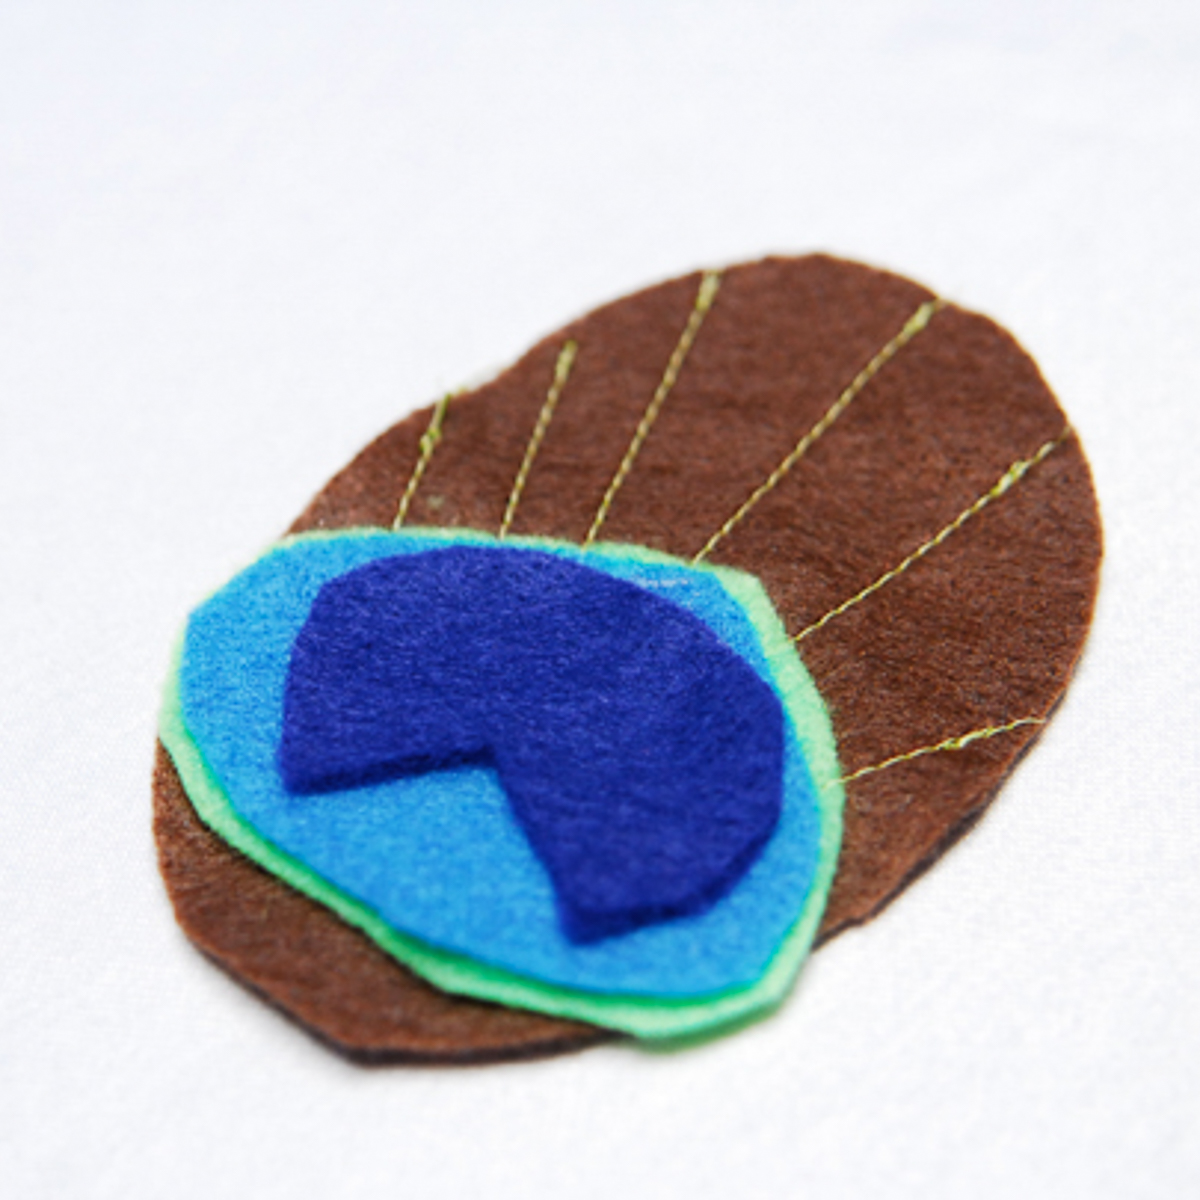
Glue the blue pieces on the feather. Use your glue gun to glue the two blue pieces on to the feather. Alternatively, use fabric glue.
Step 3: Add Feathers To Tutu
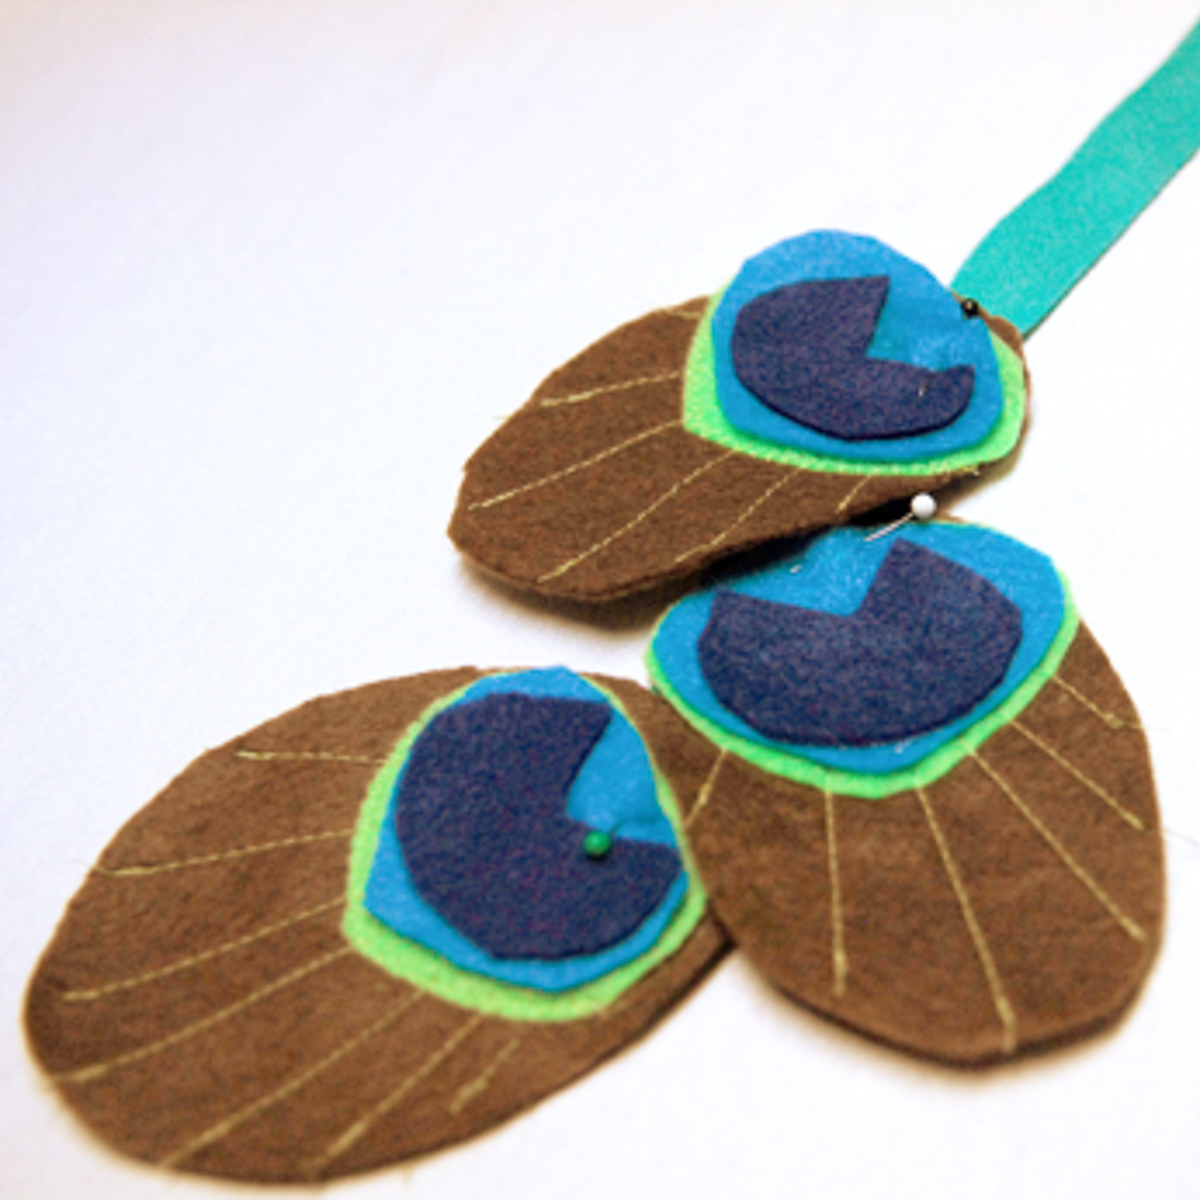
Cut the length of ribbon to be shorter than the length of the tutu, as in the photo. Tack the feathers scattered on a ribbon.
Sew the ribbons to the back of the skirt on the elastic.
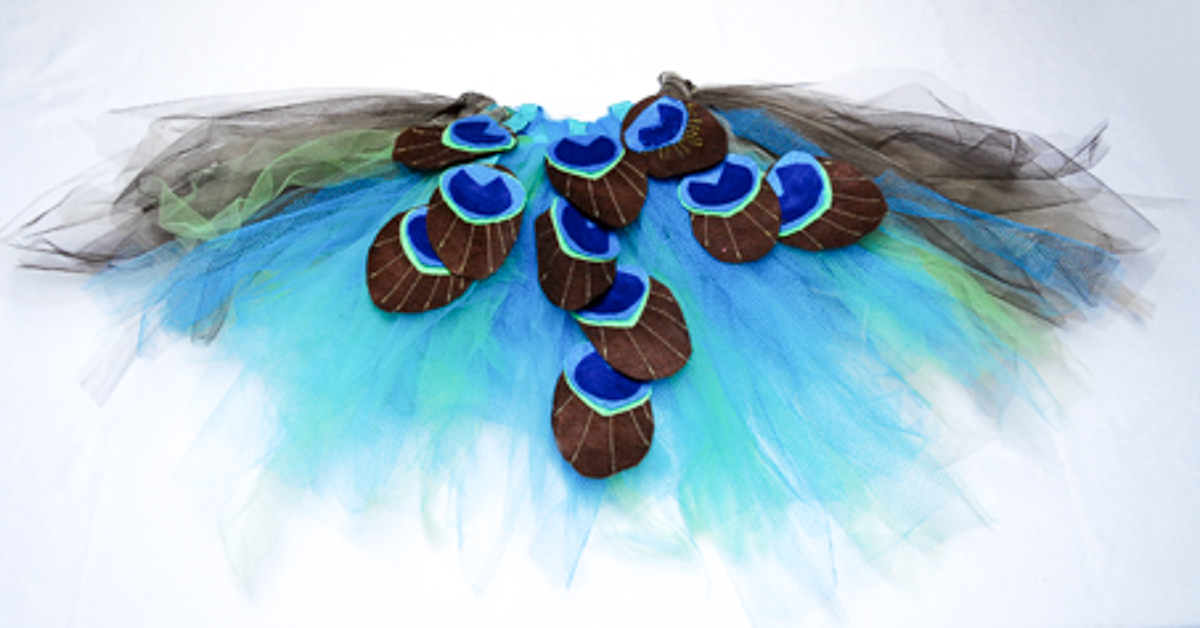
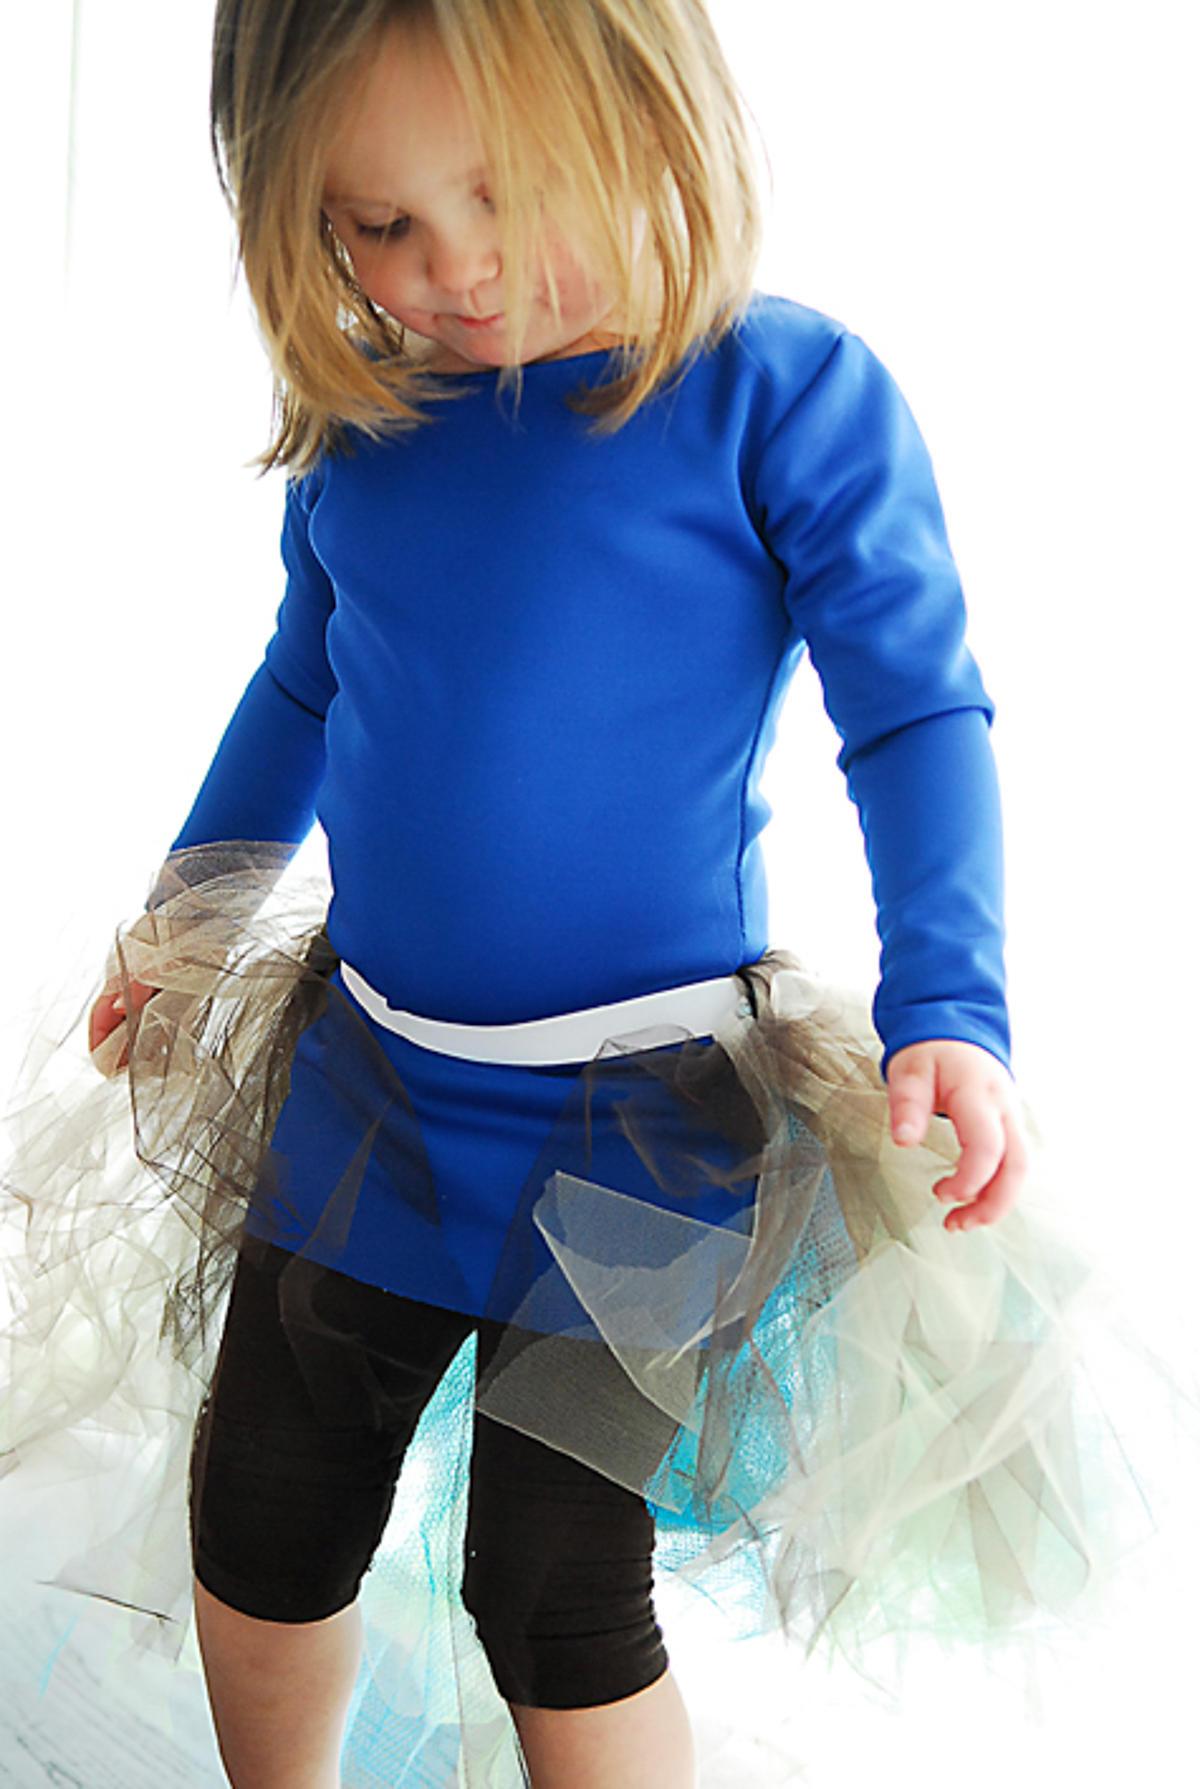
Then you are done with the peacock tutu! Pair it with tights or leggings and a matching t-shirt or sweater and you’ll have an adorable little peacock girl ready for her Halloween party or a regular day of dress-up.
More Ideas For Tutu Costumes
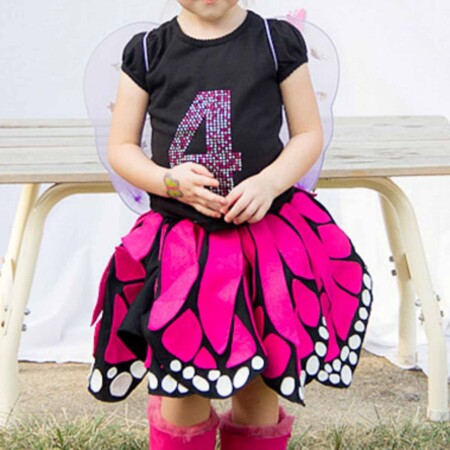
Ah, the versatility of tulle tutus! Whether you’re prepping for Halloween, a themed party, or a playful photo shoot, a tutu can be the heart of many diy halloween costumes. Here are some captivating ideas:
- Ballerina:
- Pair a tulle tutu with a black leotard. Add ballet shoes and a sleek bun to dance your way through the night.
- Fairy:
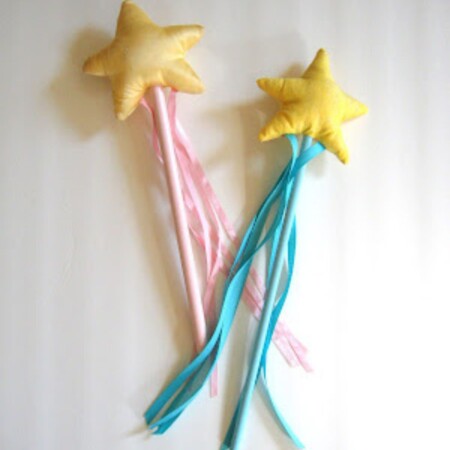
- Sprinkle some magic by coupling a colorful tulle tutu with a pair of wings. Finish the look with a wand and some sparkly shoes.
- Bumblebee:
- Using a black and yellow striped tutu, combine with a black leotard and DIY antennae for a buzzing look.
- Unicorn:
- A pastel-colored tutu goes perfectly with a unicorn horn headband. Don’t forget the glitter makeup to shimmer!
- Princess:
- Every princess needs a gown. Layer a long tulle tutu with a tiara and some sparkling shoes, and your royal look is complete.
- Ladybug:
- A red tutu with black polka dots, paired with a black leotard, can be the foundation of this cute bug look. Add easy DIY ladybug wings.
- Witch:
- Go for a unique witch look with a black tulle tutu, hat, and a broomstick.
More DIY Costume Ideas
DIY Peacock Costume Tutu
Supplies
- 1 Royal Blue Tulle Spool
- 1 Teal Tulle Spool
- 1 Lime Green Tulle Spool
- 1 Brown Tulle Spool
- Brown, green, blue and navy felt. Or buy an assorted pack of felt.
- ¾" non-roll elastic for the waistband
- Ribbon of any color coordinating with tutu. ½" is best.
- coordinating thread
Instructions
- Make a tutu skirt. Try this tutorial. I prefer the kind of tutorial where you knot strips of tulle around the elastic band. I only put the tulle in the back of the band leaving the front empty at the waist. I did brown and tan strands on the sides and then it faded to blue and green in the middle. I did this to closely mimic the peacock feathers.
- Make some feathers for the back. I started by cutting out the base of the feather in brown felt and then I cut out the shapes for the "eye" looking part of the feather. I used lime green, teal and royal blue felt for the pieces. I like the look of the fun bright colors.
- Pull out the sewing machine or hand stitch, if you prefer. Stitch the feathers. Sew the green piece to the brown piece by sewing around the edge, and then sewing lines outward for detail on the feather.
- Glue the blue pieces on the feather. Use your glue gun to glue the two blue pieces on to the feather. Alternatively, use fabric glue.
- Tack the feathers scattered on a ribbon.
- Sew the ribbons to the back of the skirt on the elastic.
Love This Project?
Make sure to share it with me on Instagram @andreasnotebook and follow on Pinterest @andreasnotebook for more!
Comments & Reviews
gmail sign up says
It looks like the real one. You’re so talent person. I hope to read more post from you next time
Free freecell game says
Hello friends that the free online card if you like to play the online card then you can visit my website and play online solitaire freecell game without downloading no need to signup just click on the homepage and play
How to register a business says
Good blog post. I want to thank you for interesting and helpful information and I like your point of view. Thank you! I love to read this type of material Good and attractive information I take from it. Thank you for posting such a good article.
Higher Reach says
My daughter would love one of these
Lee Coll says
Very talented designs – keep up the good work on your blog posts
Bonita says
This is a wonderful article.
Veronica says
What you have said is absolutely right.
Private Limited Company Registration says
Private limited organization enlistment requires some lawful advances and attentive procedures. To finish the procedure of online organization development, you have to think about what is a private constrained organization, how to frame private restricted organization, required archives for an organization arrangement, advantages of private constrained organization arrangement, and so on.
10 unbiased says
I am going to copy this design. Loved it.