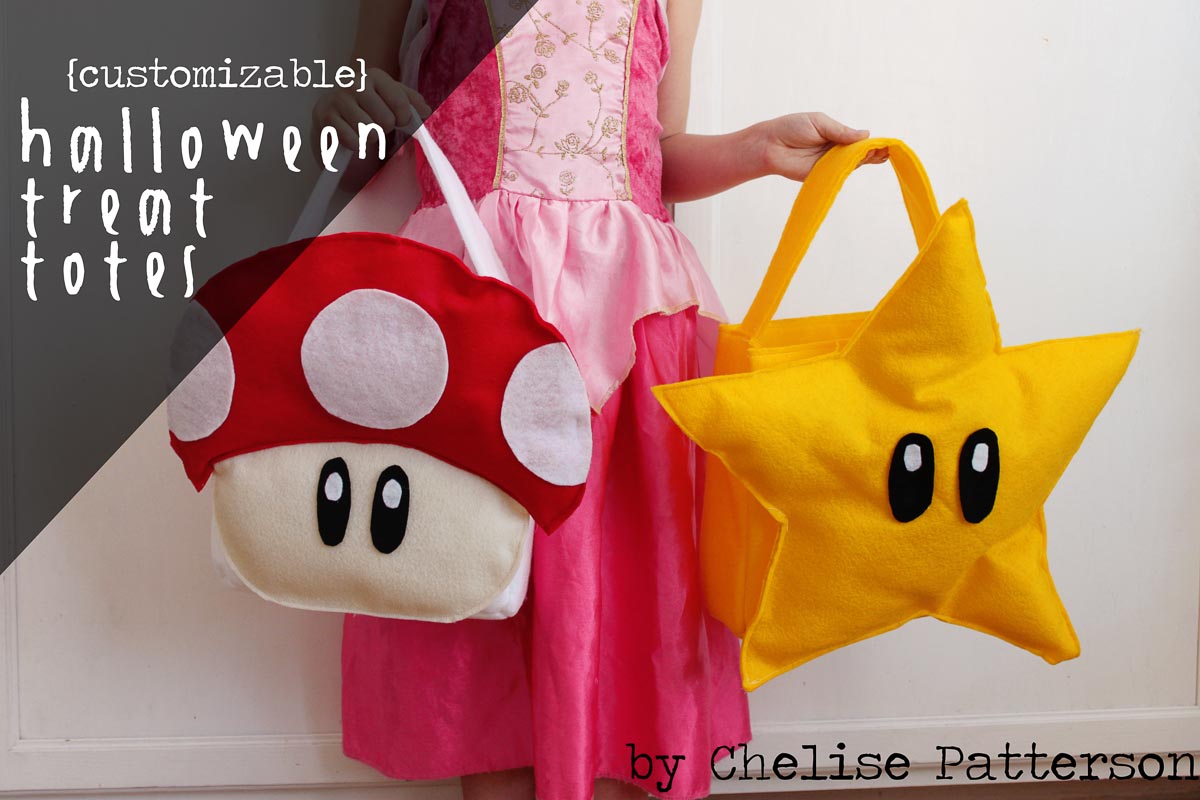
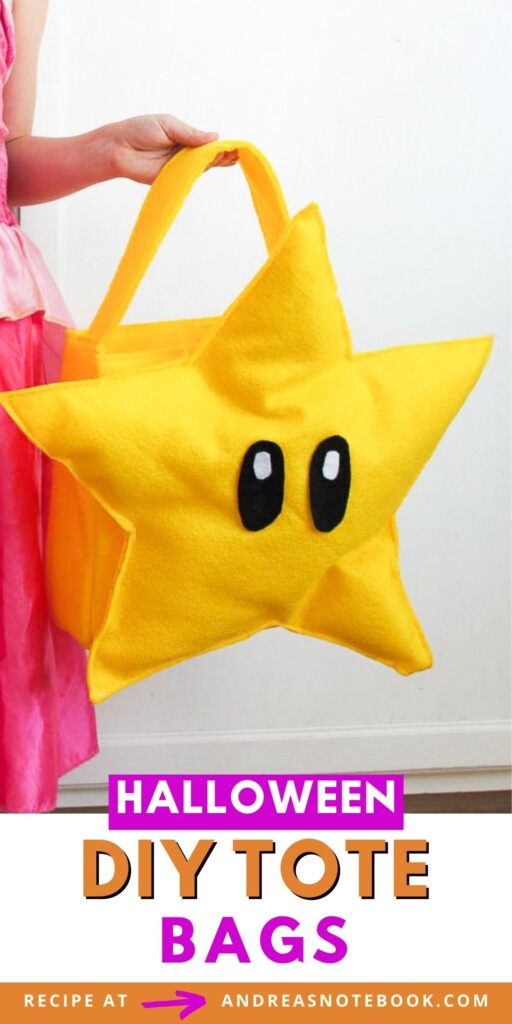
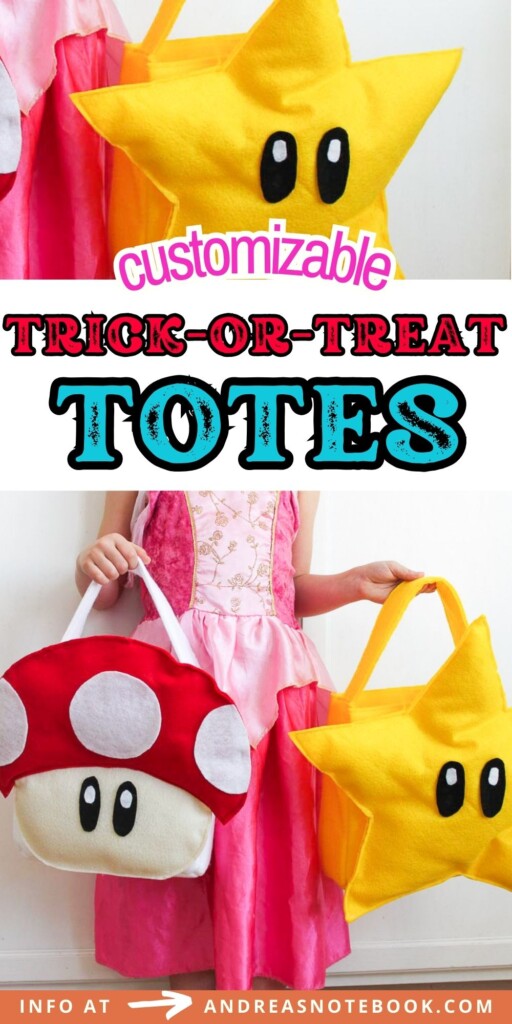
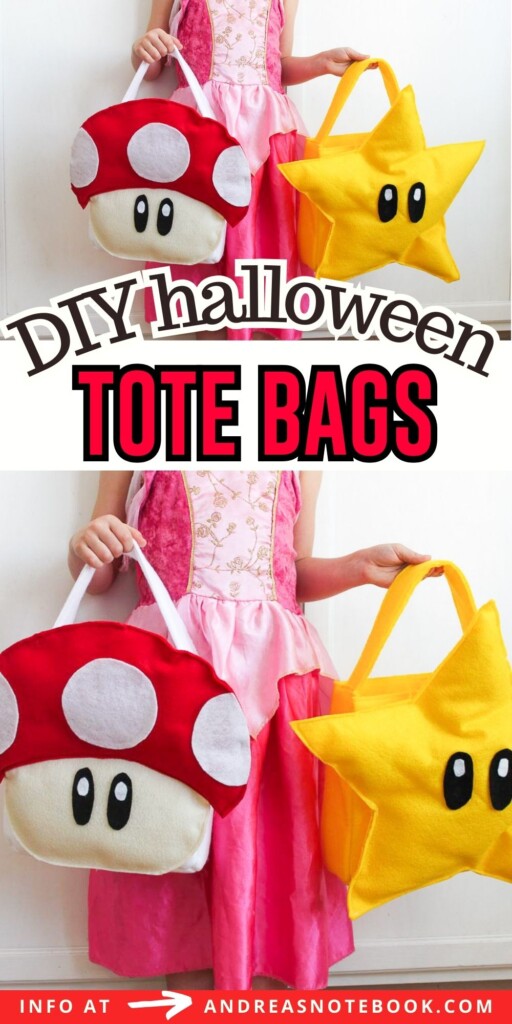
Look at these fantastic Halloween Treat Totes for trick-or-treating! These DIY Halloween treat bags are basic rectangle totes that can be customized to fit your child’s costume. The DIY Halloween bag tutorial includes full tutorial instructions for the plain bag, plus ideas for how to customize it. Add embellishments yourself to fit your costume for your Halloween party! Don’t forget to make some scary Halloween treats for your little trick or treater, as well! And don’t miss these 75 DIY Halloween costume tutorials.
What I Love About This Tutorial
Easily Customizable: Make a DIY Halloween bag for Halloween night to match your costume ideas. The fun part of Halloween is thinking up dress-up ideas. The sky is the limit for what shapes and different colors you can make this bag. It’s an easy craft for anyone who can sew a straight line. This Halloween tote bag tutorial is a great jumping off point.
Quick: This style of Halloween tote bag doesn’t take long to make! The most time consuming part is coming up with the idea.
Tutorial Author: Chelise Patterson
Gone are the days that my 5-year-old could be easily swayed as to her costume choice. This year she has unwavered in her decision to be Princess Peach and her brother to be Mario. Luckily he is only 1-year-old and doesn’t have an opinion yet anyway! I haven’t finished their costumes yet, but every year I also make a treat tote to go along with the costume theme. If you hand make a costume, then last minute pick up a 99-cent pumpkin bucket for trick-or-treating, you are missing out on a great opportunity to enhance your costume!
Here I will show you how to make the basic do-it-yourself Halloween trick-or-treat tote and from there you can customize it to coordinate with whatever costume your child insists on wearing.
Gather Supplies
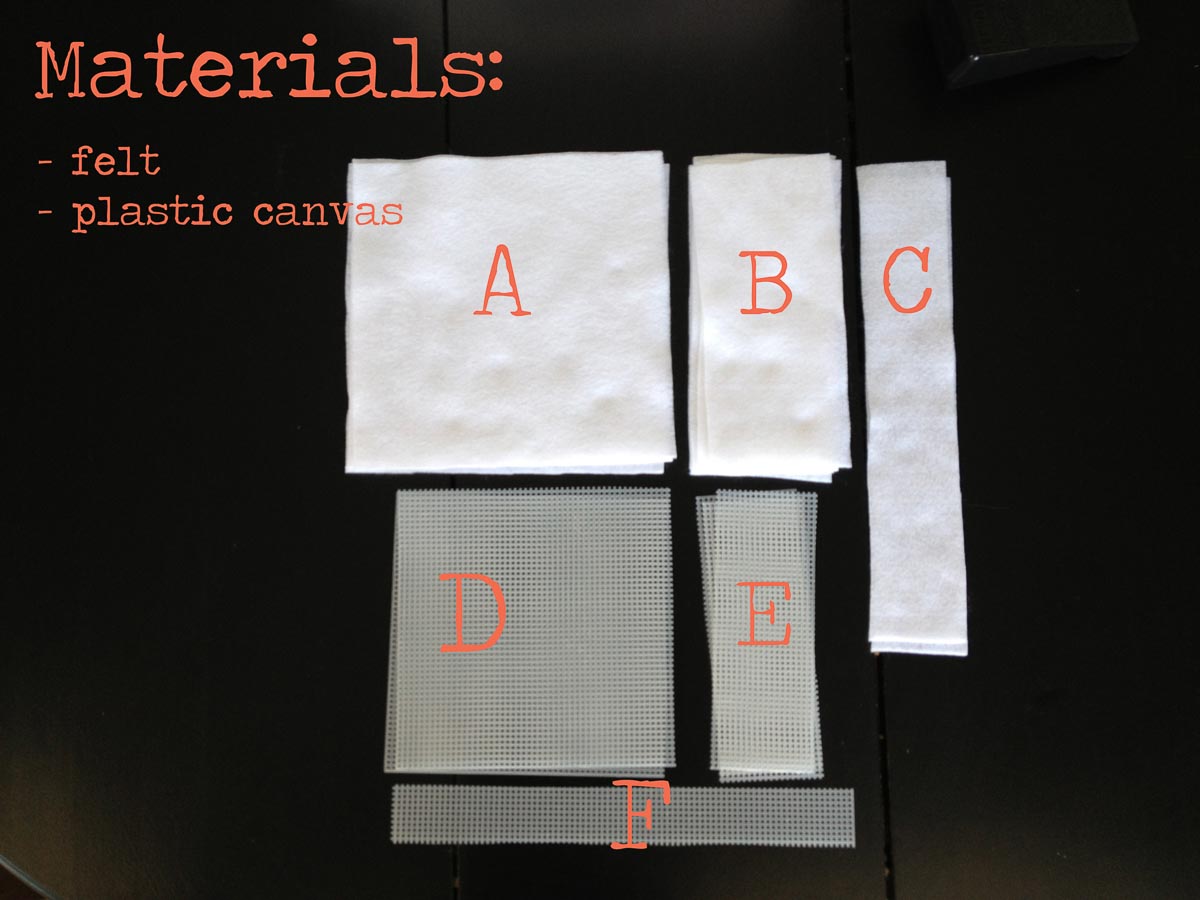
Note: If you are decorating your DIY trick or treat bag to have a star or mushroom on the front (or any other shape) you will need additional felt supplies. There is no treat bag pattern pieces. All pieces can be cut by measuring. See the “customizing your treat bag” section for tips on creating the bags shown in the photos.
All supplies are available from your local craft store or fabric store.
A- four pieces of felt size 9in x 9in
B- six pieces of felt size 9in x 4in
C- two pieces of felt size 2.5in x 14 in
D- two pieces of plastic canvas size 8in x 8in
E- three pieces of plastic canvas size 8in x 3in
F- one piece of plastic canvas size 1.5in x 13in
Why Use Felt?
Crafting for Halloween is much fun, especially when using materials that are easy to work with. Felt stands out as one of the most user-friendly fabrics, making it ideal for projects like creating an easy trick or treat tote bag. But what makes felt so wonderful?
Firstly, with felt, there’s no finishing edges required. This material doesn’t fray, meaning less time spent on overcasting or zigzagging the edges. This feature allows for a more quick and streamlined process.
Moreover, when sewing, the fabric’s thickness ensures it holds a straight line effortlessly. There’s no struggle with bunching or slipping, which is often the case with smoother fabrics. When stitching together the side seam or attaching handles, the task is simplified.
Another advantage? When sewing two pieces of felt together, you align them with their right sides together, making sure everything is in place before you start. The fabric’s texture grips onto itself, making pinning and sewing a breeze.
Lastly, felt is sturdy. Your tote bag will not only look great but will also withstand the weight of treats and the test of time. With felt, not only is the outcome aesthetically pleasing, but the journey there is smooth and enjoyable. Dive into your next craft adventure with felt and experience the difference firsthand!
Customizing Your Treat Bag
Beyond just planning a costume, consider integrating fun halloween treat bags to elevate your Halloween game. With a DIY project, you can ensure that your candy tote complements your costume perfectly!
Got a witch or black cat costume? A simple black tote bag embellished with a spider web design using white fabric paint or thread will pair seamlessly. It’ll be the purr-fect complement to your feline or magical get-up.
For those dressing up as a little monster, try adding fuzzy fabric or felt patches in bold colors to match your monstrous ensemble. Attach googly eyes or felt teeth to give your bag a creature-like appearance. It’s a great idea to get kids involved too, turning customization into a fun family affair.
Channeling a pumpkin theme? Convert your tote into a little pumpkin with orange fabric and draw or stitch on a jovial or spooky face. Don’t forget to add a green stem at the top!
The ideas are endless. For Snow White so I made a brown tote and glued a large red felt apple to both sides. You could turn it into a cauldron for a witch, a flower for a bumble bee, or a frying pan for Rapunzel.
Use felt and a hot glue gun to attach your embellishments. I desired a 3-dimensional effect for the mushroom and star, so I cut out two layers of my shapes, stitched them around the edges, and filled them with a bit of stuffing. Afterward, I glued these plushies to the totes.
Don’t Miss These Halloween Staples
How To Assemble Your Cute Tote Bag
This step-by-step tutorial guides you to create a sturdy DIY Halloween treat bag you can decorate to match your costume. Since it’s made with felt, the unfinished seams won’t unravel. These make cute tote bags for toddlers, preschoolers or older kids for any time of year but are especially useful to handle pieces of candy they’ve collected from their Halloween parties or trick-or-treating.
Step One:
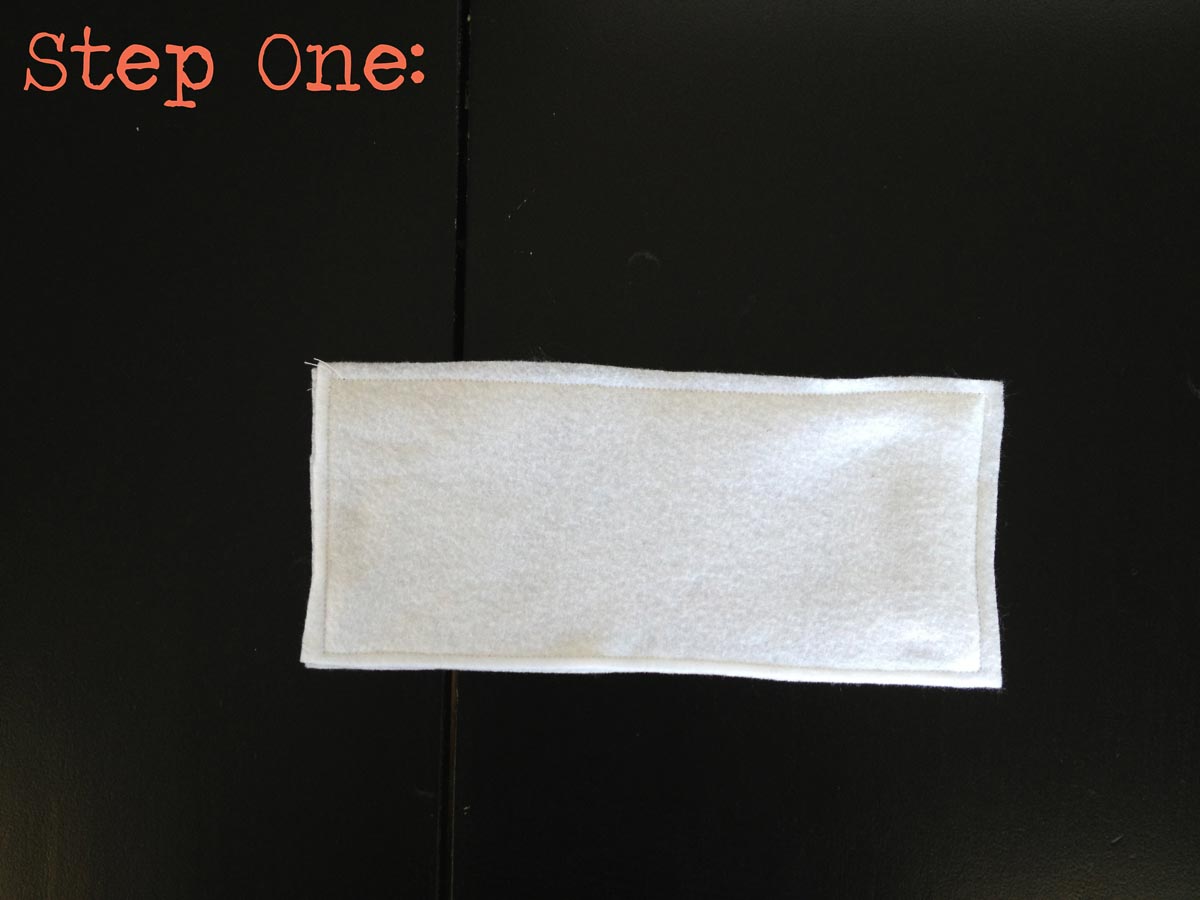
Sew together the bottom of the bag by sandwiching one piece of plastic canvas (size E) between two pieces of felt (size B) and stitching around the edges. Be careful not to sew over the plastic canvas as this could break your needle.
This will make a sturdy bottom for the tote. Most felt does not have right sides and wrong sides so there is no need to worry about that while sewing this DIY Halloween bag.
Step Two:
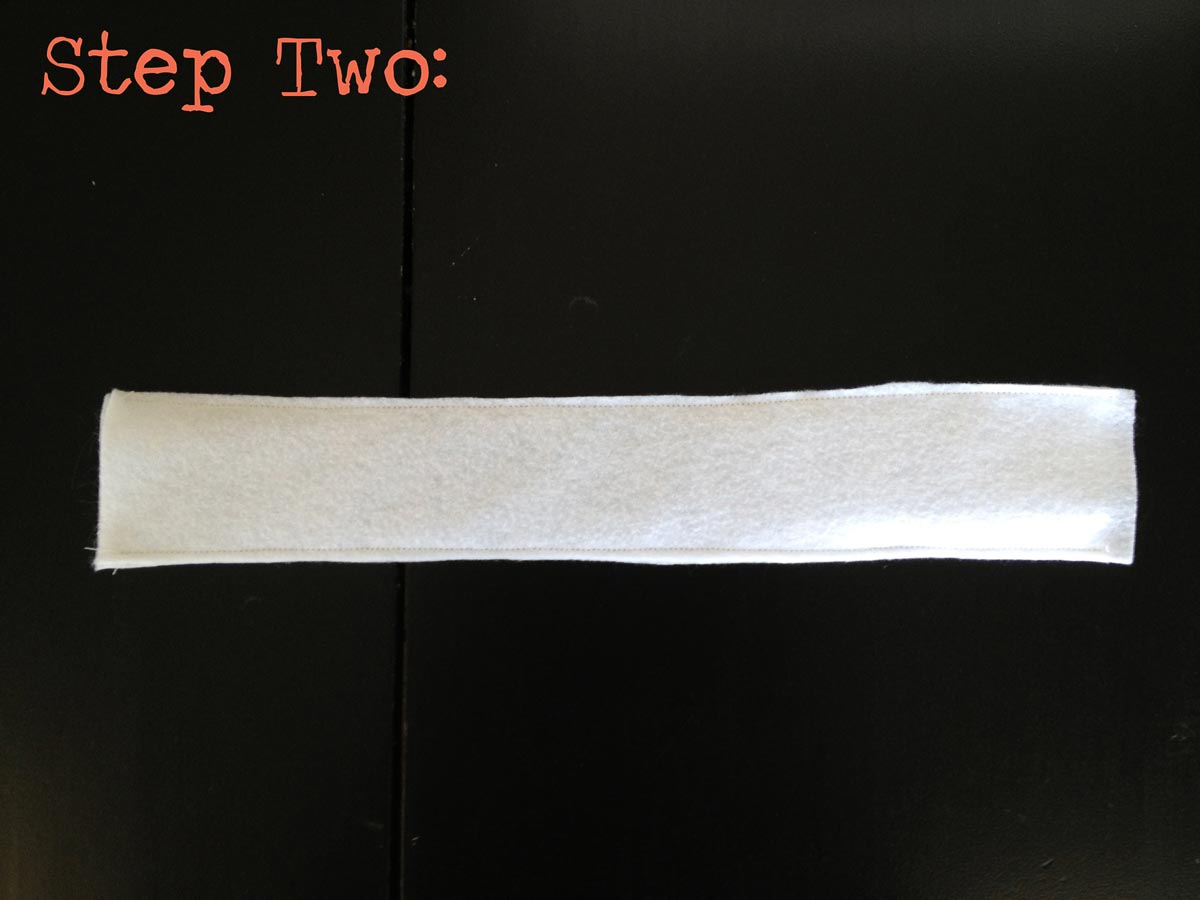
Sew the handle strap by sandwiching the long canvas piece (F) between the two long felt pieces (C) and stitching around the edges.
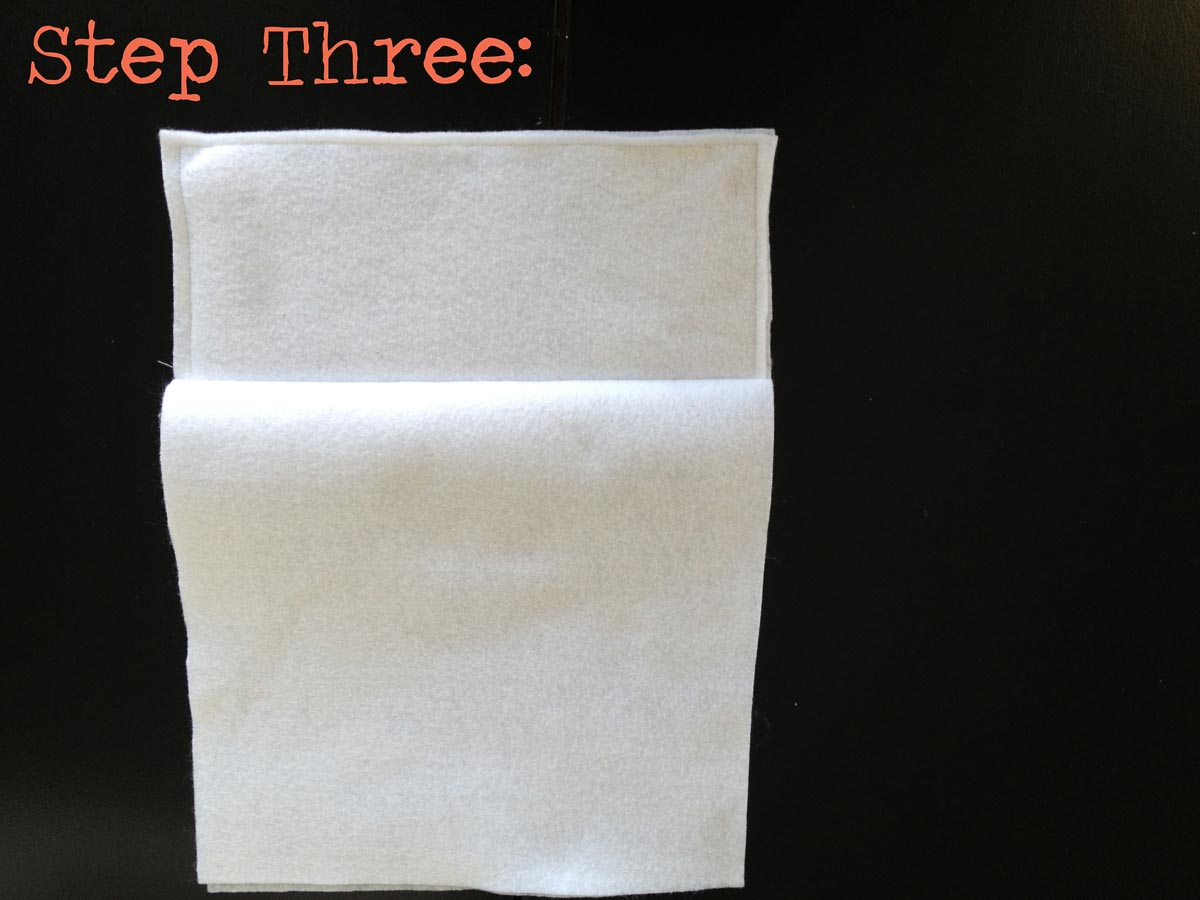
Step Three:
Next it’s time to create the bottom edge of the DIY halloween bag. Two of the large felt squares (A) make up one side of the tote. With the two large squares together, sew it to one side of the long edges of the bottom piece. Open and lay flat as shown above.
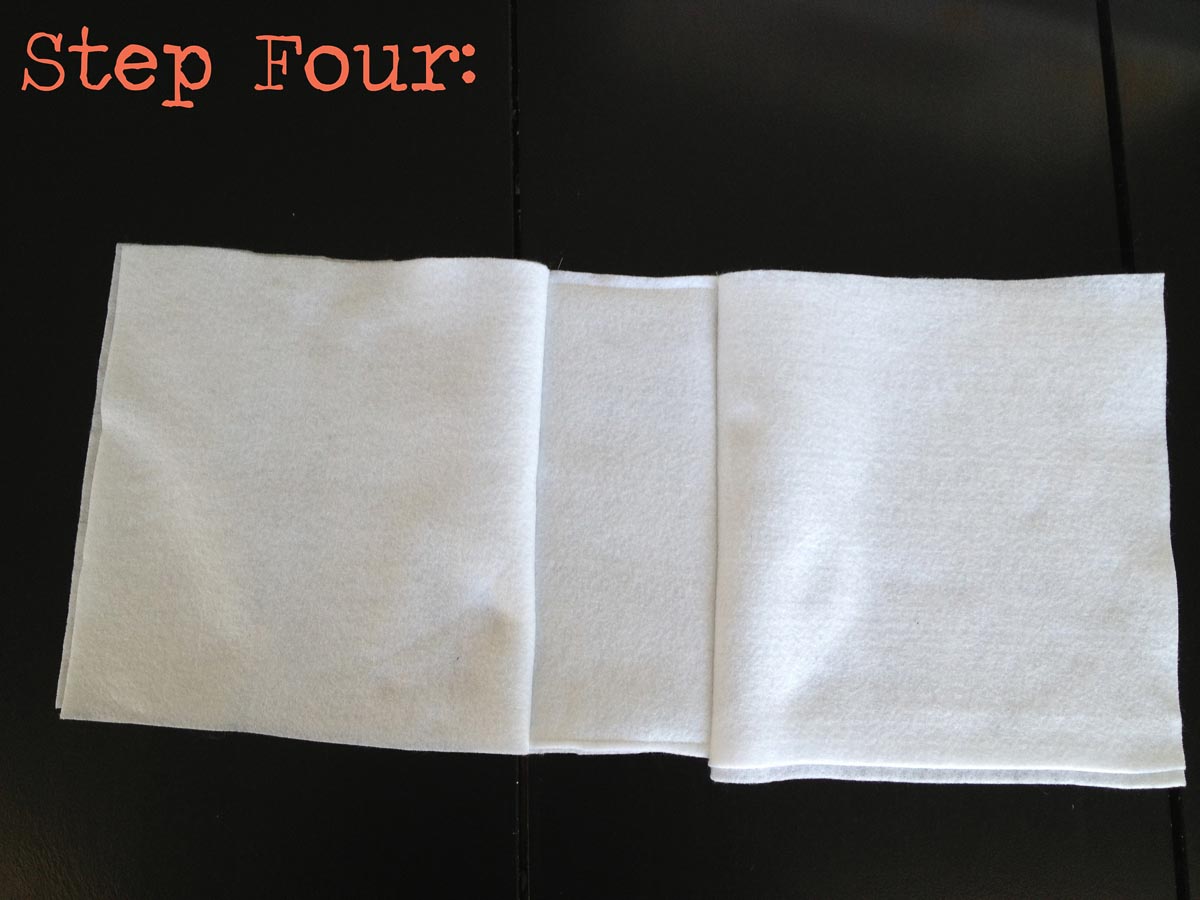
Step Four:
Repeat step three, sewing the last two large felt squares (A) to the opposite side of the bottom piece as shown below. Lay it flat again as shown above.
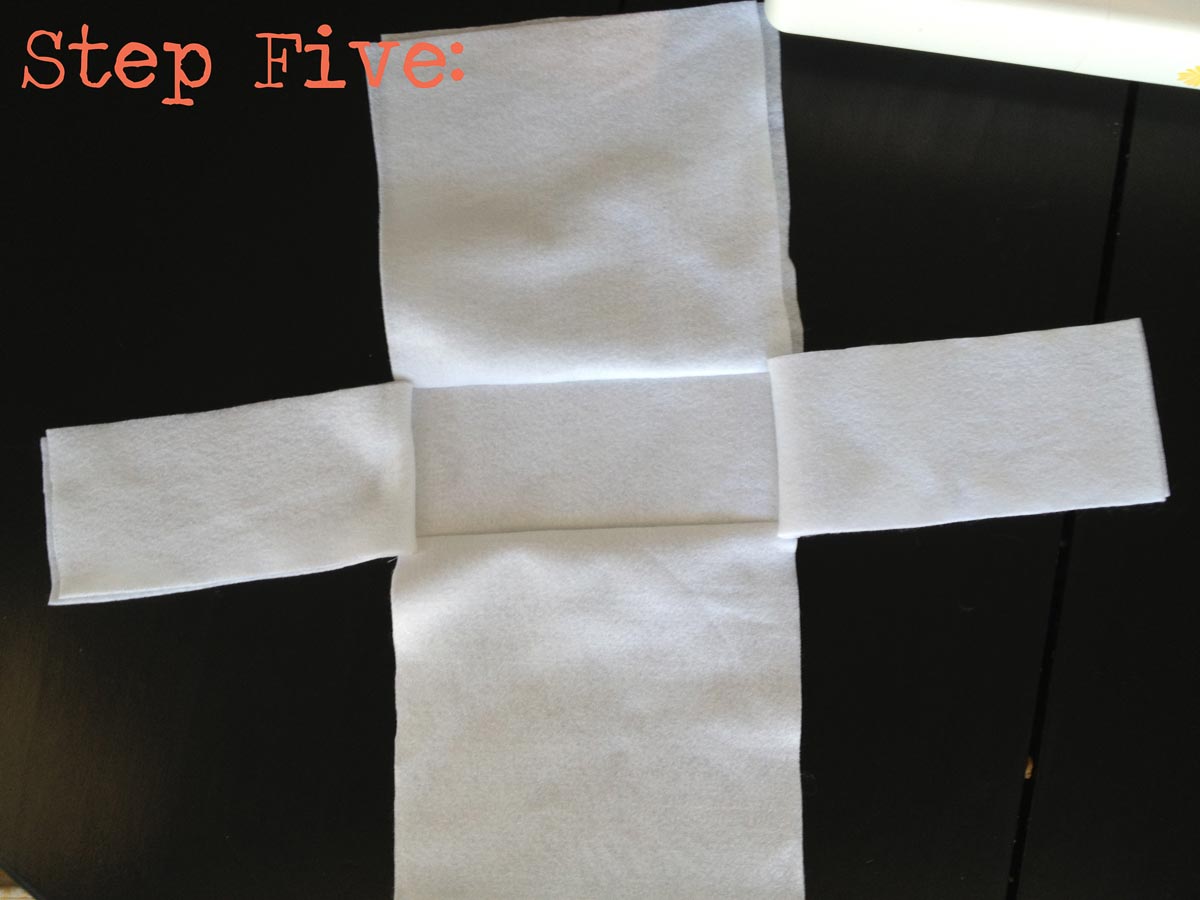
Step Five:
Sew two felt rectangles (B) to each of the remaining sides of the bottom piece. Open it all up so that it looks like pictured above. Note that all the DIY halloween bag seams are on the outside of the bag at this point.
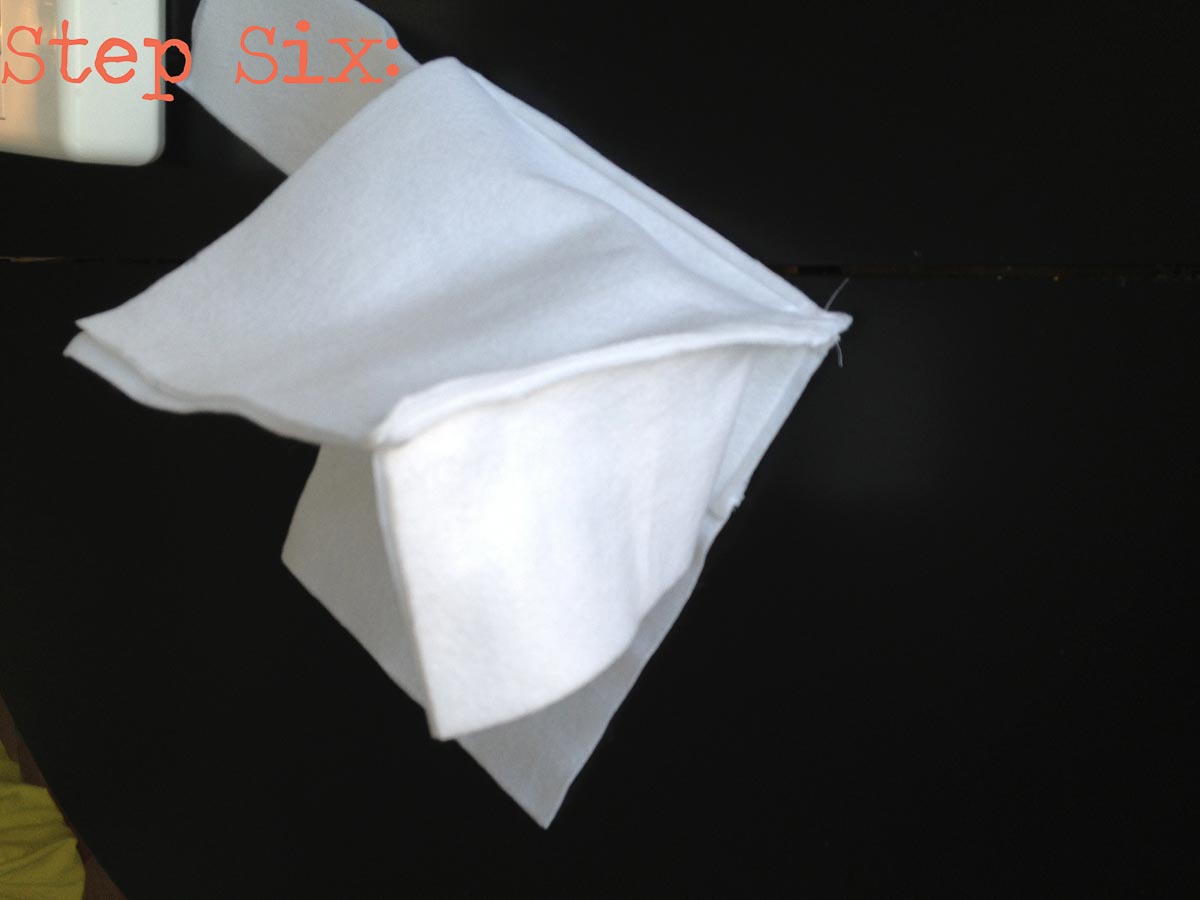
Step Six:
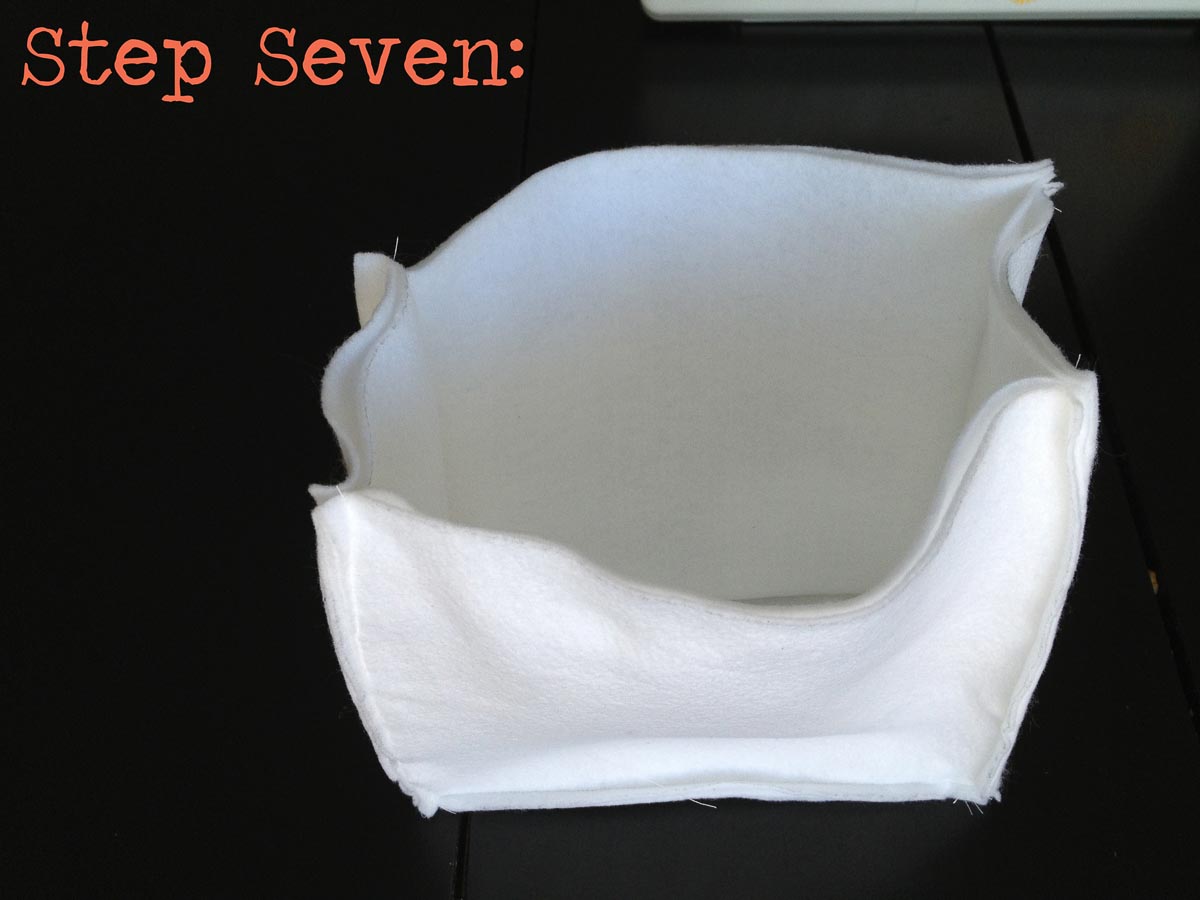
Lift up two adjoining sides of the tote (keeping the doubled up layers together) and stitch all the way down making one corner side seam. Just like the bottom seams, you’ll see the bag’s side seams on the outside until you turn it right side out.
Step Seven:
Repeat step six with the remaining sides until it has all come together like pictured above.
Step Eight:
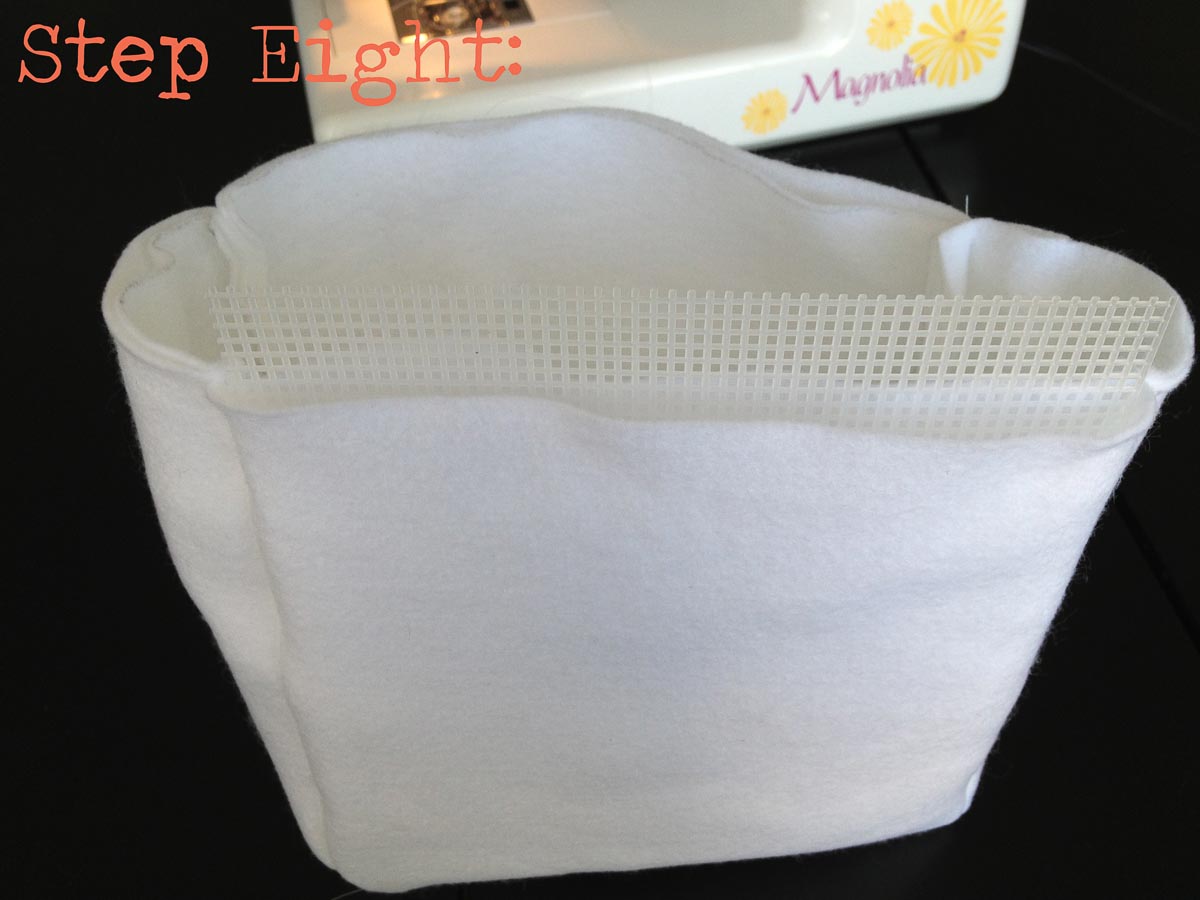
Flip the tote right side out. Insert the rest of the canvas pieces (D and E) into the “pockets” you’ve created on top.

Step Nine:
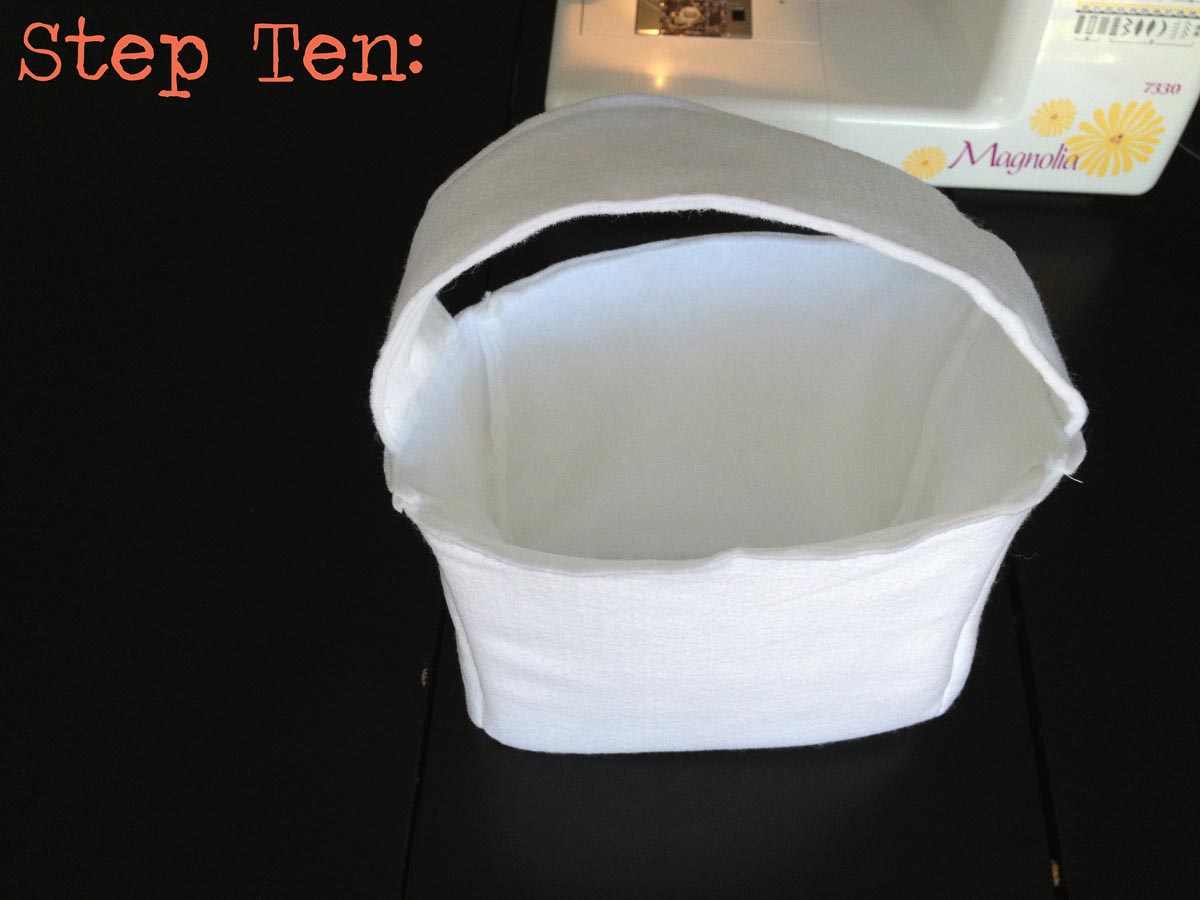
Tuck in the handle into the openings at the top of the smaller sides of the tote. Pin to hold in place.
Step Ten:
Stitch around the entire top of the DIY halloween bag, making sure that handles are being stitched in there as well. Do not sew over the plastic canvas. I also trim around all the raw edges (without clipping through the stitches) just so that everything looks clean and lined up.
You’ve finished your basic tote! Now, you can deck it out in any style you fancy. Last year, when Drew dressed as Snow White, I crafted a brown tote and affixed a large red felt apple on both sides. You have options: transform it into a witch’s cauldron, a bumble bee’s flower, or Rapunzel’s frying pan. Simply employ felt and a hot glue gun. Wanting a 3D effect for the mushroom and star, I assembled two layers of the shapes, stitched their perimeters, and padded them slightly with stuffing. After that, I attached these plush designs to the totes.
These totes are sturdy and are going to handle some major candy collecting! I hope you enjoyed the DIY Halloween trick or treat bag tutorial!
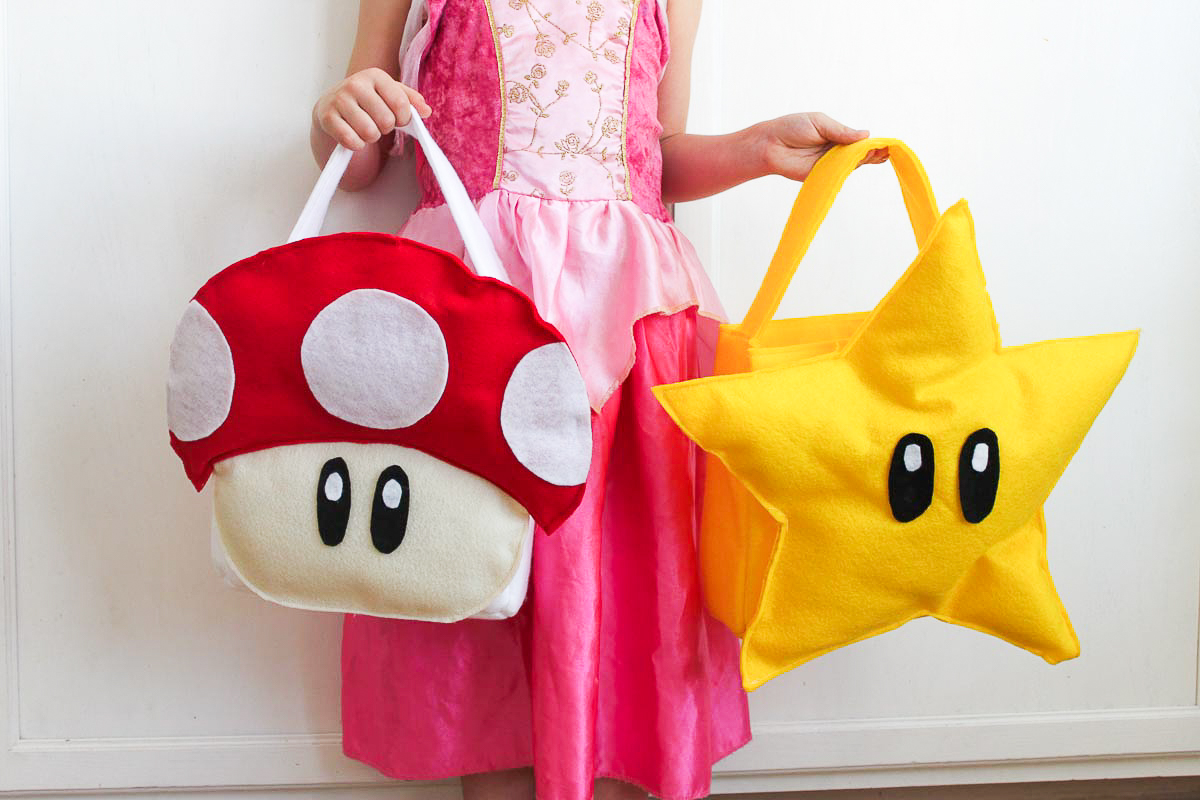
There you have it! If you followed this DIY Halloween bag tutorial now you have a cute trick or treat bag! This adorable bag will hold up all night and can be filled to the brim with yummy treats or party favors.
Comments & Reviews
kristin says
ARGH she found my weak spot! MARIO TREAT BAGS!!! love them.
Monica says
hi how can i get the star and mushroom stencil to copy the images??