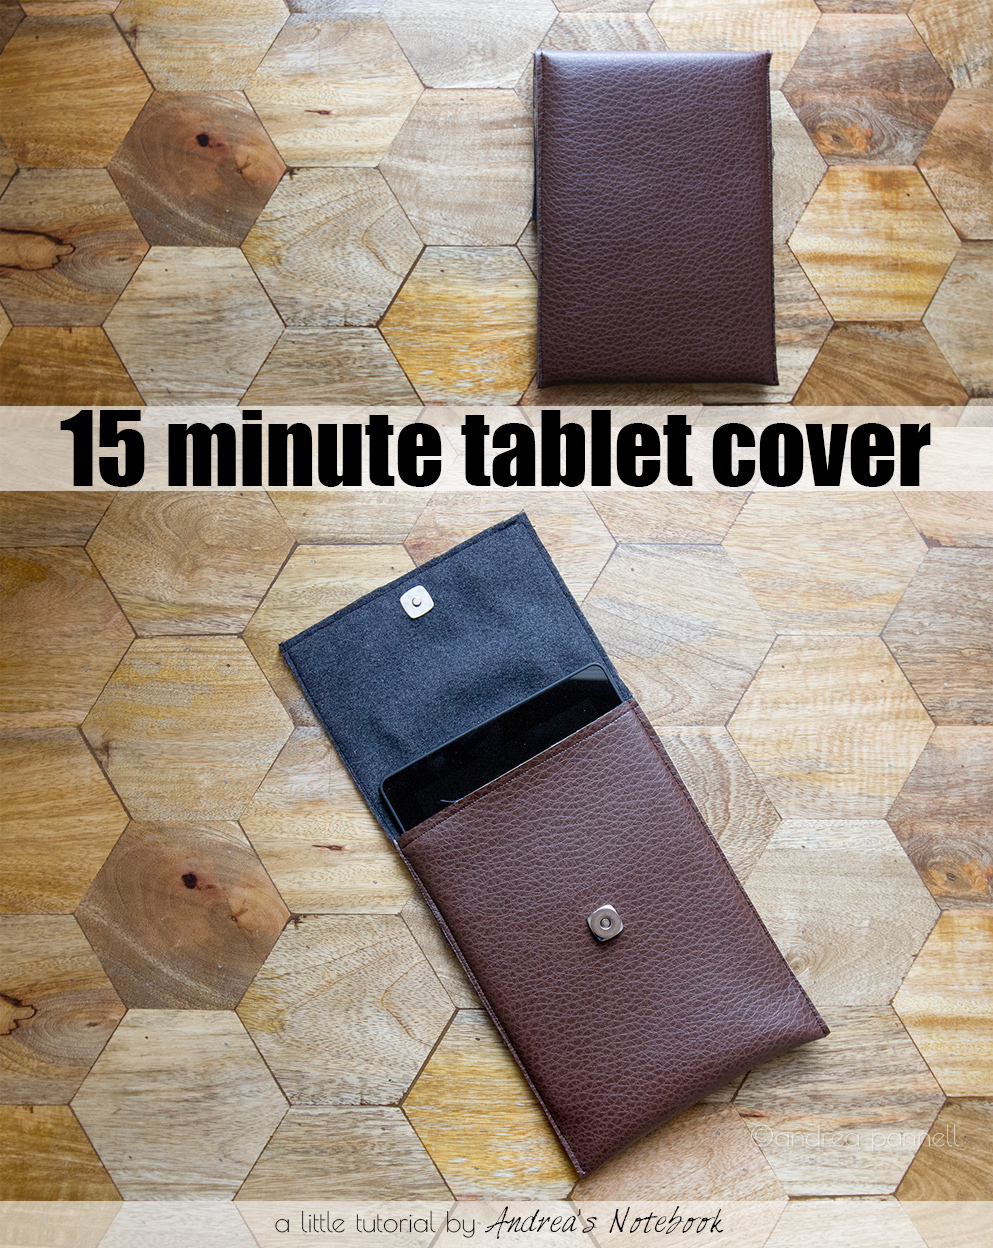
• Home
  • About
  • Sewing Patterns
  • Submit A Project
    • Bloglovin
    • Facebook
    • Google+
    • Instagram
    • Pinterest
    • Twitter
    • YouTube

Andrea's Notebook

The best DIY & sewing tips!

  • Make
    • Art
    • Crafts
    • DIY
    • Fashion
    • Fiber Arts (knit/crochet)
    • Gifts
    • Jewelry
    • Paper Craft
    • Pet Crafts
    • Party
    • Photography
    • Sewing
    • Wood Working
  • Food
    • Breakfast
    • Dinner
    • Healthy Recipes
    • One Pot Meals
    • Side Dish
    • Smoothies
  • Health
    • Fitness
    • Healthy Eating
  • Kids
    • Books
    • Kid Fashion
    • Parenting
  • Living
    • Cleaning
    • Home Decor
    • Humor
    • Inspiration
    • Interviews
    • Organize
    • Positive
  • Sewing
    • Baby
    • Books
    • Boys
    • Dogs
    • Gifts
    • Girls
    • Kids
    • Free Children’s Patterns
    • Free Women’s Patterns
    • Tips & Tricks
    • Men
    • Women
  • Travel
    • Travel – Caribbean
    • Travel – South America
    • Travel – United States
    • Family Travel
    • Travel Tips
  • Community
    • Art
    • Beauty
    • Celebrations
    • Crafts
    • DIY
    • Fiber Arts
    • Kid Crafts
    • Recipes
    • Sewing

All posts may contain affiliate links

Simple pleather tablet case tutorial

March 31, 2014 by Andrea 8 Comments

Chances are you own a tablet of some sort. Whether it’s an iPad or a Kindle Fire or some other tablet. And chances are you take it with you places by throwing it into your handbag. If you’ve got 15 minutes you can make this quick tablet cover to protect it from scratches and cheerio crumbs! This tutorial is perfect for beginners.
 
15 minute tablet cover tutorial

Supplies:

  • leather or faux leather. I used leftovers from this project.
  • wool felt or other fabric that doesn’t fray. I used wool scraps from this project but don’t recommend because it frays a bit.
  • magnetic snap (available at most fabric stores)

Let’s begin:

tablet cover tutorial

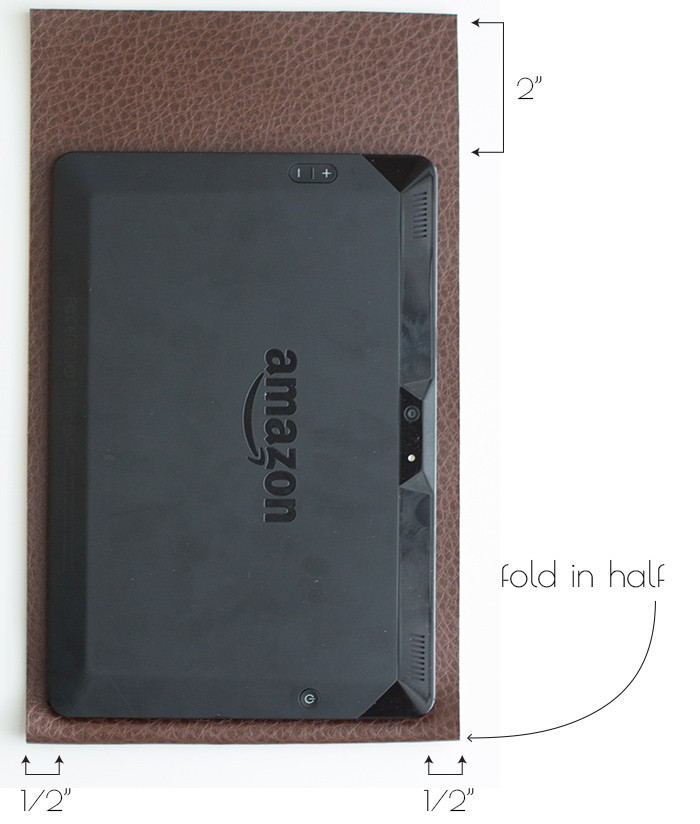
Just fold your leather in half. Cut the leather in the approximate dimensions as shown above.  Repeat with the lining.tablet-cover-supplies

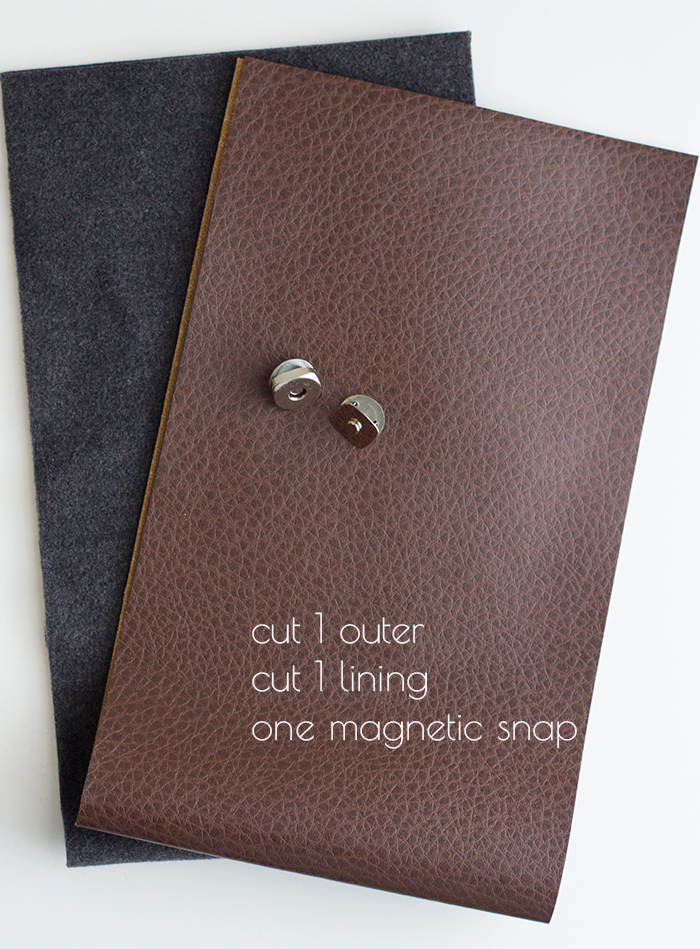
Add your snaps. The female piece will go on the right side of the lining. The male piece will go on the right side of the outer layer. See photo below for tips. Insert snap according to package directions (it’s really easy).  Make sure you test out the location before attaching the snaps to make sure it folds over and closes with a little extra room for the tablet.

tablet-cover-magnetic-snaps

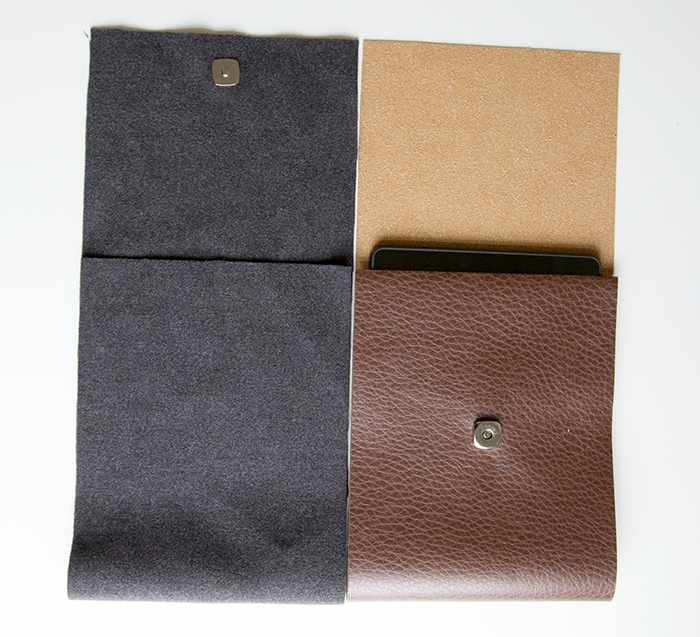
Lay your lining and leather together so the wrong sides are together. Sew one short end. Then fold your pieces as above. Put your tablet in it to measure how much you want to fold.
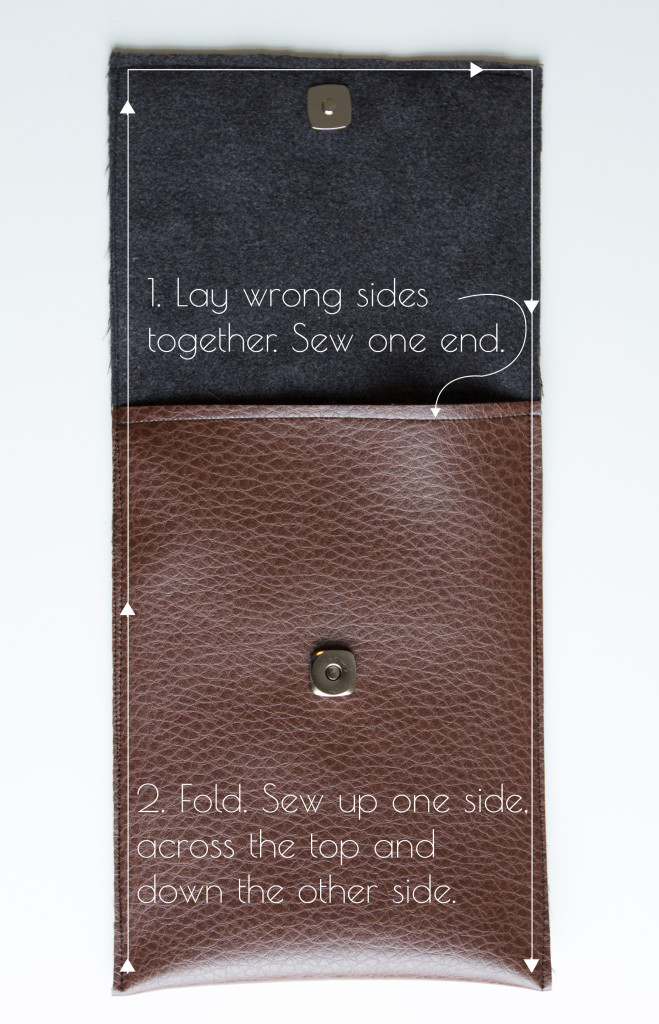
Easy leather tablet cover tutorial

Sew the last raw edges with a 1/4″ seam allowance! That’s it!

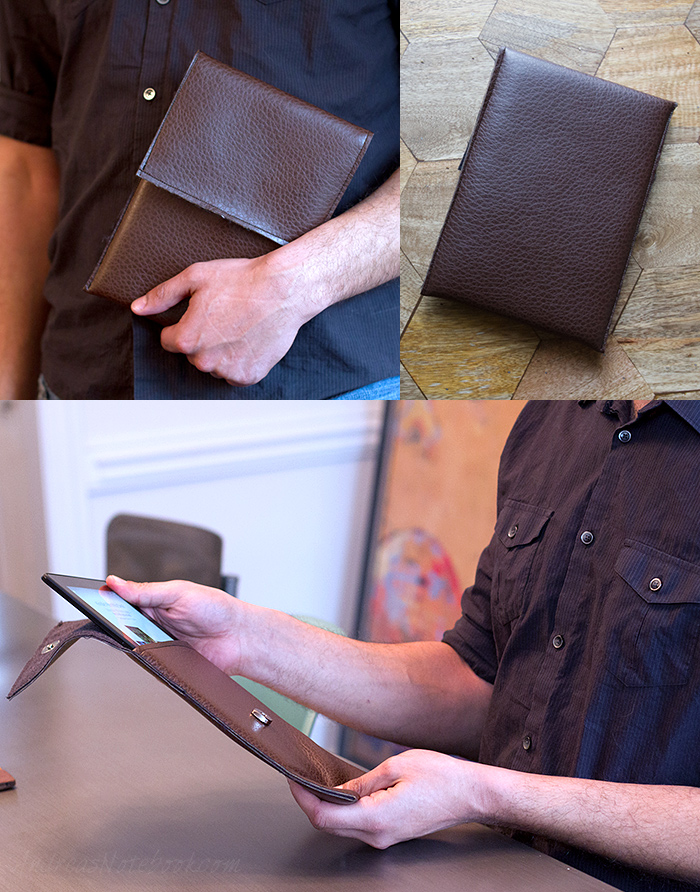
This would make a great gift for anyone.

tablet-tutorial

Now go check out all the wonderful home sewing tutorials at Living With Punks!!

Filed Under: DIY, Sewing, Sewing for boys, Sewing for Girls, sewing for house, Sewing for men, Sewing for women, Sewing gifts, Tutorials Tagged With: leather, sew, tutorial

About Andrea

Andrea is a mom to four and the creator of both Andrea's Notebook and Sewtorial. In her spare time she designs sewing patterns for Go To Patterns and surfs the web for interesting articles to post on The Train To Crazy.

« How to Make a Bacon Weave
Organizing recipes »

Comments

  1. Anne says

    March 31, 2014 at 11:16 am

    Love it!! My husband may be getting one of these for his birthday! I’ve got a Craft Gossip post scheduled for later this morning that links to your tutorial:
    http://sewing.craftgossip.com/tutorial-15-minute-tablet-cover/2014/03/31/
    –Anne

    Reply
  2. Beverly {Flamingo Toes} says

    March 31, 2014 at 1:41 pm

    I love it! This is so cool and I really like that it is perfect for guys or girls. Awesome gift idea.
    I am also completely distracted by those awesome wood hexagons. Is that your floor??? Because I am in love.

    Reply
    • Andrea says

      March 31, 2014 at 2:06 pm

      It’s my desk =) I love it!

      Reply
  3. Ajaire says

    April 1, 2014 at 7:38 am

    I’ve been eyeing those hexis on your posts and I can’t believe it’s your desk. I thought it was a coffee table. That is so cool. And the project is great too, but wow that desk 🙂

    Reply
  4. Susan says

    April 1, 2014 at 6:53 pm

    Thanks for the awesomeness Andrea! I love it and can’t wait to make one for me…keep the punks’ sticky fingers off of it!

    Reply
  5. Peggy Meriwether says

    April 6, 2014 at 1:00 pm

    Do you have one that’s just a case that you just open when you’re ready to use it and not just a carrier?

    Reply
    • Andrea says

      April 7, 2014 at 4:03 pm

      no

      Reply
  6. Denice Spiers says

    March 30, 2016 at 4:50 pm

    Thank you for the auspicious writeup. It in fact was a amusement account it. Look advanced to more added agreeable from you! However, how could we communicate?

    Reply

Leave a Reply Cancel reply

Your email address will not be published. Required fields are marked *

Today’s Most Read Posts

Spring Cleaning Tips and Tricks

Posts You’ll Love

  • Bloglovin
  • Facebook
  • Google+
  • Instagram
  • Pinterest
  • Twitter
  • YouTube
  • about
  • sponsorship opportunities
  • become a contributor
  • privacy policy
  • Facebook
  • Google+
  • Instagram
  • Pinterest
  • RSS
  • Twitter

Copyright © 2019 · Andreas Notebook · Design & Development by Shay Bocks