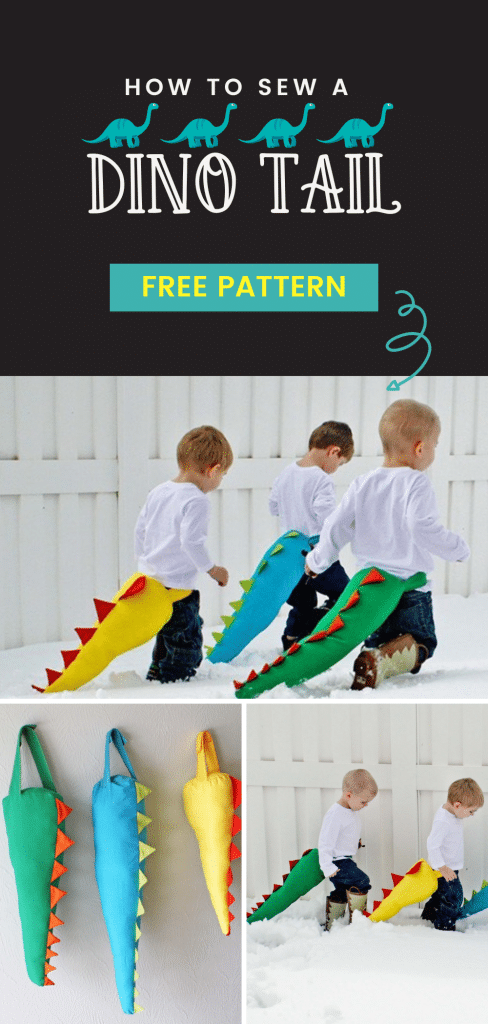

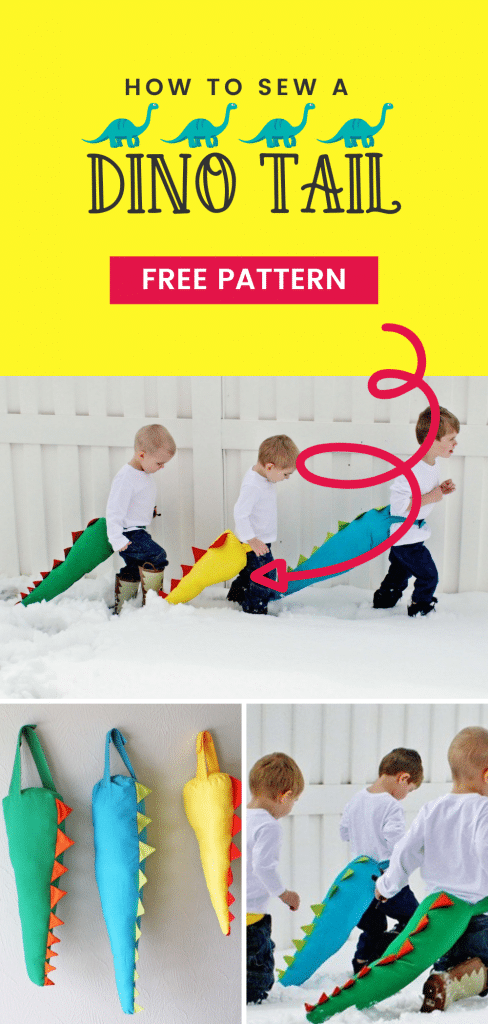
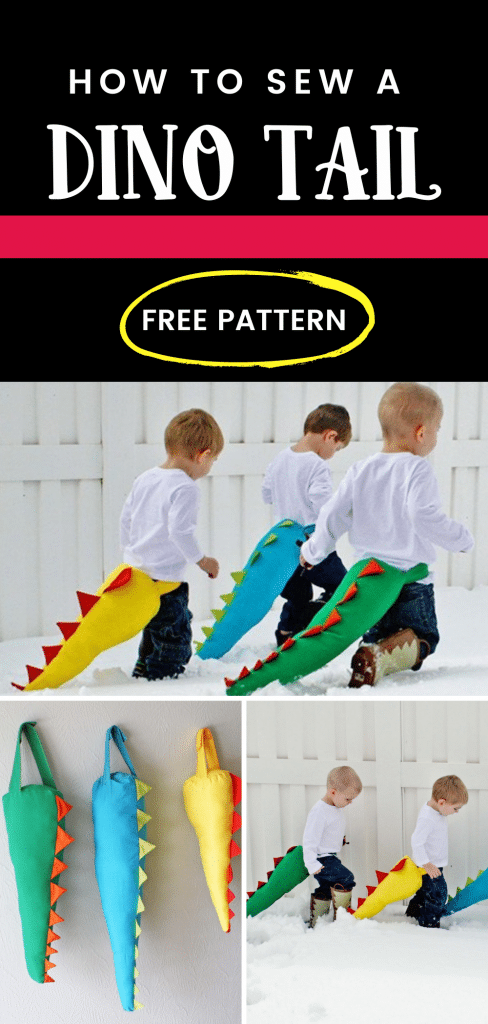
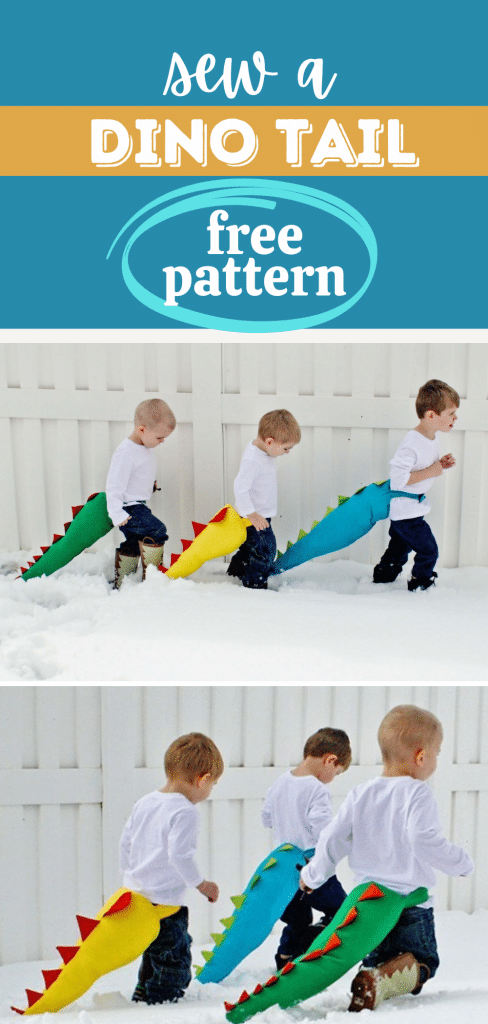
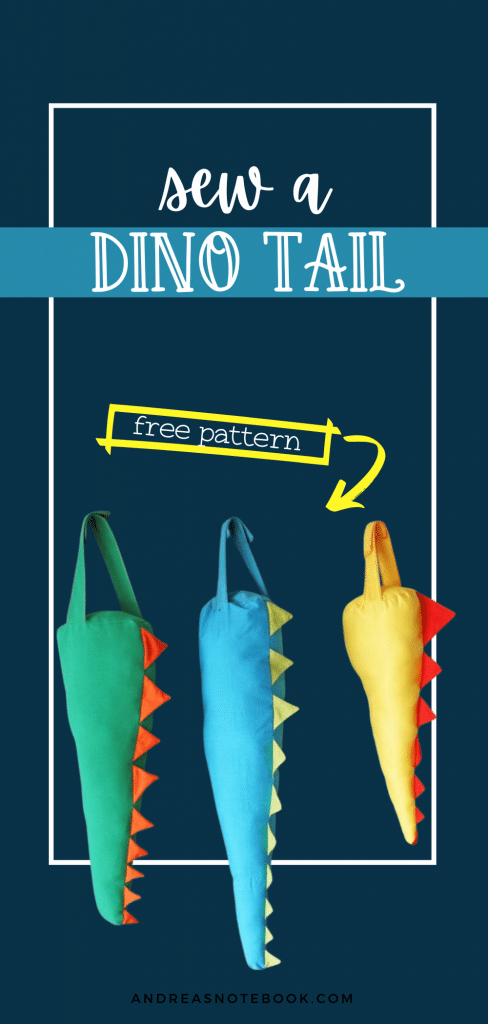
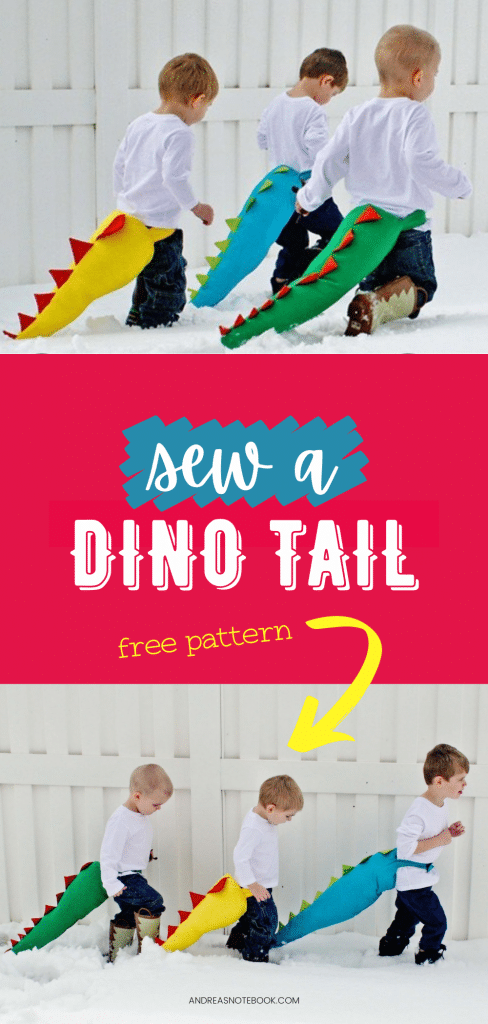
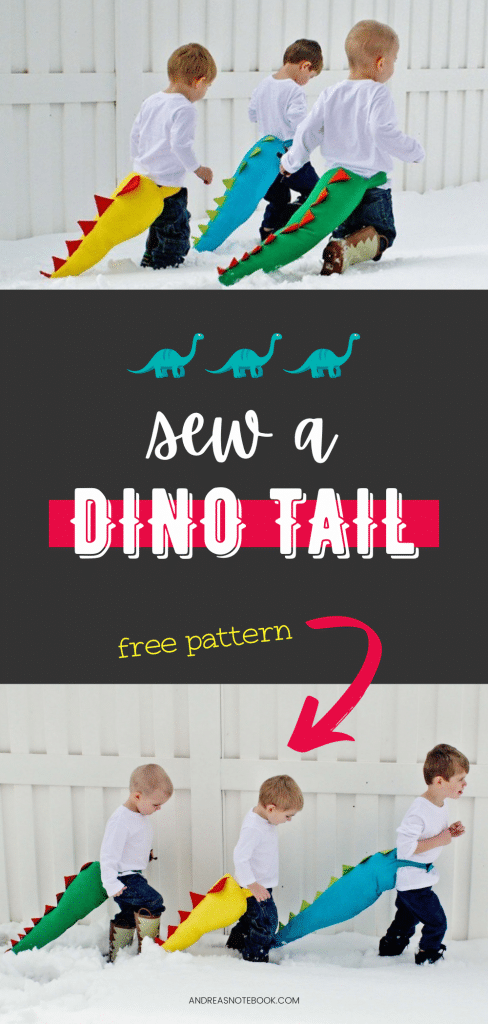
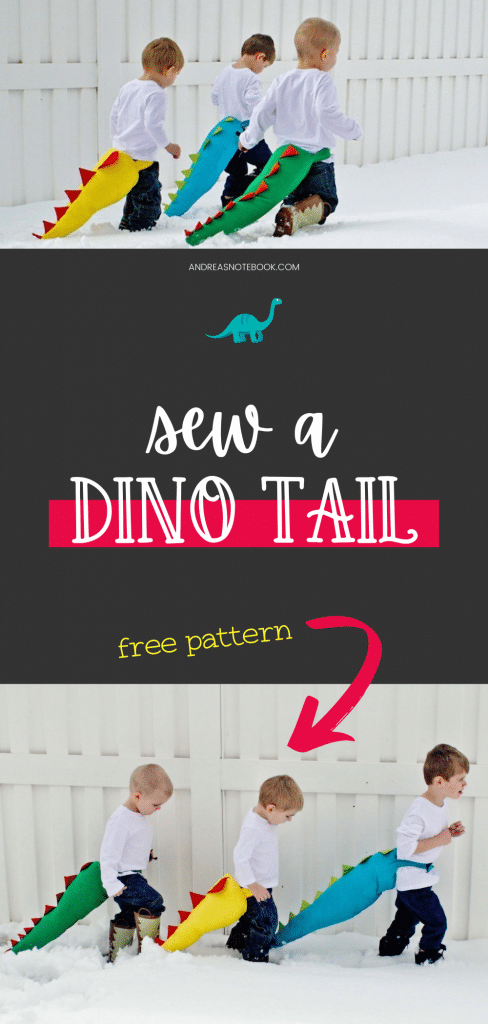
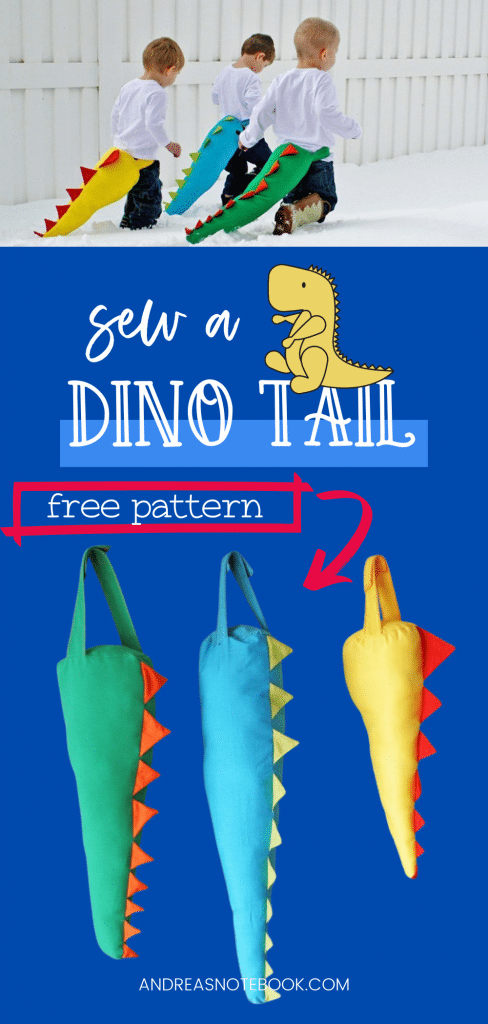

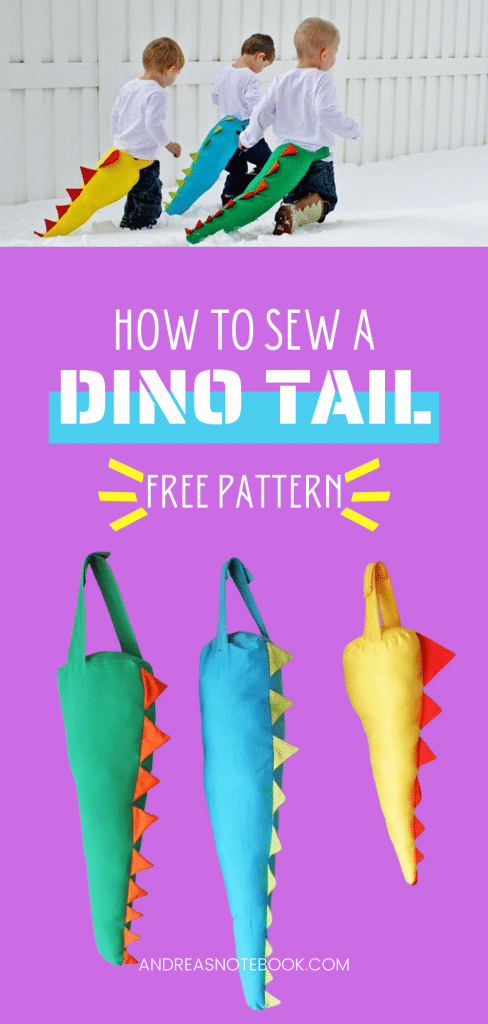
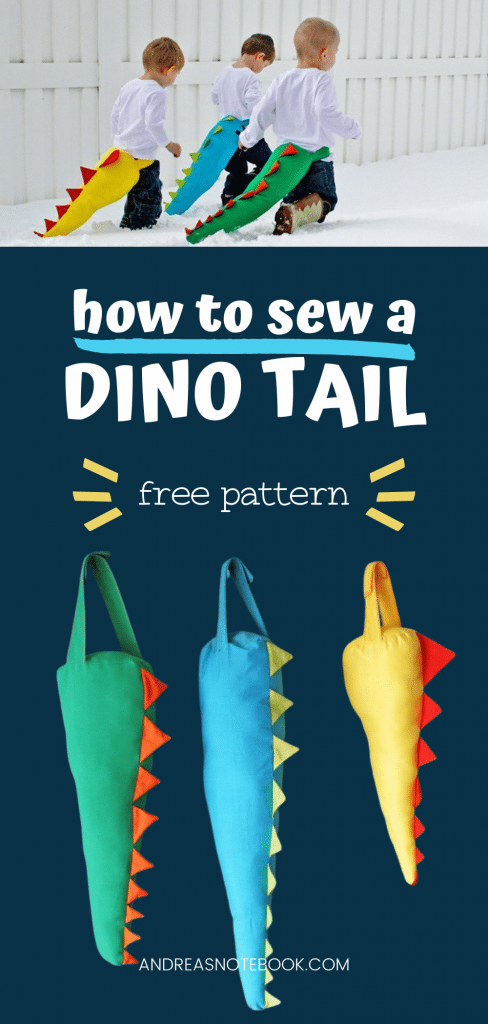
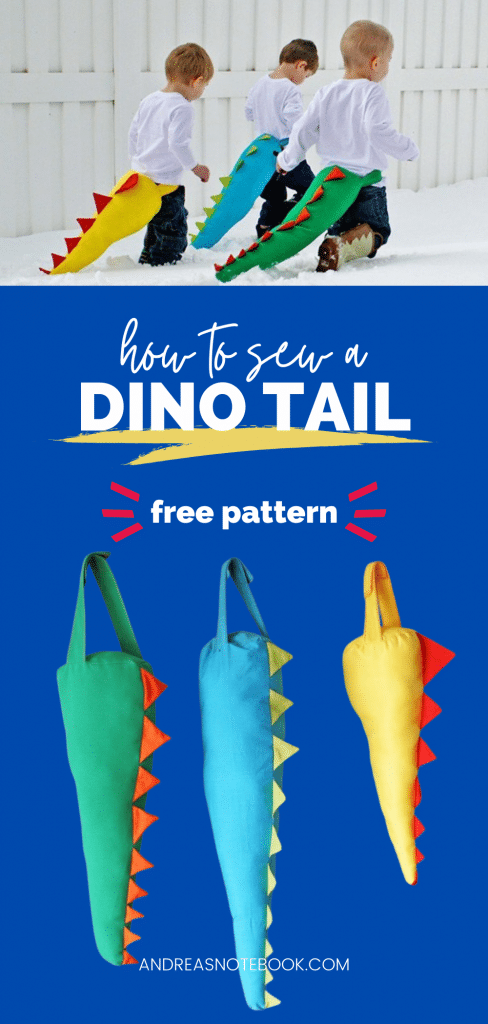

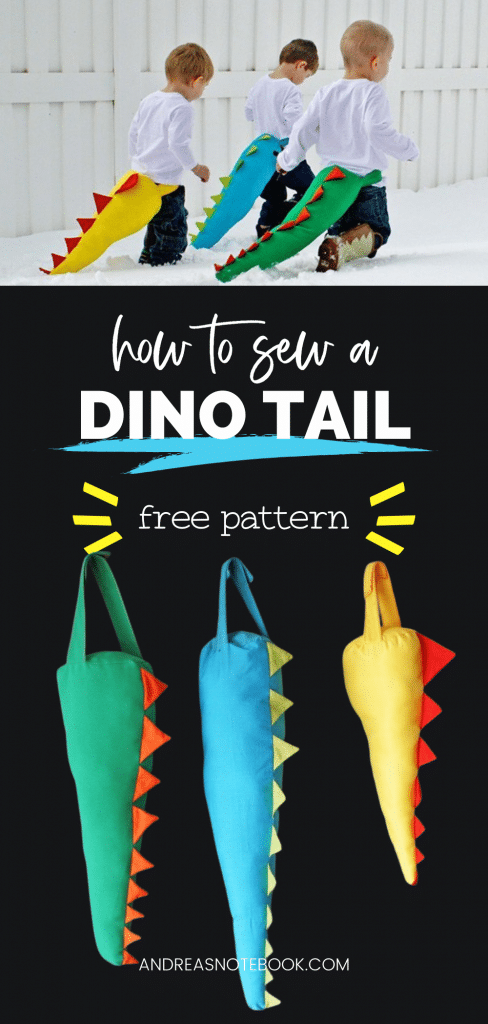
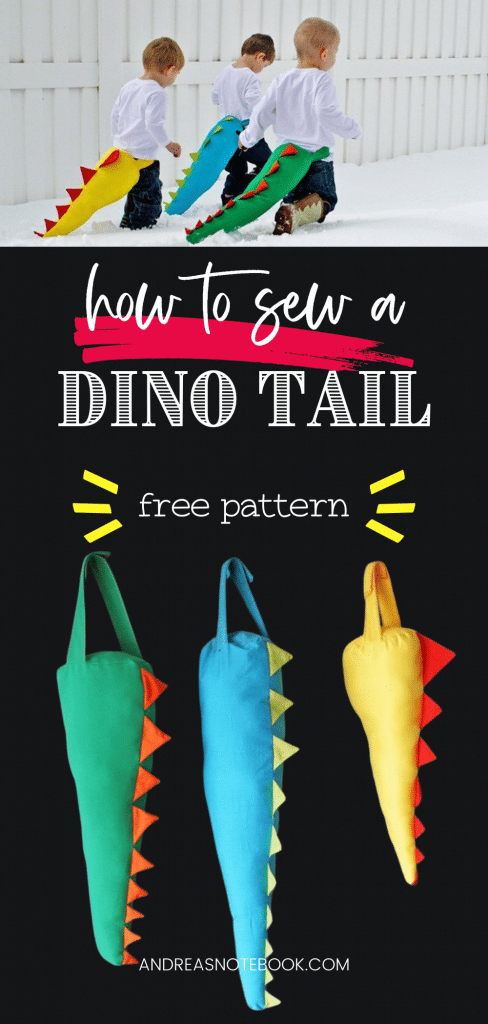
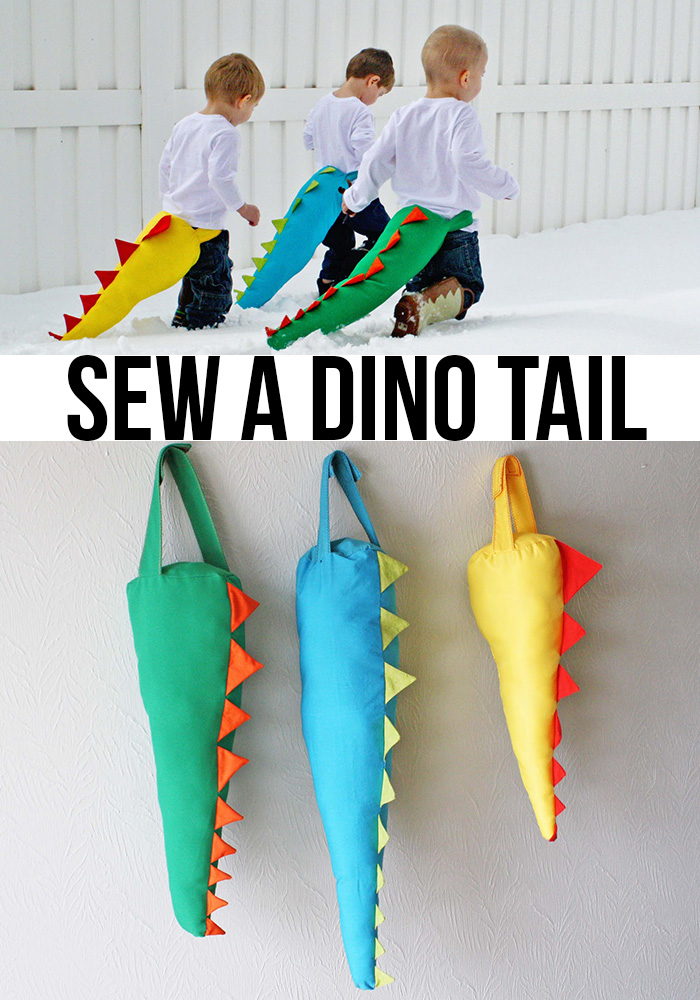
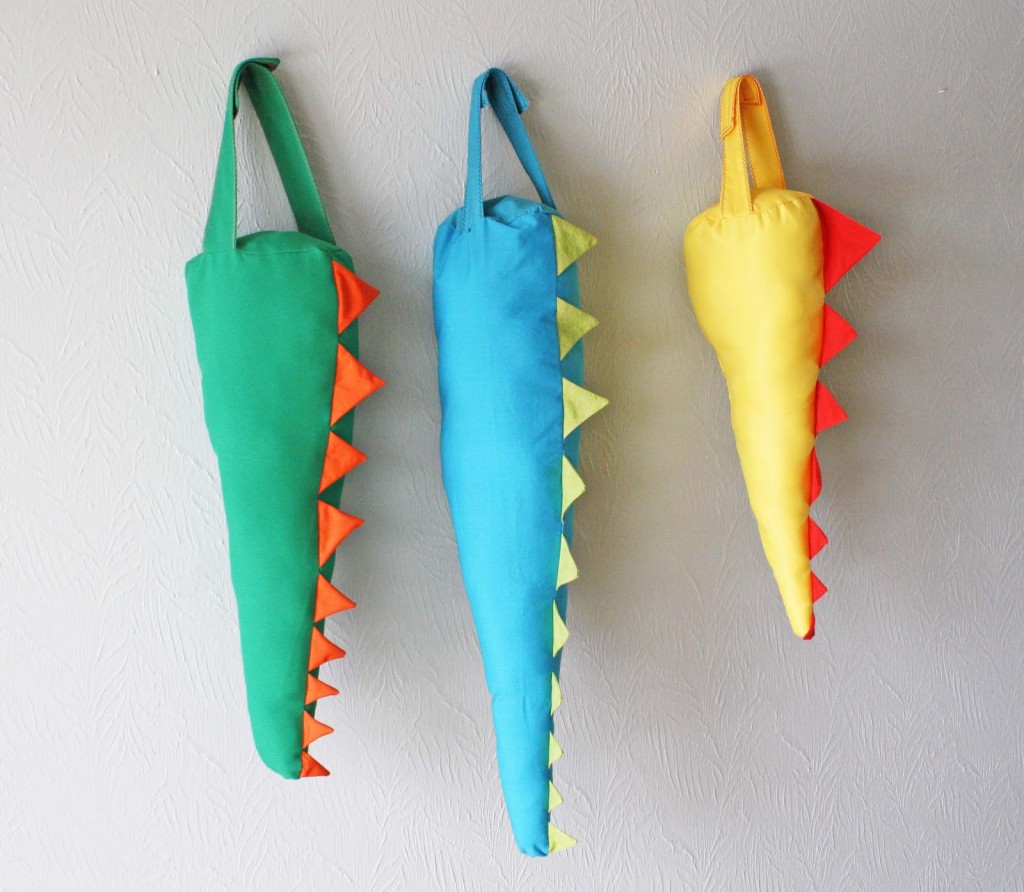
Learn how to make a do-it-yourself (DIY) dino tail, or dragon tail, for kids with this free dinosaur tail tutorial and pattern. Perfect for boys and girls all year round. Add it to their toy dress-up bin! This is an easy sewing tutorial. Even beginners can make this!
Why You’ll Love This Tutorial
Sewing Skill: This is a beginner to intermediate level sewing tutorial.
Pictures: Full picture tutorial is included.
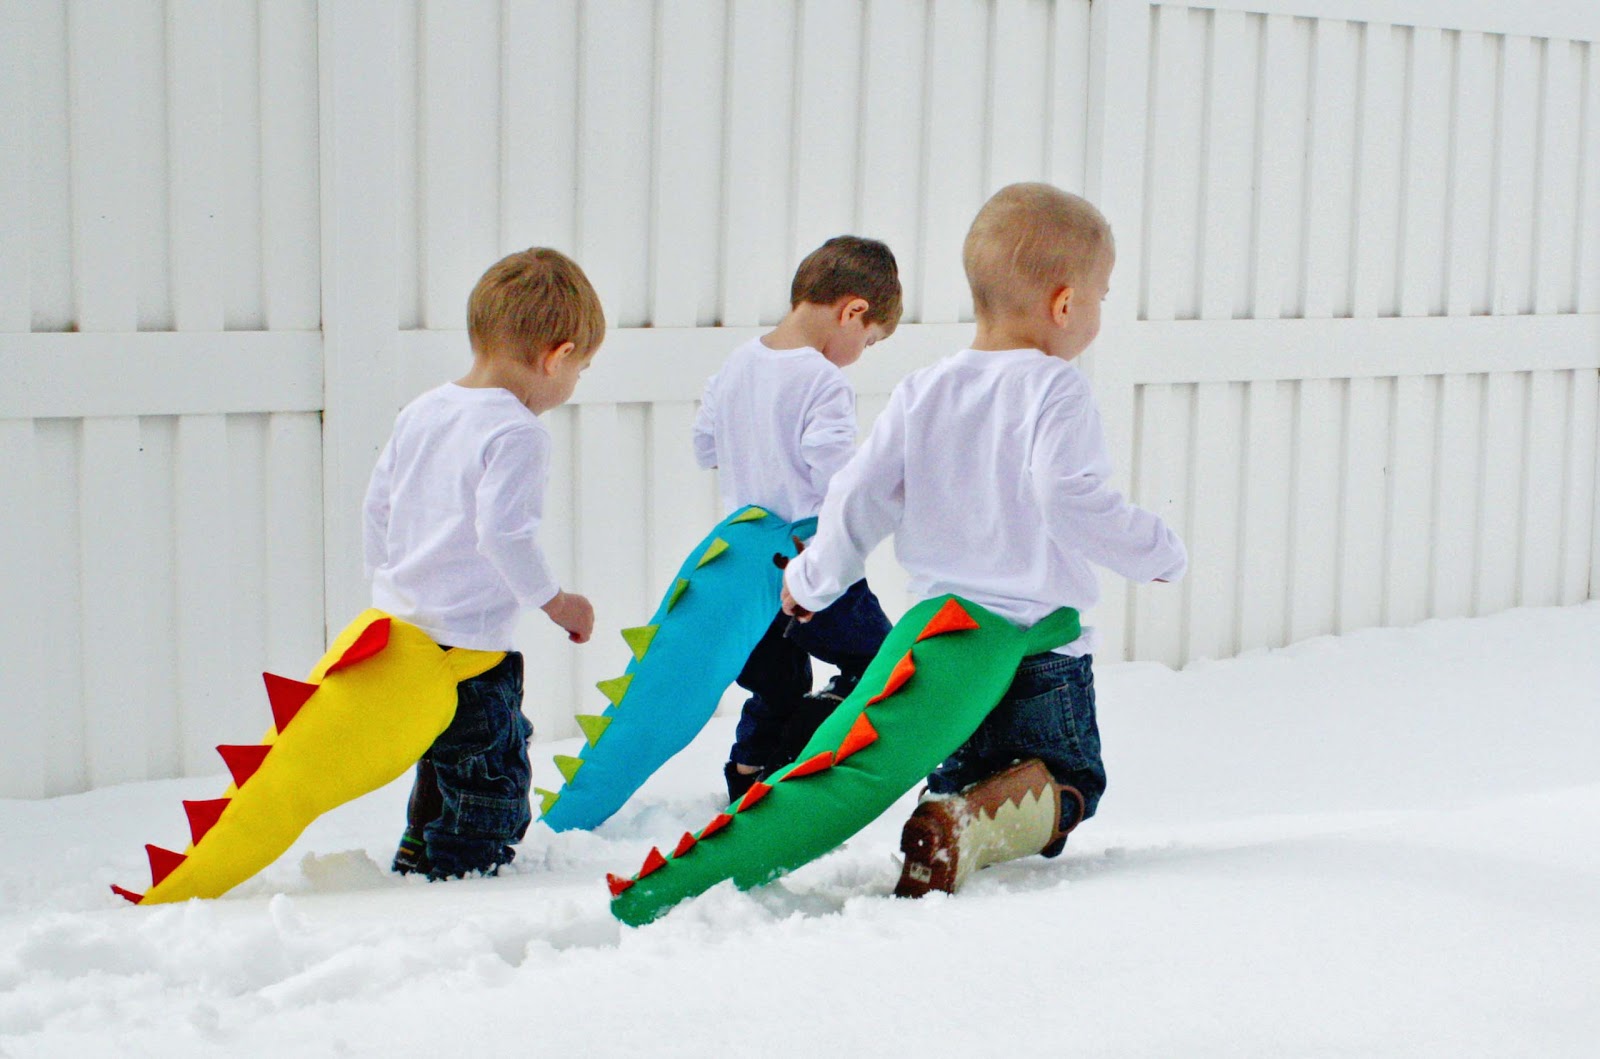
Long Life: This sewing project won’t be used once and discarded. These dino tails will be worn for years to come by little boys and little girls that visit your home. Make a whole set for their friends.
Time: Finish this dinosaur tail in under 2 hours.
Tutorial by Jessica from Running With Scissors.
**Please be respectful of her designs and only use this tutorial for personal use. Not intended for commercial sale or manufacture, even on a home based scale. Make them for yourself, to give as gifts, but not for profit.
Love making costumes? Check out 100 Halloween Costume Tutorials and Ideas
The tails have two straps that wrap around the little girl’s or little boy’s waist with velcro in front, like a belt, making it easy for them to get them on and off themselves.
Supplies
- ½ to ¾ yard main fabric– pretty much any fabric that’s not stretchy (this yellow is polyester lining)
- ¼ yard spike fabric
- 5″ velcro (hook and loop)
- Polyfill batting (small bag)
- thread
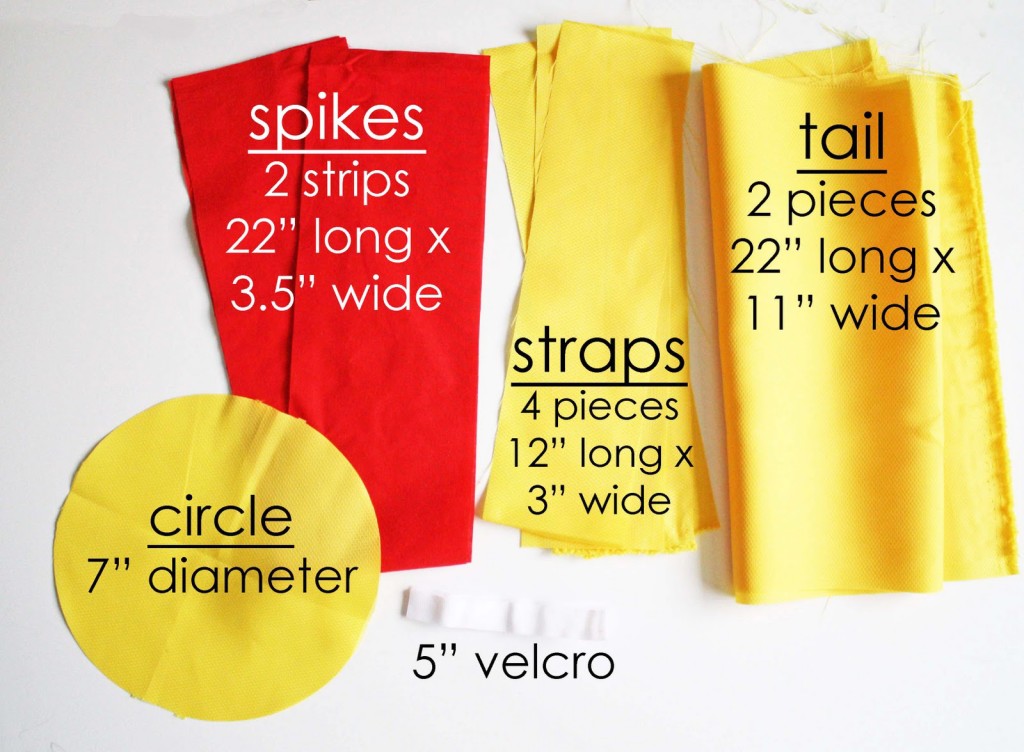
Cut List
Main Fabric:
- tail: (cut 2): 22″ x 11″
- waist straps: (cut 4): 12″ x 3″
- circle: 7″ in diameter (I cut a 7″ square, fold it in fourths, then cut the curve from fold to fold)
Contrasting Fabric
- Spikes (cut 2): 22″ x 3.5″
Looking for a full dinosaur costume? This Baby Dino Costume tutorial is adorable.
Instructions
Full step-by-step instructions and photos will help you make this easy DIY dinosaur tail (or, if you prefer, a DIY dragon tail). These tails can be finished in under 2 hours.
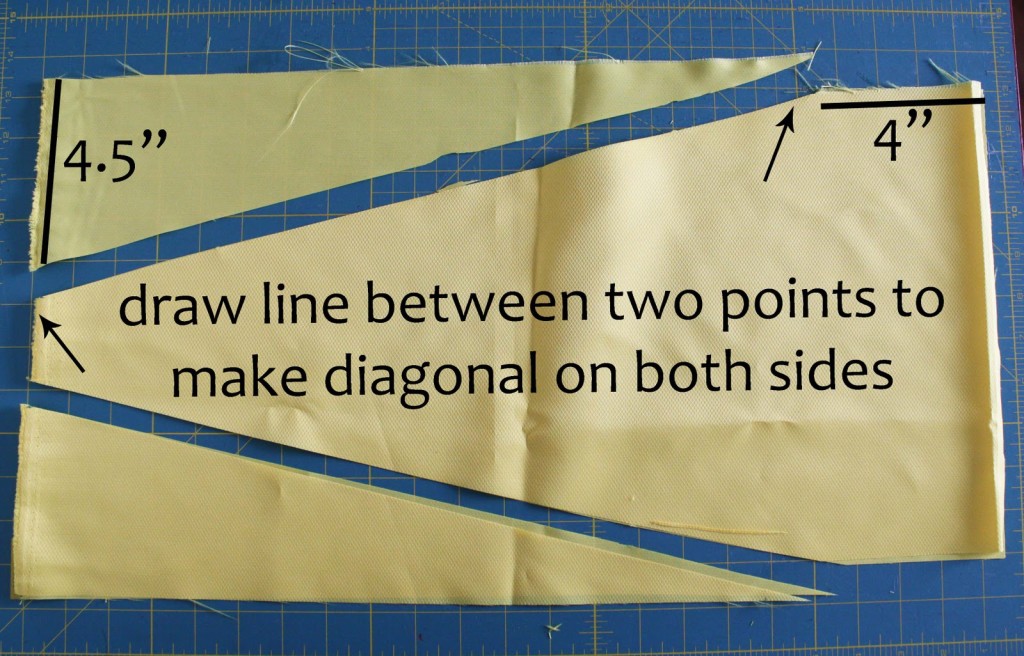
Step 1: Trim Tail Strips
1. Lay your two 22″ x 11″ tail strips face down.
2. On one end you’ll measure 4.5″ from each side. The two inches left in the middle will be the tip of the tail.
3. On the other end, you’ll measure 4″ along the sides as a marker. Connect these two markings to create a diagonal for the cone shape of the tail. Cut off the triangular sides and throw them away.
Step 2: Make Spike Strip
TIP: To make the spikes easier, you could cut just 1 strip of spikes out of fleece or felt fabric, which will not fray.
1. Take your two spike strips and lay them right sides together.
2. Draw a row of triangles along the strip for the tail spikes. Begin drawing at one end and make the spikes get gradually smaller to the other end. I left about a ½″ between spikes.
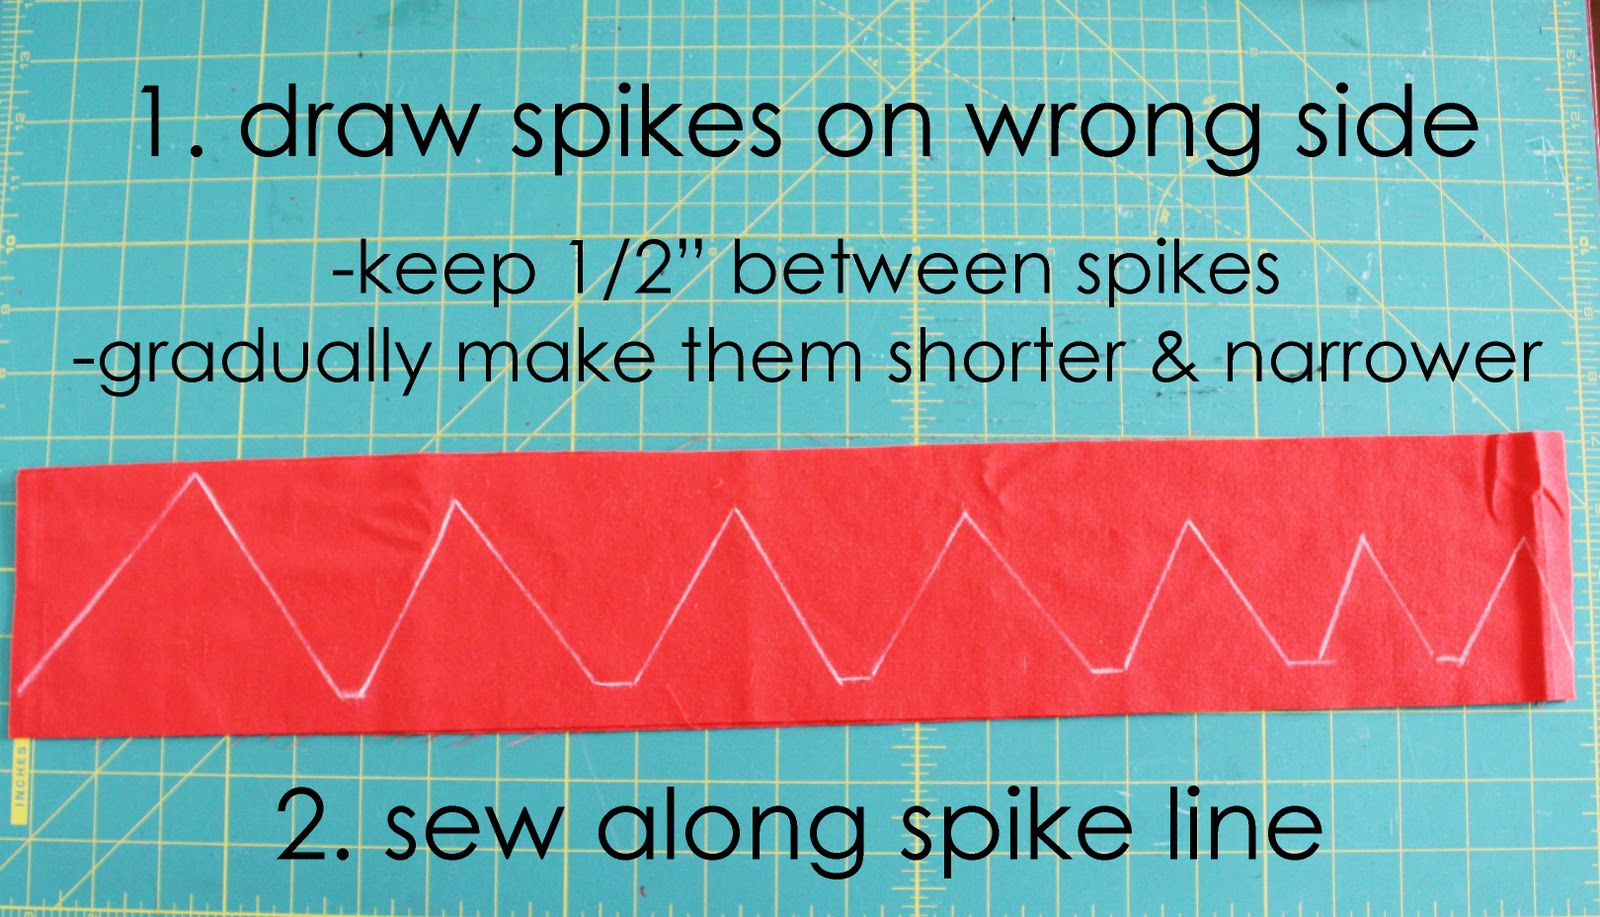
3. Sew along your spike line. When you get to the corners it helps to pivot by dropping your needle down into the fabric, lift your presser foot, move the fabric, then start sewing again until you get to the end.
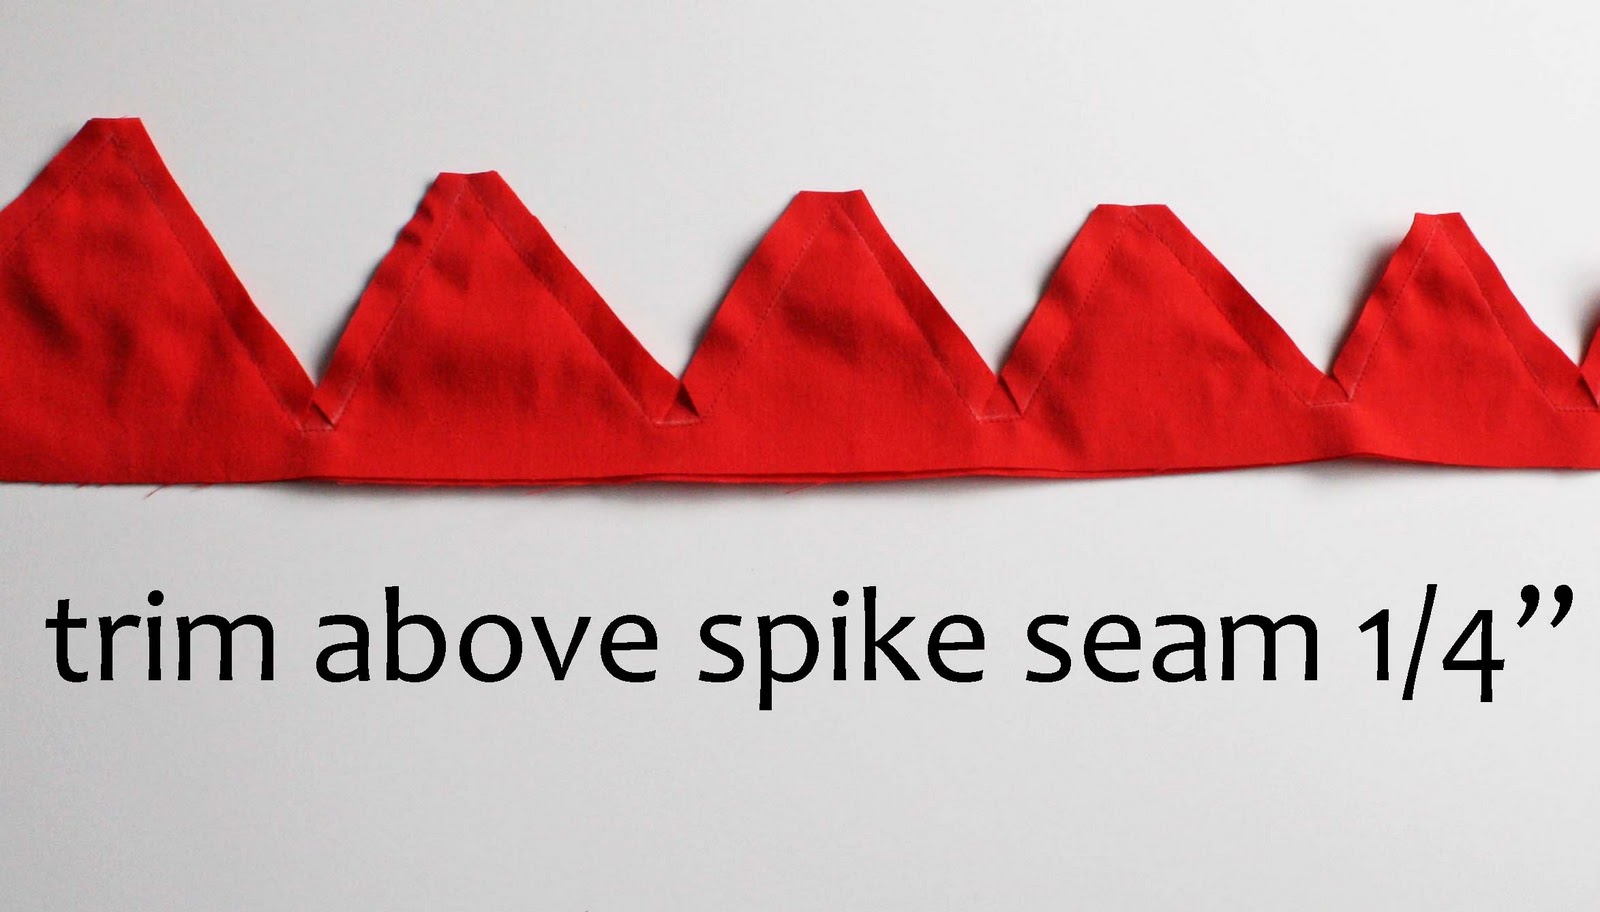
4. Trim along your sewn line leaving ¼″ seam allowance along the whole strip.
5. On the top of the spikes, you’ll trim off the point, being careful not to snip through your seam. This makes it easier to turn the spikes inside out with a crisp corner.
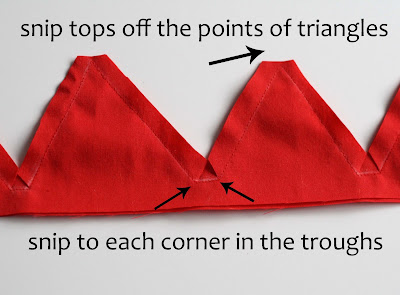
6. In between each spike, you’ll snip diagonally into each corner, once again don’t snip through your sewing.
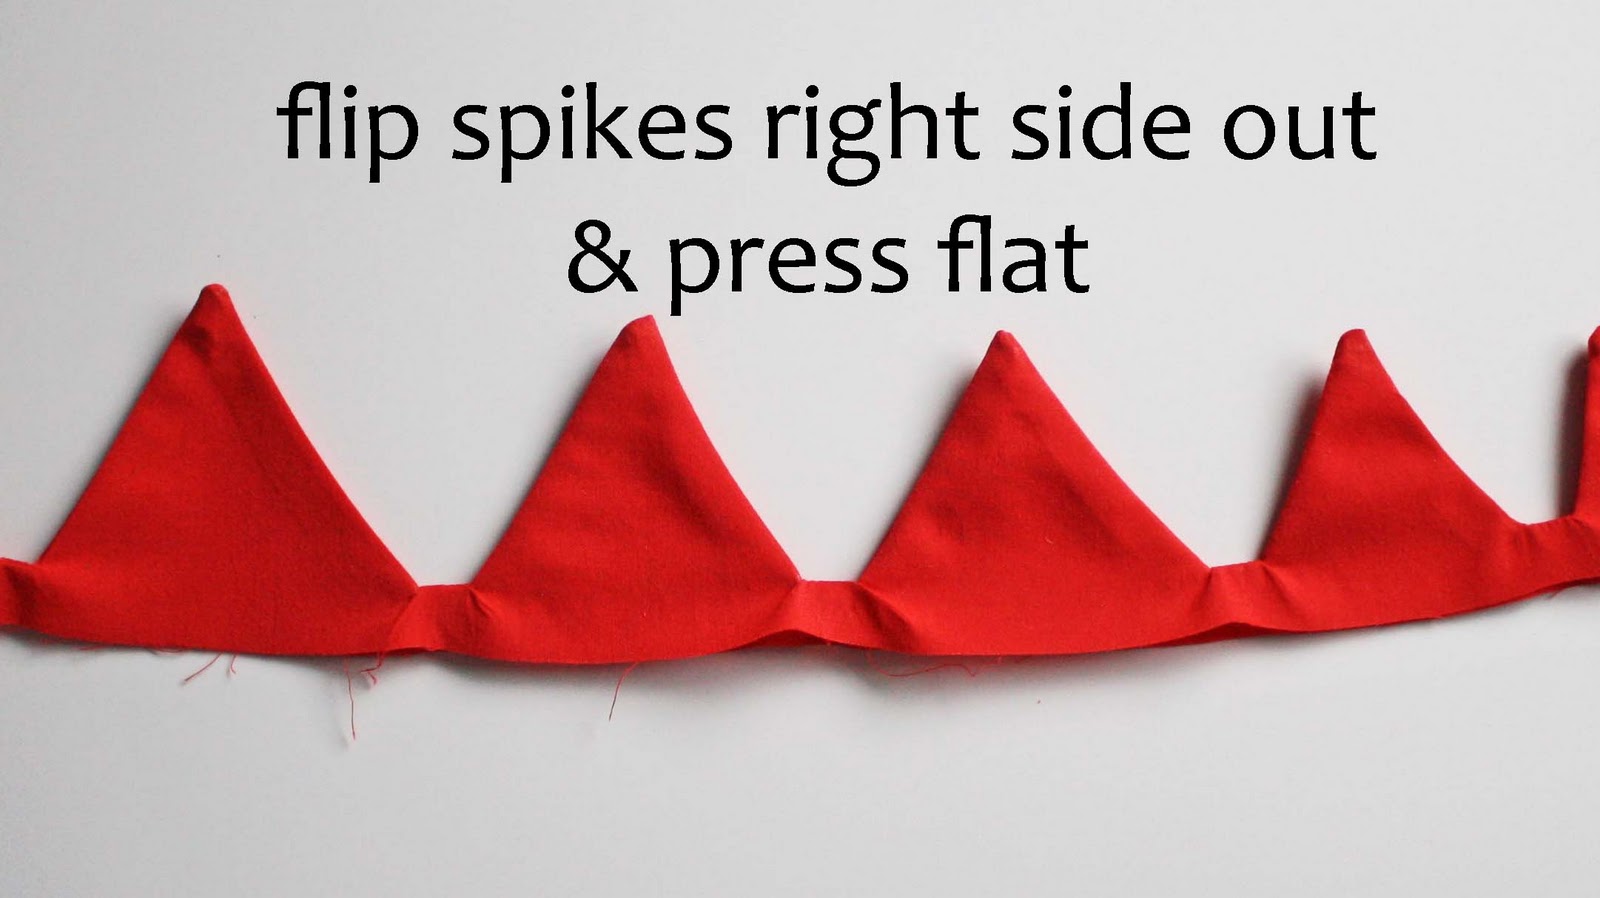
7. Then you can turn the whole strip of spikes right side out, using a pen lid, knitting needle, etc. to push the tips of the points out. Iron your spike strip nice and flat.
Step 3: Sew Tail Body
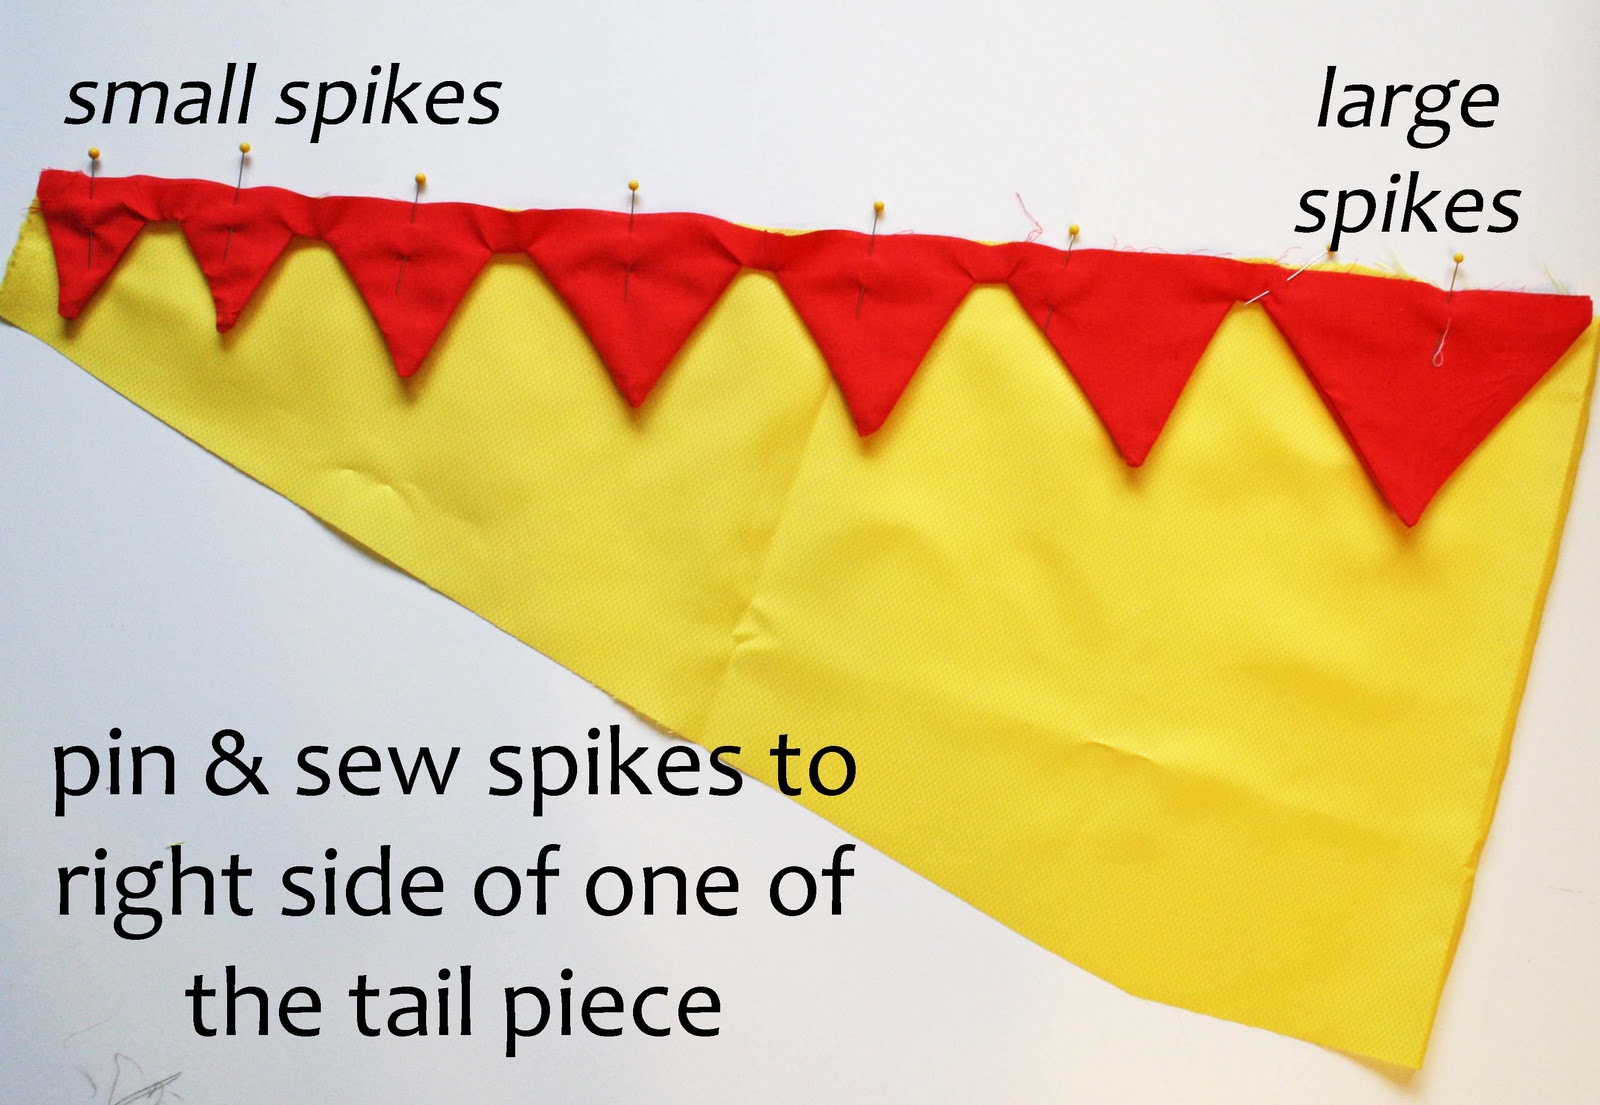
First, sew the spikes to one piece of the tail. Pin the largest spike to the tall side of your tail piece, lining up the raw edges.
2. Sew the spike strip to the tail piece with ¼″ seam allowance. This is just basting, or tacking the pieces together.
3. Next, put your second tail pieces right sides together. The spike strip is in the middle of the sandwich.
4. Sew down the spike strip again, this time with ½″ seam allowance, making sure you sew past the troughs so there is a space between each spike when you turn it right side out.
5. Sew a slight curve as you go around the tip of the tail.
6. Sew around the end of the tail and along the bottom side. Leave a 4-5″ hole in the middle of the tail for turning the tail right side out later.

Step 4: Sew Waist Straps
1. Lay 2 waist straps right sides together. Repeat with other 2 waist straps.
2. Sew along side, across the short end, and along the other side on each set. Use a ½″ seam allowance.
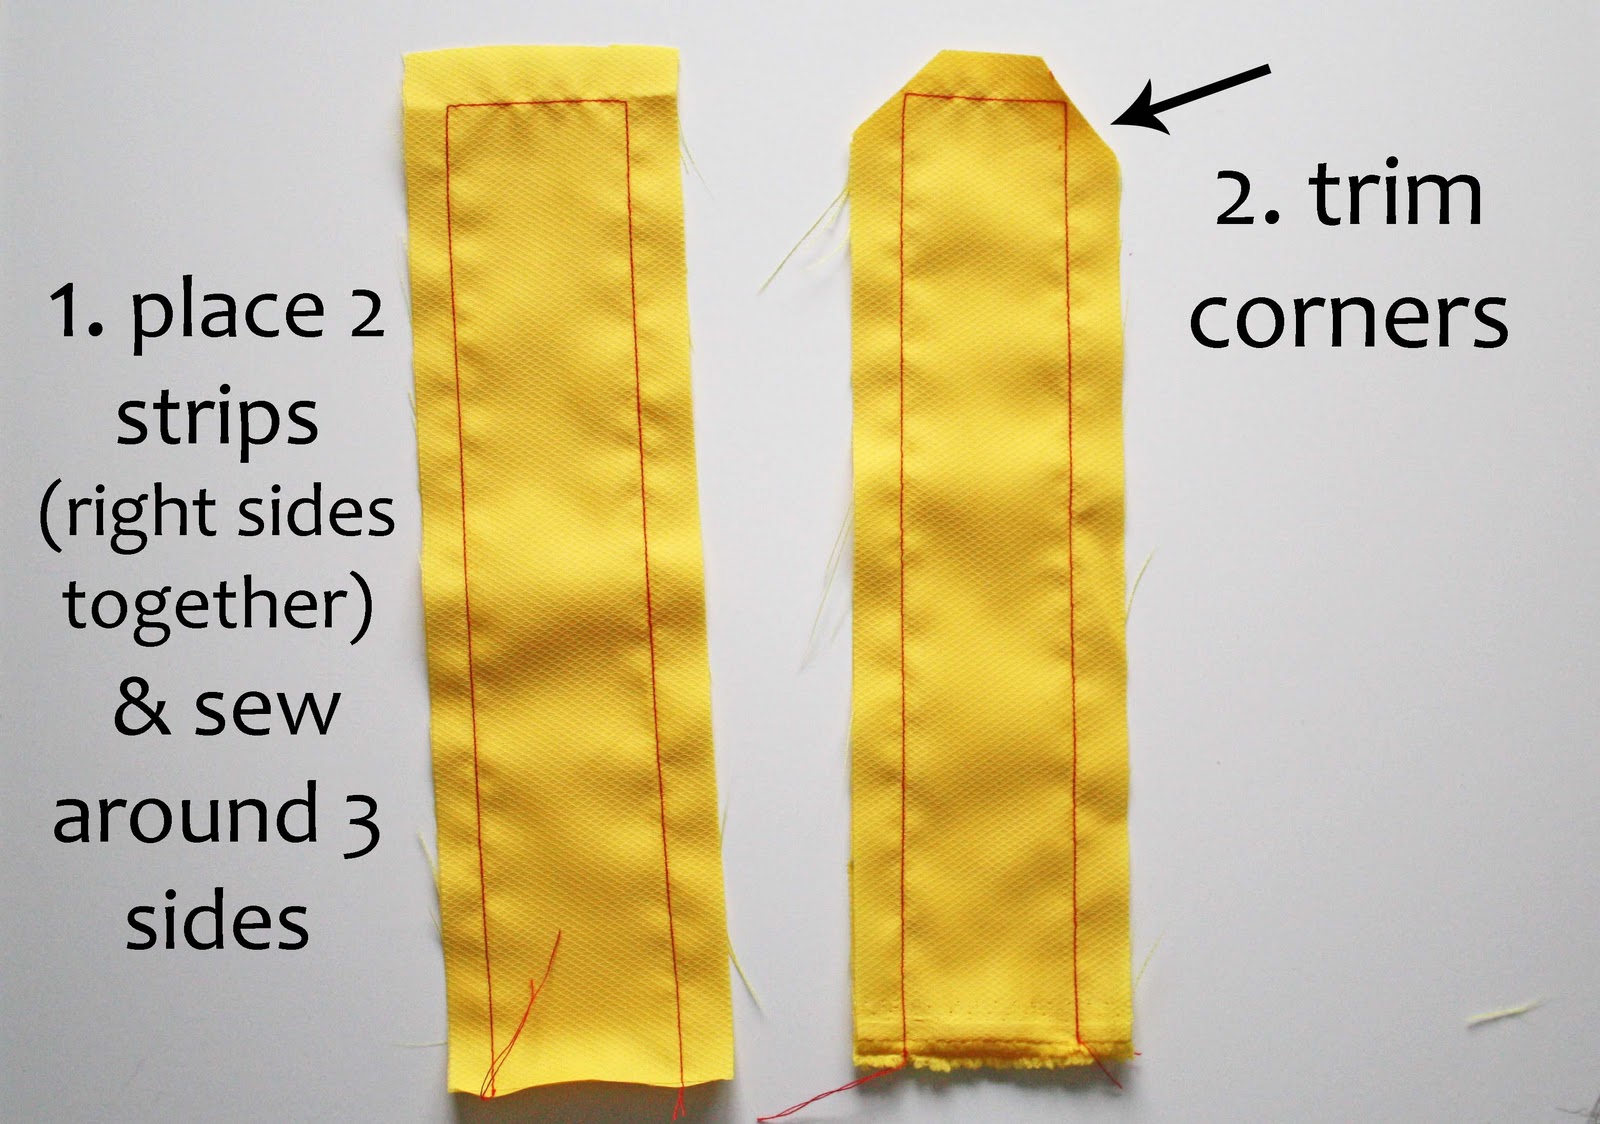
3. Snip off the corners, being careful not to cut through your seam.
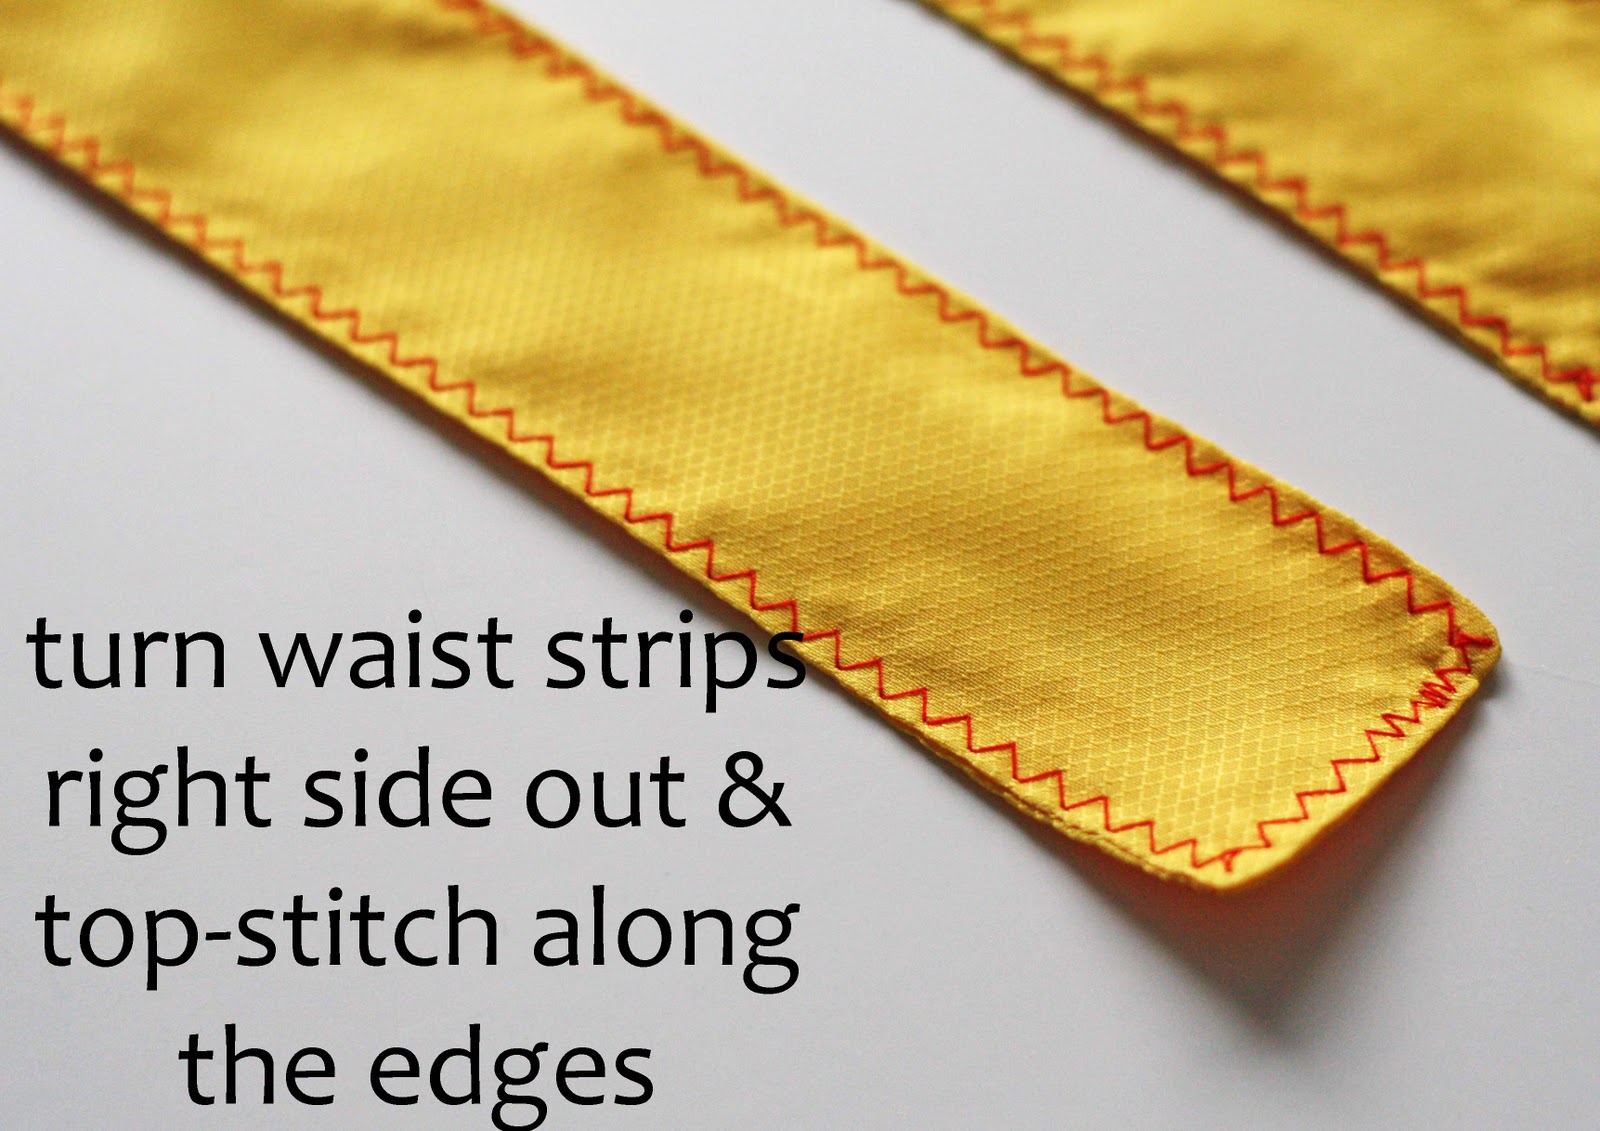
4. Turn each strap right side out, pushing out the corners with a pen lid or knitting needle so they’re crisp and pointy.
5. (optional) Top-stitch the edges to make the straps lay flat. Use a zigzag or straight stitch.
6. Sew your velcro pieces to each end. Center the velcro in the center of your strap. The velcro should be ½″ from the very end.

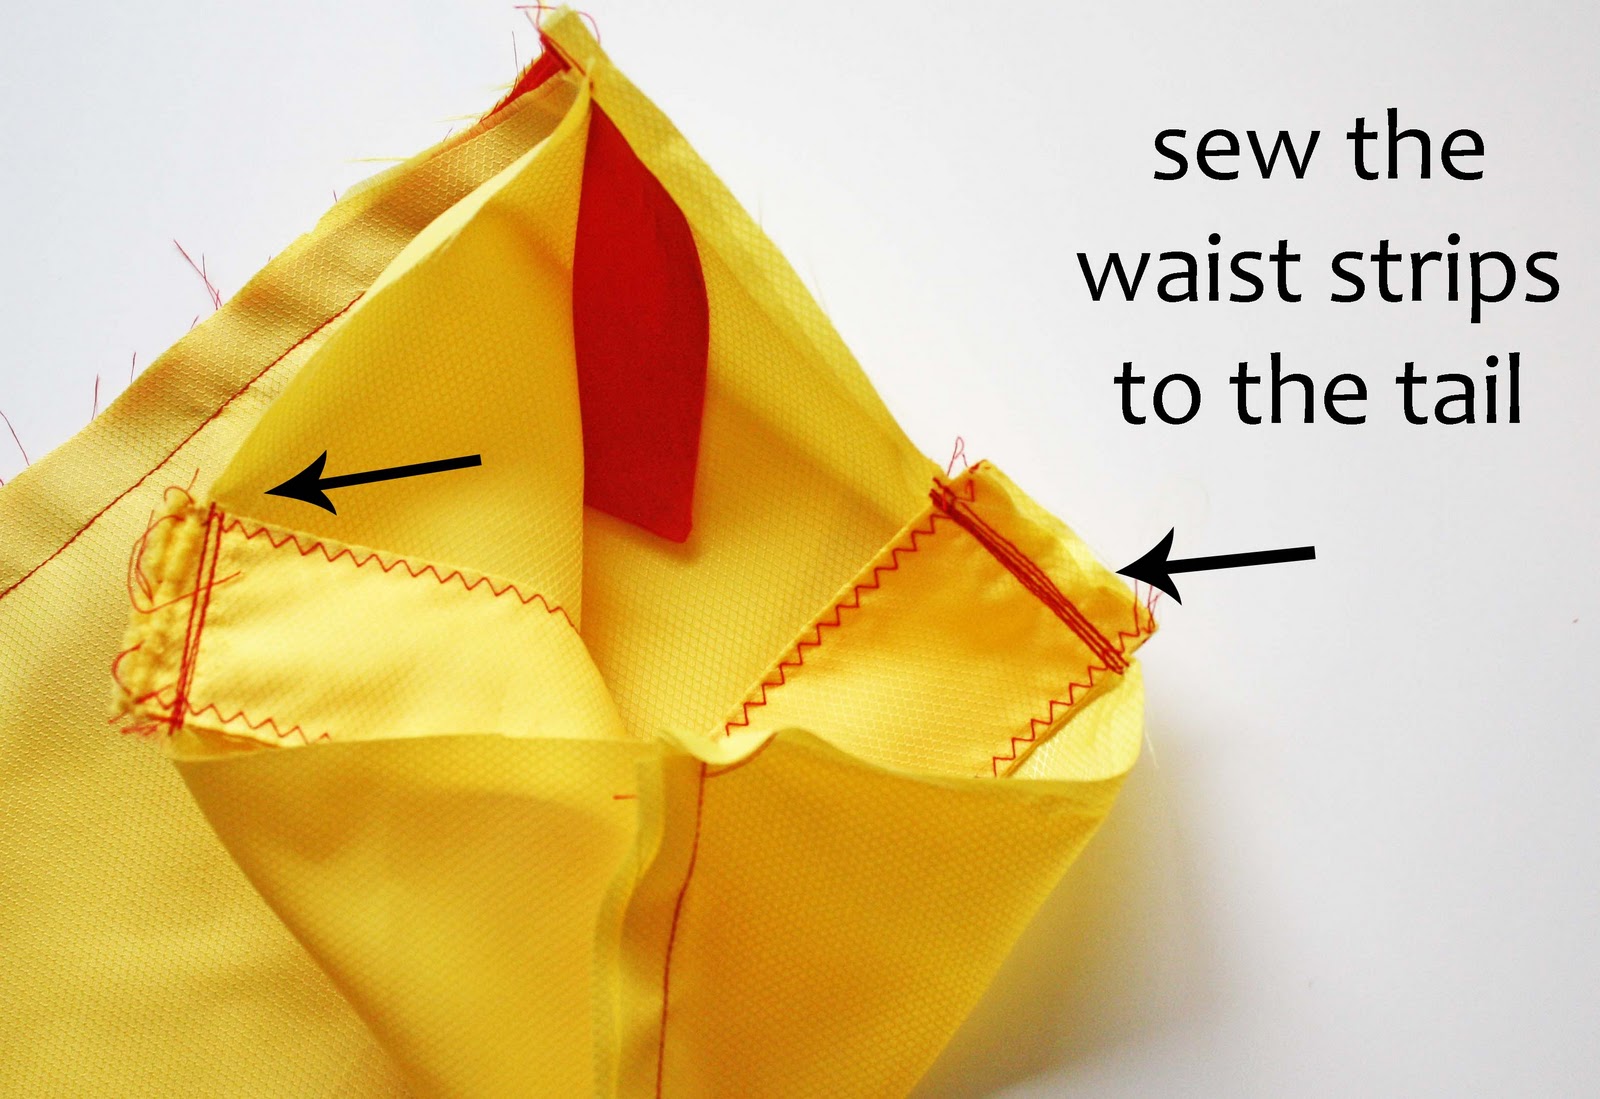
Step 5: Sew Tail To Straps
1. Mark the quarters by lining up the top (spike) seam with the bottom seam and pinning the folds on the sides.

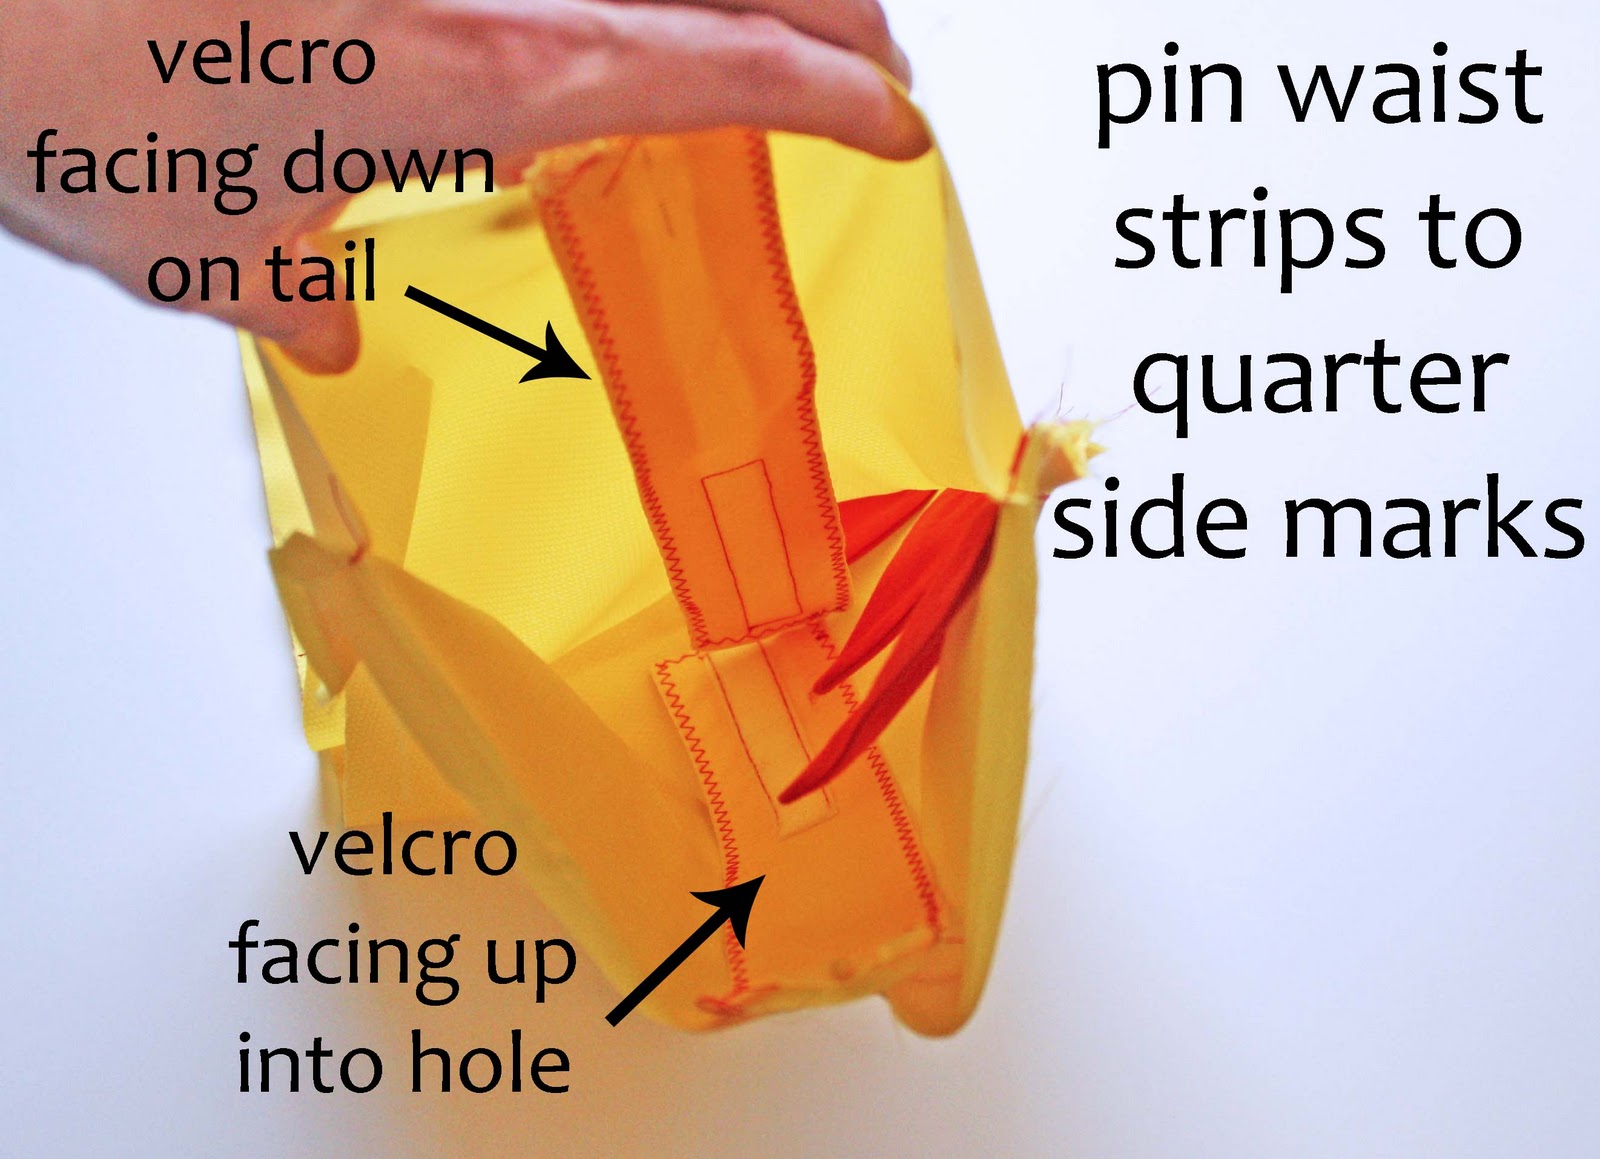
2. Pin the waist straps inside the tail. Pin the straps to the quarter side marks.
3. IMPORTANT: Velcro has to be pinned opposite so the straps will match up around the waist. Put one waist strap with velcro down on the right side of the tail, then pin the other waist strap with the veclro facing up into the cavity of the tail.
4. Sew the straps to the sides of the tail ¼″ from edge.
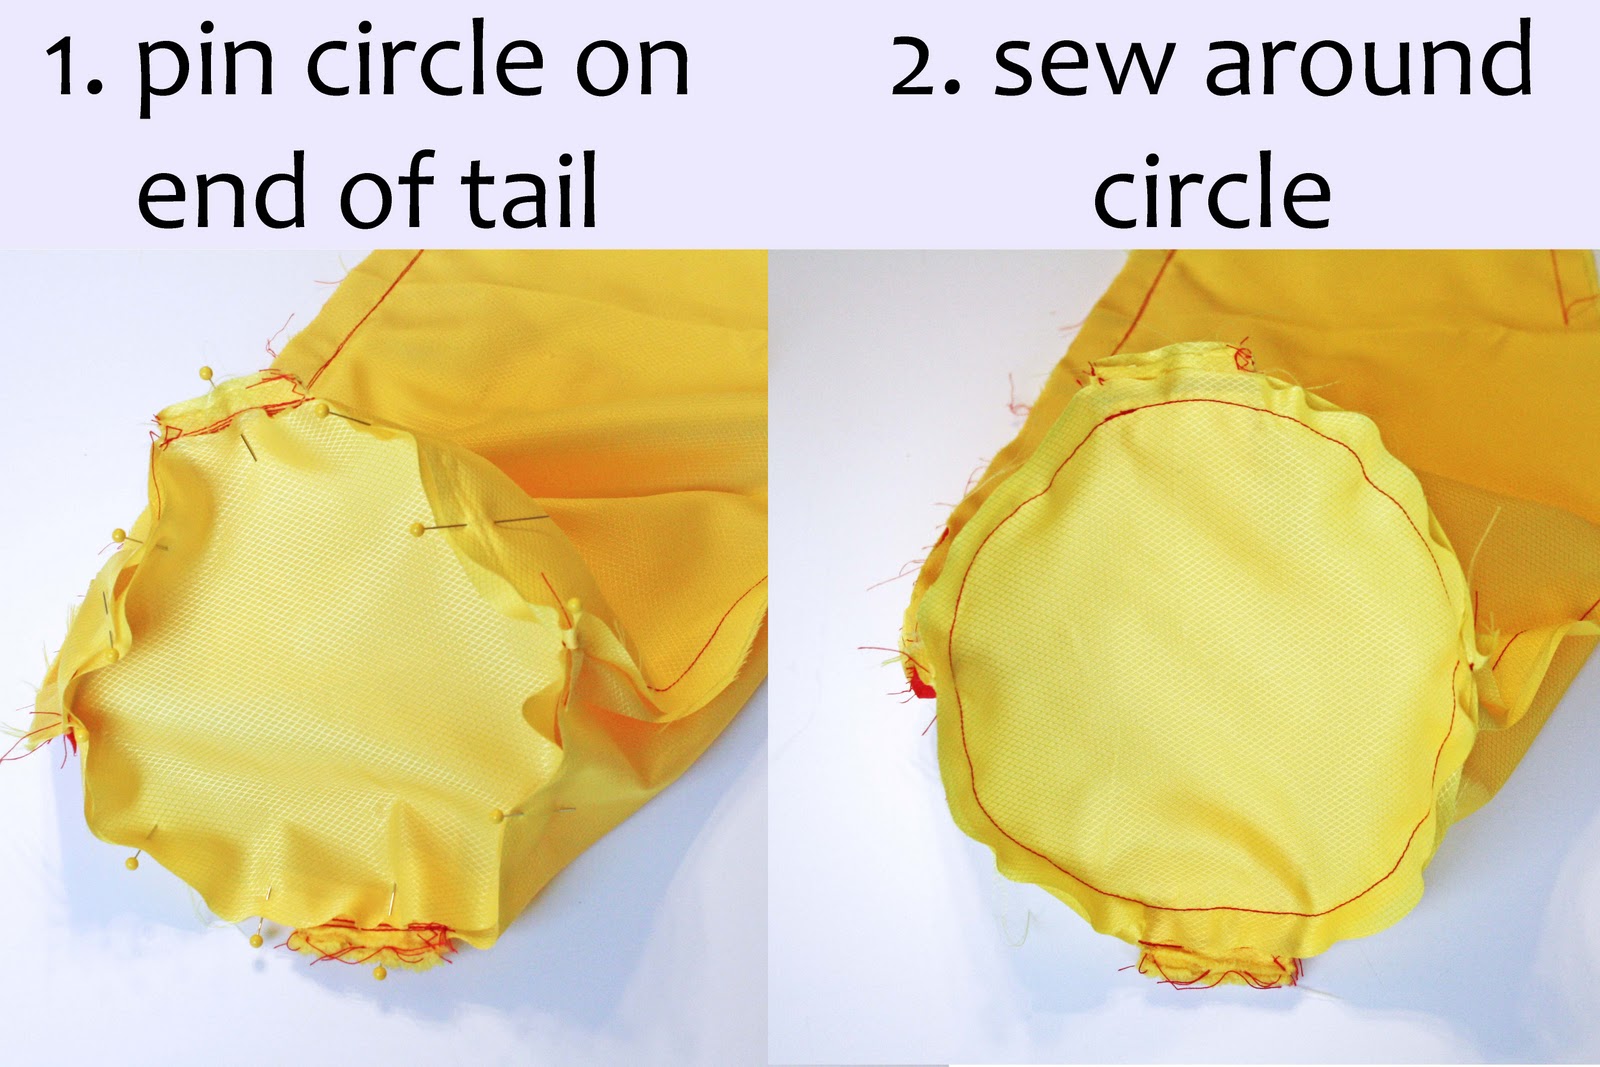
5. To finish off the tail, you’ll pin your circle fabric (with the right side facing into the tail) around the large tail opening. I fold my circle in quarters so I have a crease vertically and across to use as a guide to pin to the two seams (top and bottom) then line up with the waist straps on the sides.
6. Next you sew around your circle with ½″ seam allowance.
Step 6: Stuff Tail And Finish
At this point your dino tail is sewn and you can turn it right side out through the hole you left on the bottom seam. Your velcro waist straps should be oriented to match and stick together, and your spikes should stand up out of the top seam.
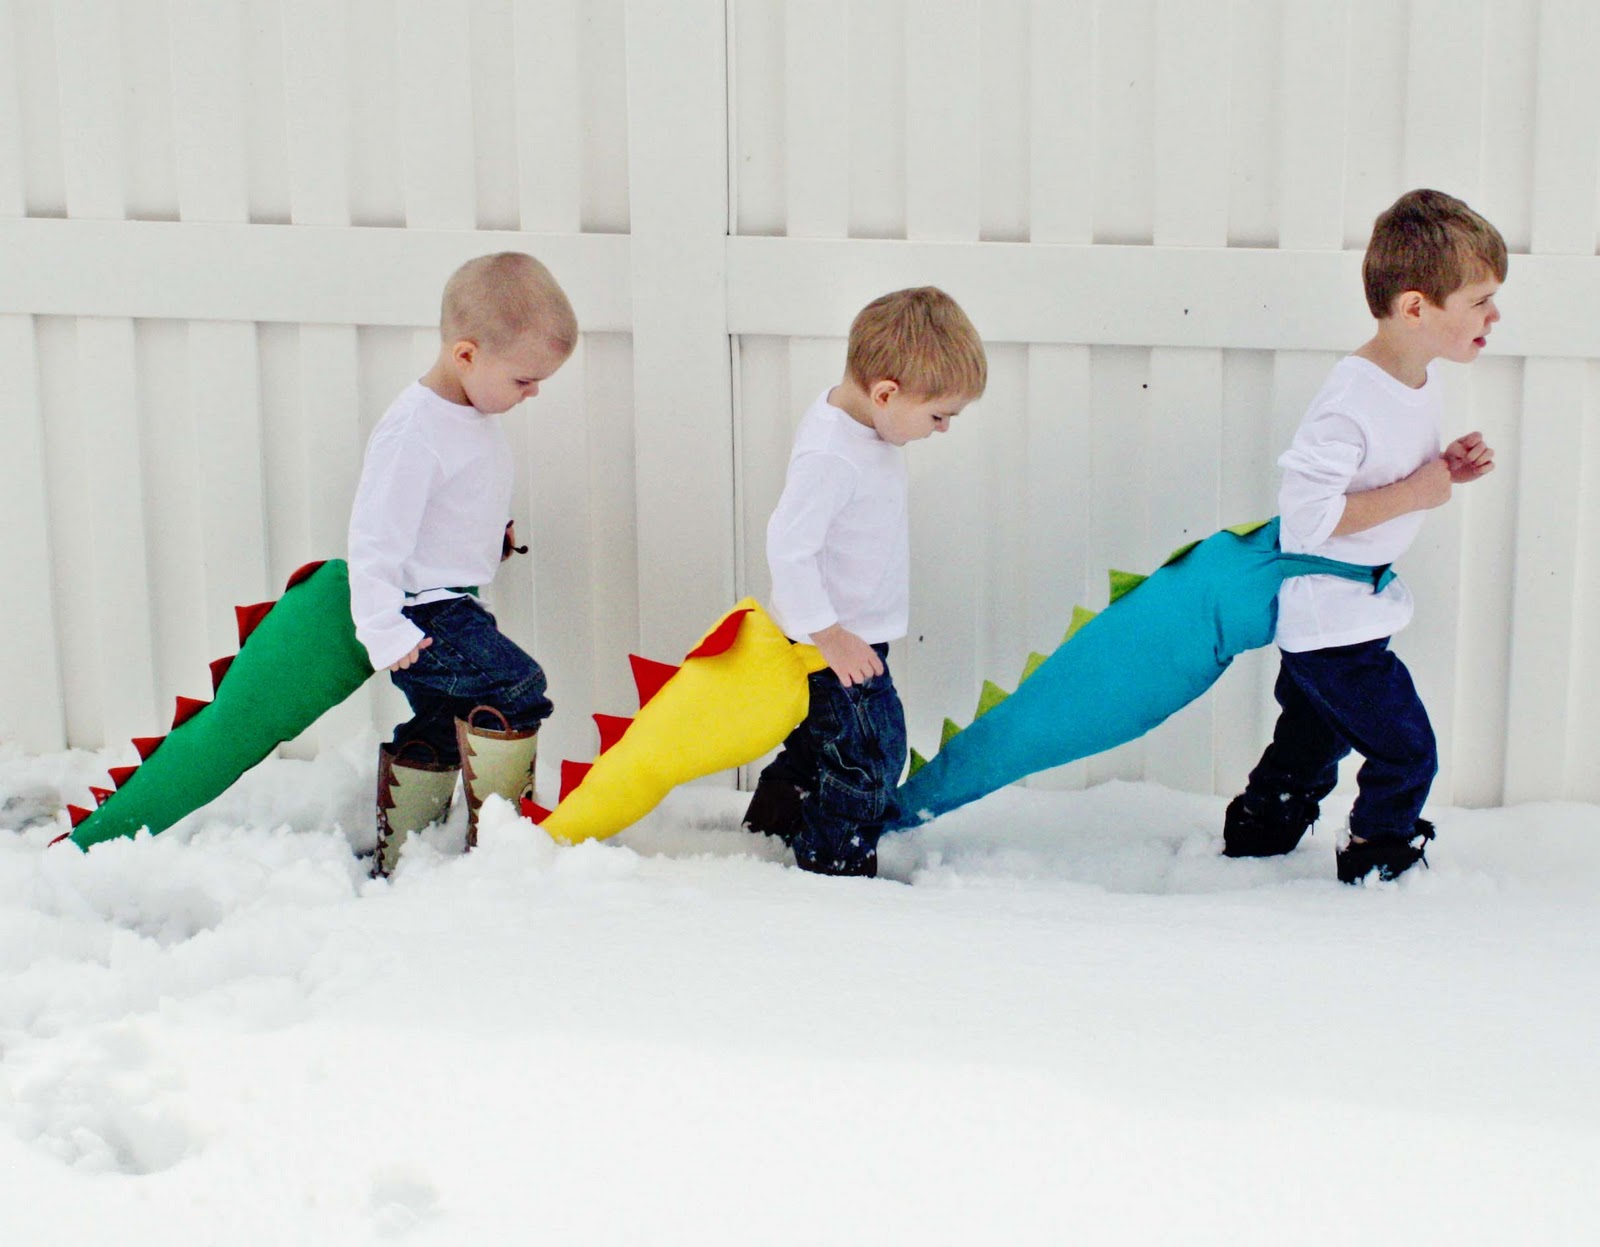
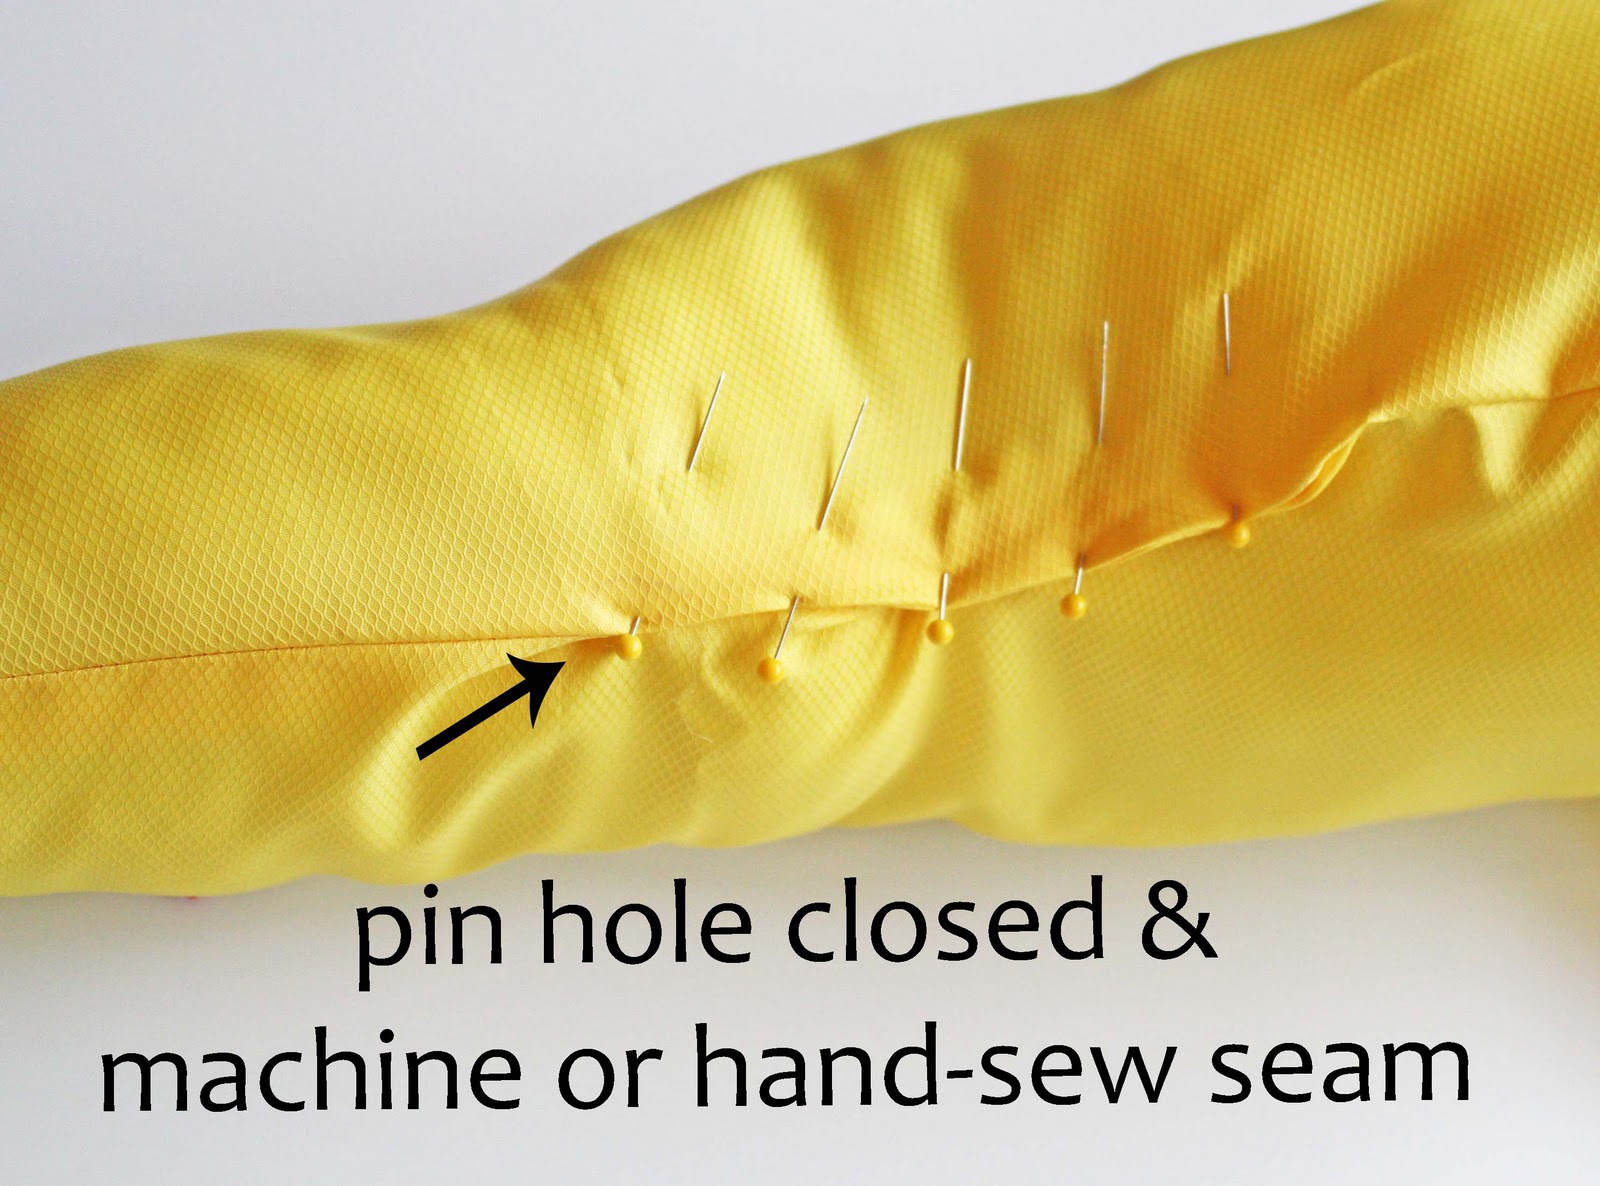
1. Stuff your tail with Poly-fil batting. The density of your stuffing inside of the tail does determine how the tail will look. I stuffed this yellow tail tighter than the blue or green tails, and I noticed it stood almost straight out from the boy’s back, where leaving the stuffing a little looser makes a more droopy tail. Stuff however you prefer.
2. Pin the hole closed underneath. I chose to just machine sew the seam shut, but it would probably look best to hand-sew the seam closed to allow it to lay flat.
Variations
Length: it’s easy to make the tail longer or shorter by cutting the tail and spike pieces longer than 22″. Make sure you cut them all the same length.
Felt or Fleece Spikes: as mentioned earlier in tutorial, you could make the tail even easier by cutting felt or fleece spikes with one layer rather than sewing/ turning 2 pieces of fabric
Scalloped Spikes: Make your spikes with scallops and rounded rather than pointed.
Printed Fabrics: I stuck with bright solids, but textured or printed fabrics would look awesome too. Use different colors for fun.
If you are interested in more of Jess’s Halloween ideas, here are a few:
Comments & Reviews
Stephanie E. says
So cute and definitely going in the dress up box.Thanks!
Maryanne says
Thank you for this great tutorial. I made one for my son to wear to his cousin’s dinosaur birthday party. He is only 18 months. He caused lots of laughter when we would say “Where is your tail, Will?” and he would turn round and round in cicles trying to catch a glimpse of it! It is a favourite dress up now.
Andrea @ The Train To Crazy says
So fun!!
Mandy says
Wow. That was a great tutorial. I did it, and I am a beginner. Thanks so much!
Jessica says
Can I hire you to make these for my kids party? I’m totally serious BTW.
Barbara says
WOnderful! Thank you! My granddaughters want a mermaid tail, which I have yet to make) and I had nothing for the boys! Now I do! Thank you!
Andrea says
Love this! Headed to Hobby Lobby this weekend! Thanks for sloving my Halloween costume problem!
Sarah says
I have to tell you , I was sitting on Pintrest when my 26 mo old little girl, who frequently announces that “She just needs to be a stegosaurus” saw this and immediately demanded that I go find my “snowing machine” to make her a blue tail….thank you for making her day!! (And mine!)
Cindy says
What a great Idea. Thank you so much for sharing. I have made 3 so far, the kids love them.
Fanny says
These are incredibly cute! I’m in the process if making 20 to use as favors for my daughter’s dinosaur birthday party 🙂 I’m making 10 as is and 10 with just four spikes at the end (stegosaurus). Thank you thank you for posting this tutorial 🙂
Andrea @ The Train To Crazy says
Wow!!! Fun party!!
[email protected] says
What length would you recommend for a three year old and about and 8mo old. I’m making them for gifts for my nephews and I don’t want to mess up the sizing. Thanks!
Nancy says
Would you be willing to make me one? I suck at that type of thing but my grandson would love it.
Sandra says
What a fantastic idea. I would have loved to do this for my son when he was that age. He’s now 38 but loved to pretend he was a dinosaur at age 3, using a housecoat belt tucked into his underwear to be a tail. You are very creative and I will try this for my grandson who just turned three yesterday.
alica says
This also works very well as a mermaid tail with out the spikes…a great win for the aspiring Ariel in my house! Thanks
Jess says
I made one of these out of Costume suede cloth with a crocodile foil pattern and bright orange duck cloth. It was perfect for my four-year-old nephew this Christmas (And his six-year-old brother, and their four-year-old cousins… this was definitely the most fought-over Christmas present this year).
It also made a stinkin-cute wizard hat for my four-year-old niece.
Yogi says
This was a clear, well written tutorial. I made one and it’s the cutest thing ever. Thank you!
Jen says
Thanks for the tutorial. I just whipped one up as a last minute birthday present. I used one of my husband’s old button down shirts (striped fabric so it’s a multicolor ringed tail!) and used the button placket for the belt part. It worked out great!
Ericka says
Thank you for the awesome tutorial! I just finished my first one and it came out amazing! My 4-year-old daughter about lost her mind when told her I’d make her one for her birthday!
Vivien says
Thanks for a great tutorial! I’ve just made one for my daughter and she loves it. Everything was so well explained that it was pretty easy.
Allison says
I just wanted to drop in and say thank you so much for posting this pattern and instructions for the dinosaur tail. I just finished a purple one with pink spikes for my daughter and I’m starting my sons tomorrow. They absolutely love them and can’t wait for my to finish the rest of their dinosaur Halloween costume
Kelly says
Brilliant tutorial! Have made my son a fab crocodile tail that he loves!! Thanks!
ellen says
Hi Thanks for a great tutorial – I am making 3 for my grandkids – I did add iron on interface to the spike material to make them stand up nice and straight. They came out very cute!!! Adding those foam dino feet and gloves with foam claws attached and a foam mask made from some printable masks. They will love these costumes for Christmas!
Anneris E Kondratas says
Thank you very much!! This is an amazing tutorial, I can’t wait to get started. I need to make one oversize for my husband. ? Thank you again for such a cool idea.