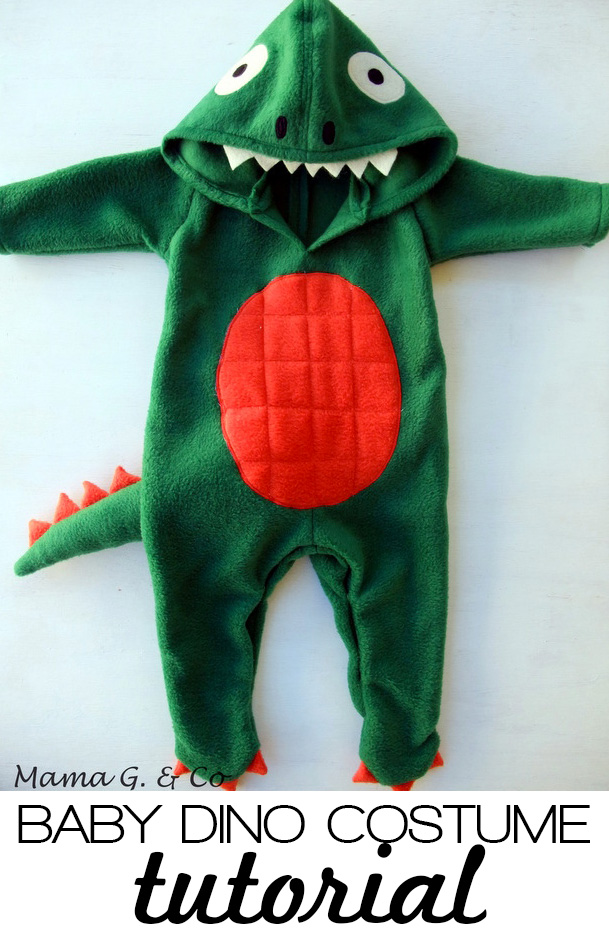
Amazing, adorable, baby dinosaur costume tutorial from Mama G. & Co. Gwen is here today to show us ho to make a dino costume! I love this tutorial. Adorable and simple yet looks so much better than store bought! Thanks for the tutorial Gwen!
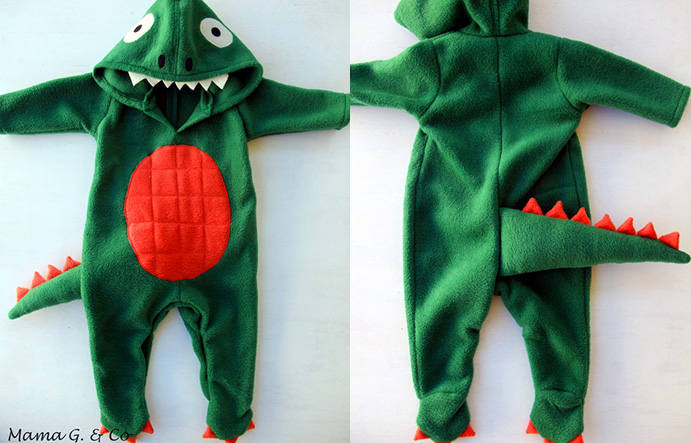
To make the dinosaur costume, I used a romper pattern that I had, then modified it to fit my requirements. The modifications include adding a seam allowance to sew the front part shut whilst allowing room to fit the head through the neck hole. Any romper pattern you have on hand would do the job; the one I used is Bettsy Kingston’s Jack and Jill Romper.
OK, so let’s get started. All seams are ⅜”/1cm
What you’ll need:
- Pattern pieces for the tummy, tail and hood (click on each name for the link; make sure that all options like ‘auto-rotate and center’ and ‘page scaling’ are NOT selected)
- 1 yard/metre green fleece fabric
- ¼ yard orange fleece fabric
- Matching thread
- Ballpoint or stretch needle
- A few scraps of felt for the eyes, nostrils and teeth
- A small amount of Heat ‘n Bond (or other double-sided fabric adhesive)
- A small amount of fusible fleece
- snap buttons
Draw out your pattern pieces. On the front piece, lower the neckline by 1”/2.5cm. Make a mark 2.5”/6cm (3”/7.5cm for size 12 months) down from the centre top. This will mark the end of the placket and the stitching start point.
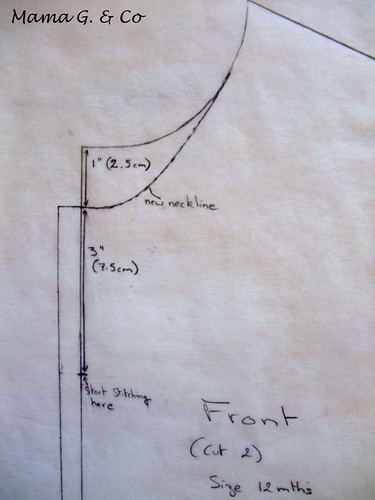
Still working of the front pattern piece, add a ⅜”/1cm seam allowance all the way down the centre part and along the inseam, stopping 1¼”/3cm above the start of the foot. Do the same on the back piece, for the inseam ONLY (do not add seam allowance above the inseam, as this will be sewn as per normal). Stop 1¼”/3cm above the foot, as you did for the front piece.
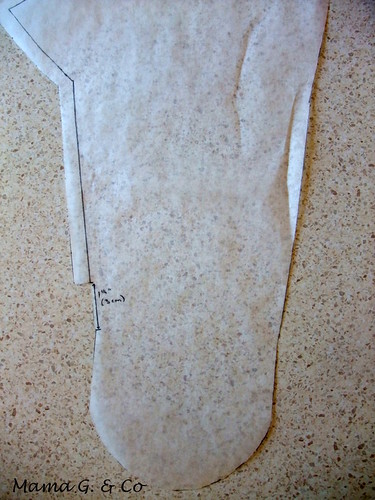
Now you’ve got all your pattern pieces modified and ready to go, cut the front, back, feet, sleeves, hood and tail from the green fleece and the tummy piece from the orange fleece and the fusible fleece.
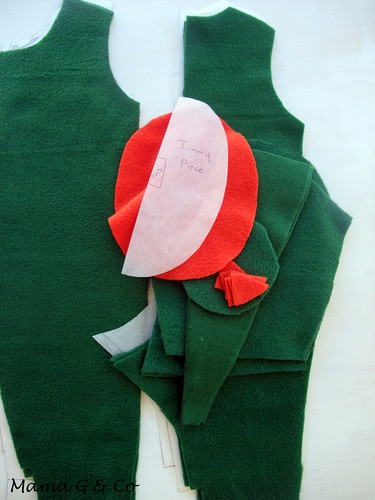
Let’s start with the tummy piece. Iron the fleece on the back of it, and then draw vertical and horizontal lines with a fabric marker in a wide grid pattern. Using orange matching thread, stitch along those lines.
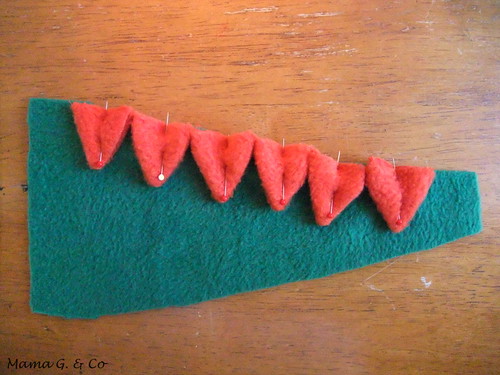
Cut 6 small triangles out of the orange fleece. Place them RST along the top of one of the tail pieces, raw edge to raw edge and baste together. Place the two tail pieces RST, keeping the spikes tucked in between and stitch along the top, short side and bottom, leaving the other side open. Clip the corners and turn right side out. Stuff lightly with toy filling. Pin to the right side of one of the back pieces, raw edge to raw edge and baste in place.
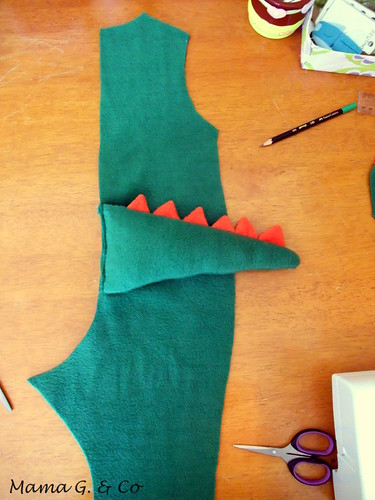
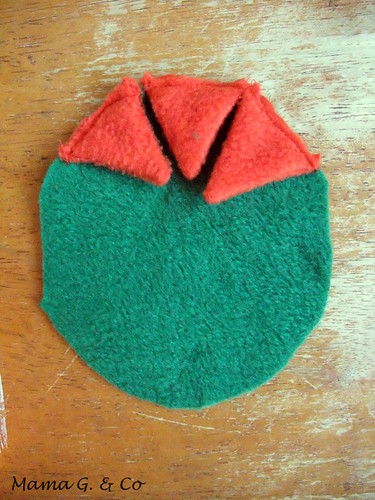
Cut another 6, slightly bigger, triangles out of the orange fleece and place 3 on each foot and baste in place as you did for the tail.
Now for the hood/head of the dinosaur. Switch to green thread in your machine, place both hood pieces RST (right sides together) and stitch along the curved side (back of the hood) only. Press the seam allowance open and topstitch ⅛”/0.3cm on each side. Press the front of the hood down ⅜”/1cm to the wrong side and topstitch.
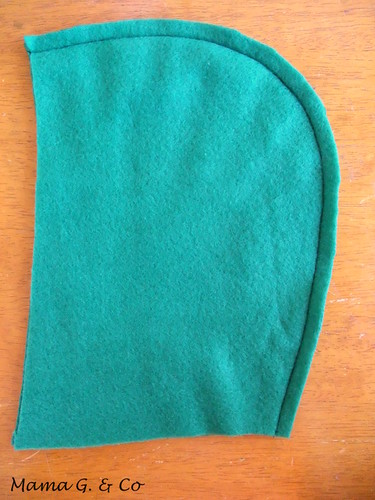 Sew back of the hood
Take your felt pieces and apply some Heat n’ Bond to the wrong side. Cut out the shapes for the eyes and nostrils then iron them on each side of the head. Stitch in place using a tight zigzag stitch. Cut the teeth out of white felt, pin it to the front of the hood and stitch in place.
Sew the front pieces together, starting at the end of the placket (the mark you made when drawing your pattern). Press the seam open. Apply some Heat n’ Bond on the back of the tummy piece then iron to the front piece. Stitch in place with a tight zigzag stitch all around the edges.
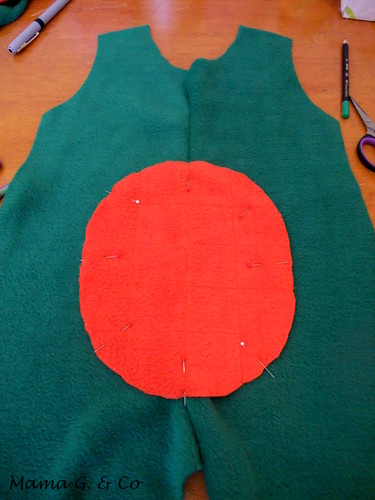
Sew the romper together as per the pattern instructions. If you wish, reinforce the inseam’s seam allowance with a strip of lightweight interfacing, then fold down ⅜”/1cm towards the wrong side and topstitch. Add the snap buttons. Do the same for the placket at the top front. Add a snap button if desired.
Pin the hood all around the neckline, RST and raw edge to raw edge and sew. Press the seam allowance open, topstitch if desired.
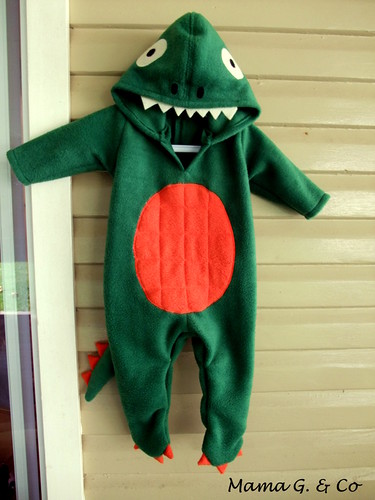
And you’re done. Put on your baby and admire the cuteness, hehe. You could also change the colours of the fleece and a few details to make other animals: bunny, lion, etc…
Comments & Reviews
Rebecca Watkins says
I am sending this quick message to let you know that we have featured this post
in our latest article:10 Inspirational DIY Halloween Costumes for Kids at: http://naturalmothersnetwork.com/natural-parenting/diy-halloween-costumes/
If you like the post and think your readership would too, then it would be wonderful if you were to share the post with your Facebook , Twitter and Google + followers. I am asking all the bloggers included, to share it with their social networks, so that everyone can benefit. Thanks for a fantastic tutorial and we hope you get even more visitors to your blog:-)
Rebecca @ Natural Mothers Network.com
Izy Jude says
Hi – it seems the links to the pattern pieces don’t work any more. Do you still have them? Desperate to make this! Thanks.