 One of the best gifts you can give to a soon-to-be mother is a soft, adorable, minky baby blanket! New moms want to make sure they have everything ready to go for their baby. The perfect baby blanket provides comfort, warmth, safety and lots of cuddles.
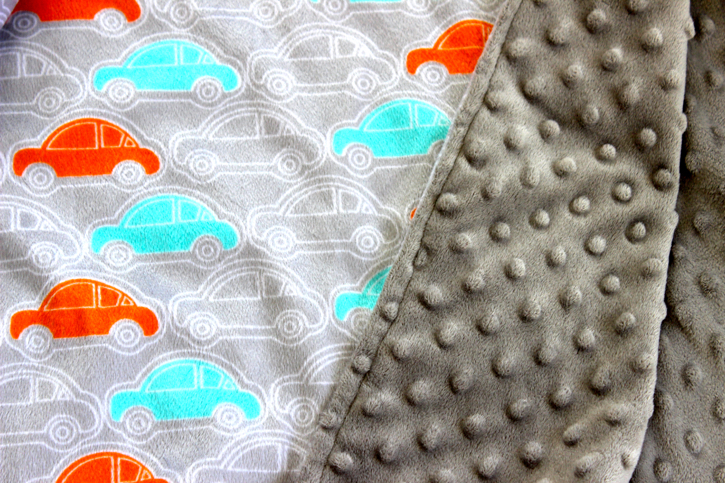
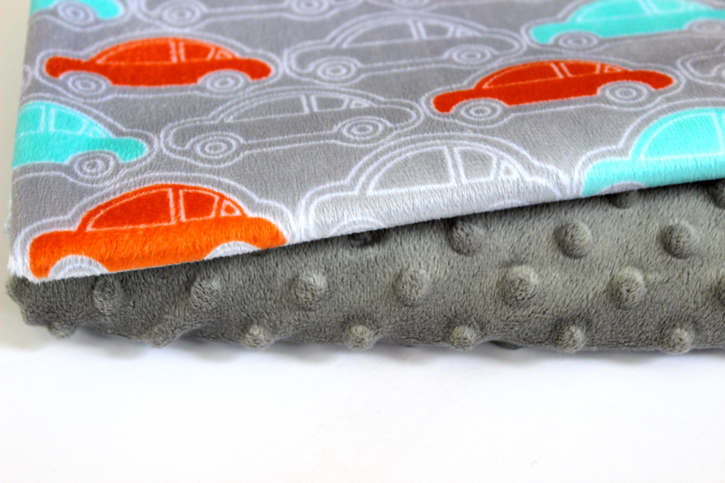
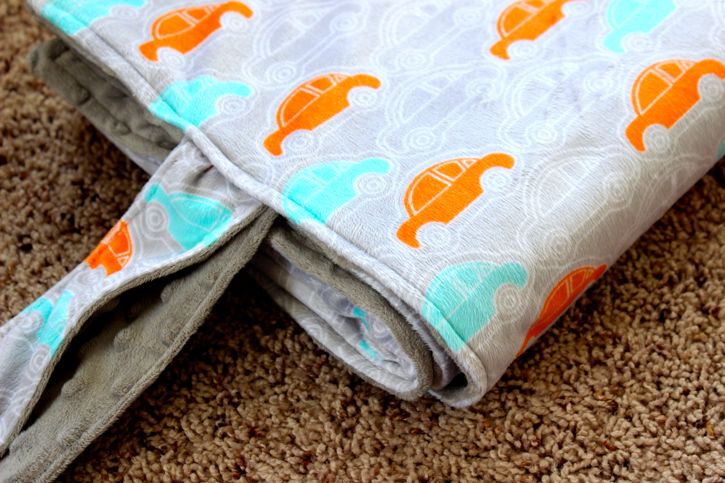
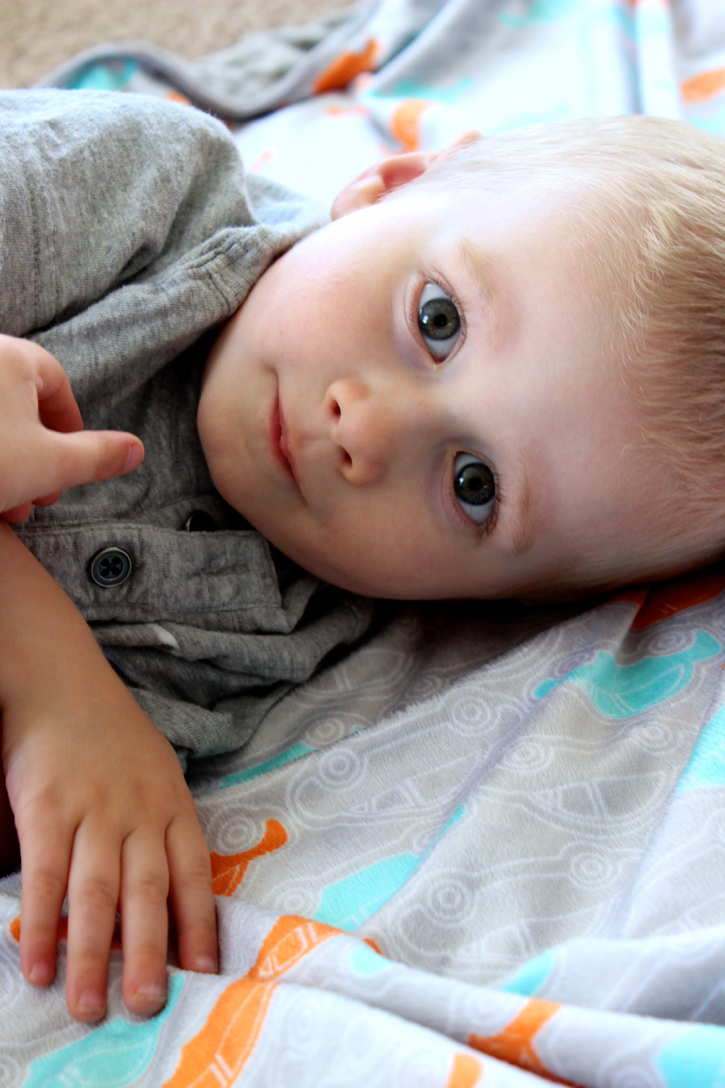
As a mother, I have wanted to make something special for each of my kids before they were born. My 2 year old is extremely attached to his double-sided minky blanket and I wanted to make sure that I had a new blanket that was extra special for our new baby boy! So I made a double-sided minky blanket just for him. I am absolutely in love with the soft minky. It is so adorable!
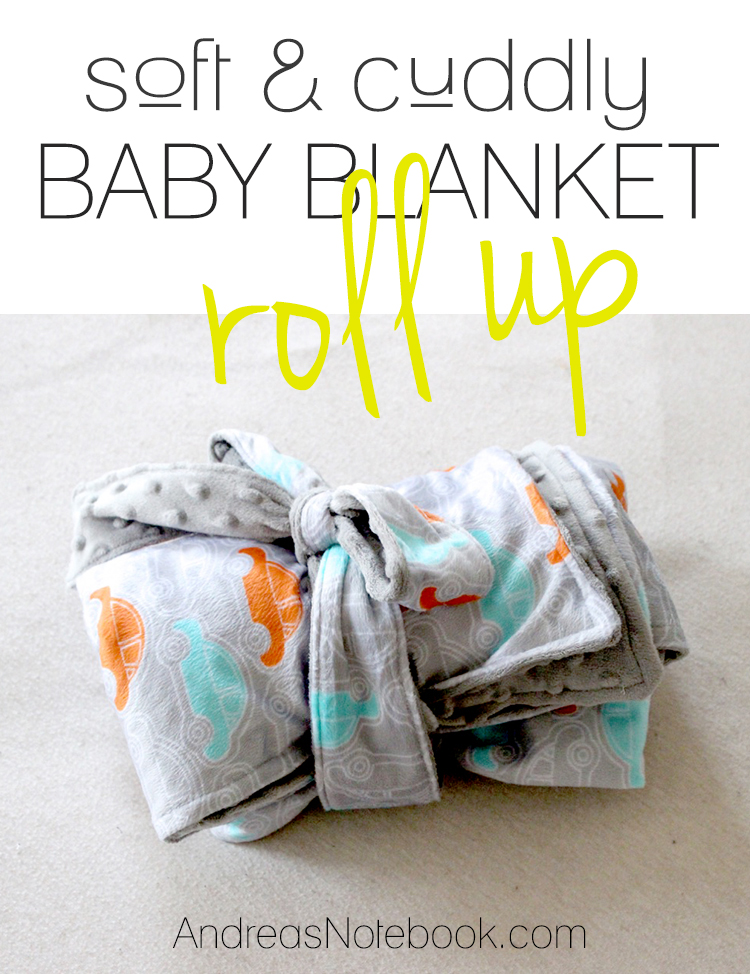
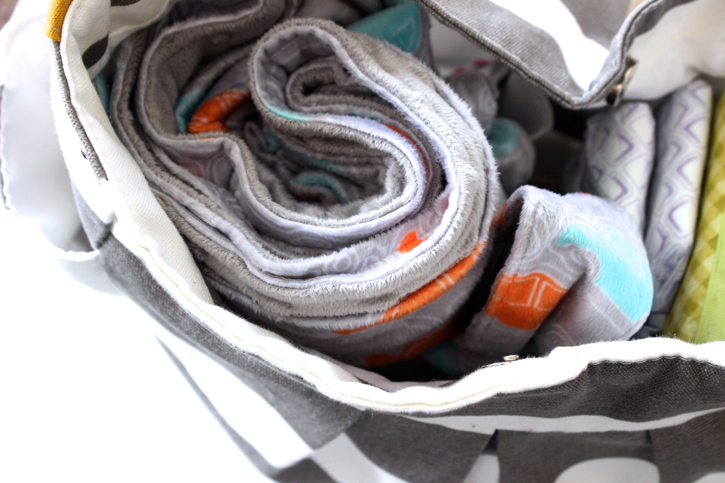
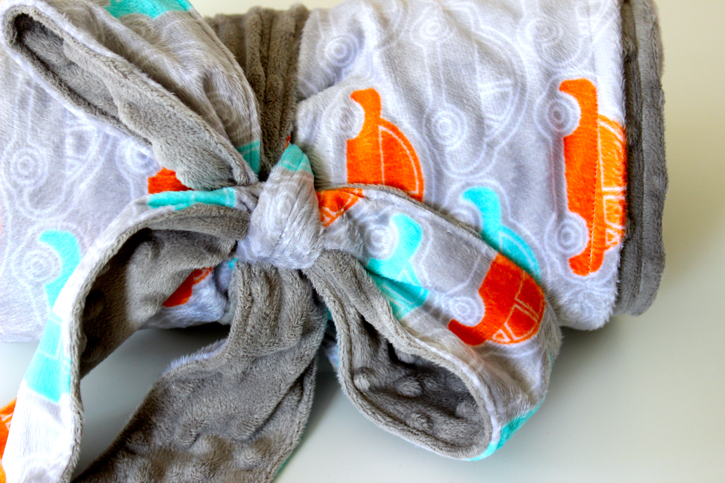
I wanted it to be something that would be easy to use on-the-go because summer is a crazy busy time for us and we are constantly going! Blankets can be bulky and hard to pack, so I decided to make a roll-up blanket so that I can easily roll it up, tie it off and go. Once it is tied up, it easily fits in my bag with plenty of room for all the other baby essentials.
I wanted it to be something that would be easy to use on-the-go because summer is a crazy busy time for us and we are constantly going! Blankets can be bulky and hard to pack, so I decided to make a roll-up blanket so that I can easily roll it up, tie it off and go. Once it is tied up, it easily fits in my bag with plenty of room for all the other baby essentials.
Supplies Needed:
- 1 ½ yard minky
- 1 ½ yard coordinating minky
- coordinating thread
- sewing supplies
Instructions:
1. Find the perfect fabrics for your blanket and cut them to size. Typical baby blankets are 36×36, however, I love to have a blanket to set out on the floor as my babies get a little bigger and are moving around a bit. So I chose to make mine 42×42 to give a little more room for my growing baby!
Plus, my toddler became attached to his baby blanket and it doesn’t really cover him up, so I wanted to make sure that this blanket will last through the toddler years as well!
2. Once you decide on a size, add ½ to ¾ inch to each side before you cut. I cut mine 45×45 so that I would have some room to work with!

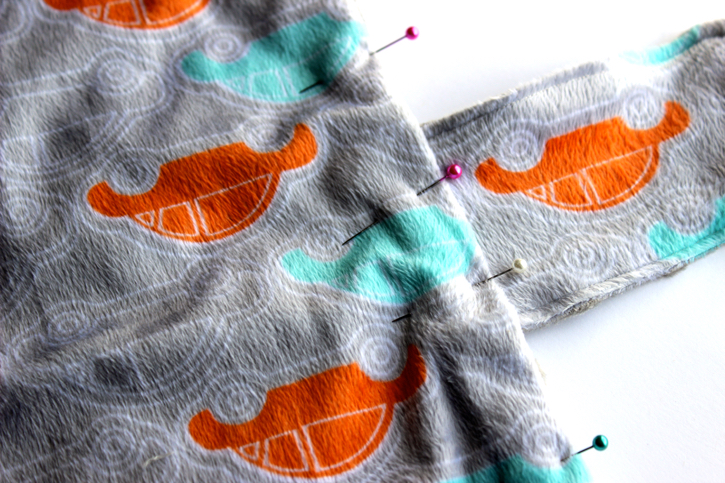
3. Once your fabric is cut to size. Place one fabric face up on the floor and place the coordinating fabric face down on top of it.
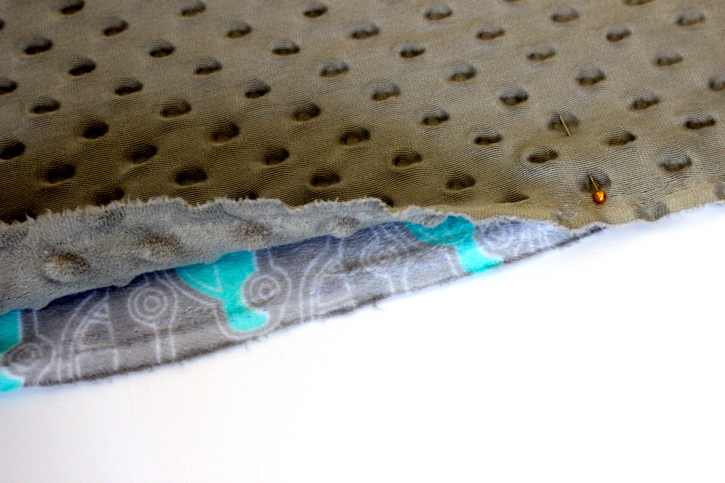
4. Line up your edges and pin together.
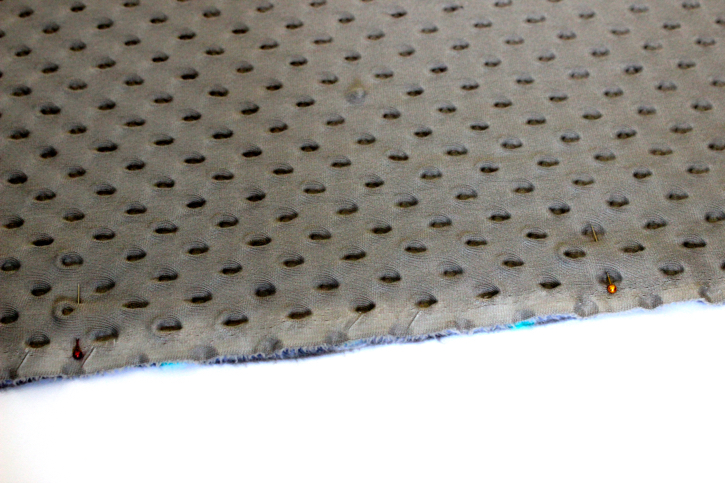
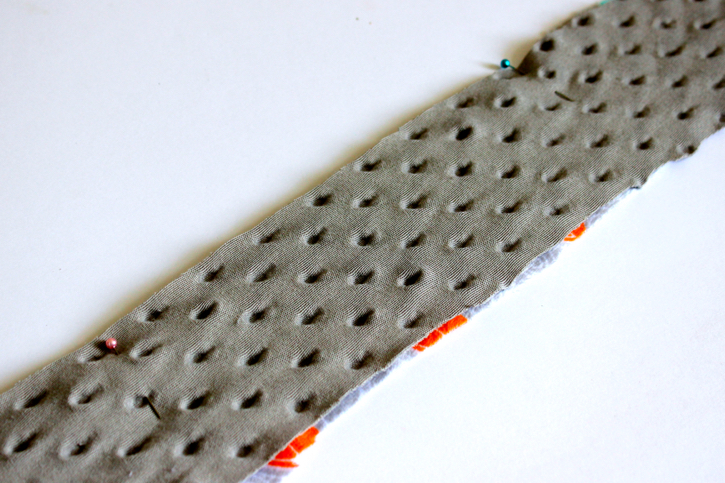
5. After pinning, you are ready to start sewing. Sew along the edges leaving ½ inch seam. Go all the way around.
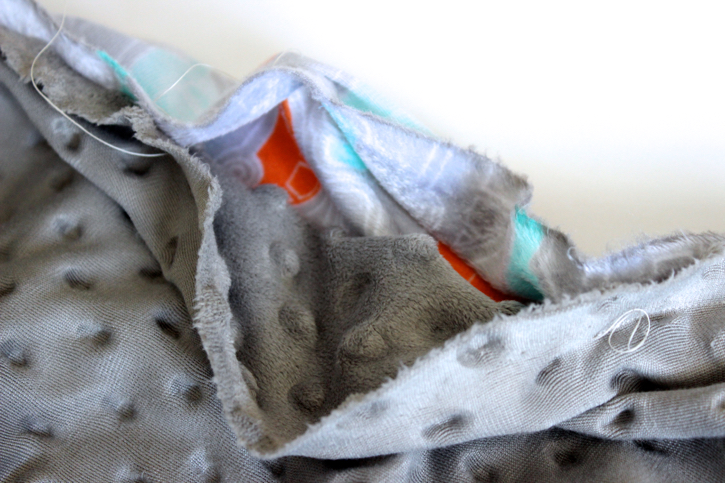
6. You will want to leave about 3-5 inches open so that you can flip the blanket inside out once you have sewn around the edges.
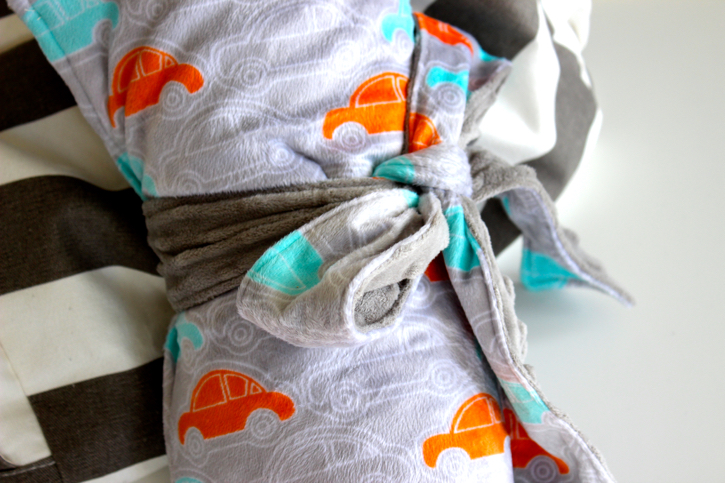
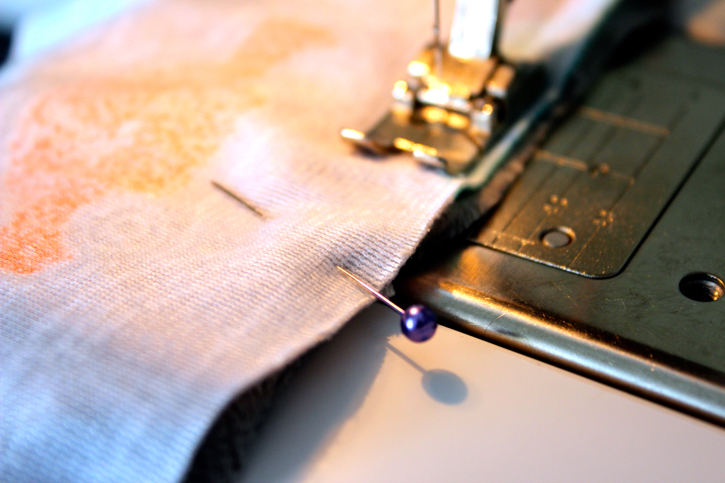
7. Cut 2 strips 4 inches by 25 inches for the ties. Pin the strips right sides together and sew around the edges leaving a ½ inch seam. Flip the strips inside out and iron flat. You can top stitch these strips if you would like!
8. Flip the blanket inside out and lightly iron the edges with a warm iron so that it will be easy to topstitch the edges. Pin again all the way around the edges. Insert the ties into the 3-5 inch opening you left on your blanket and attach firmly with two pins. This way when you topstitch they will be firmly attached.
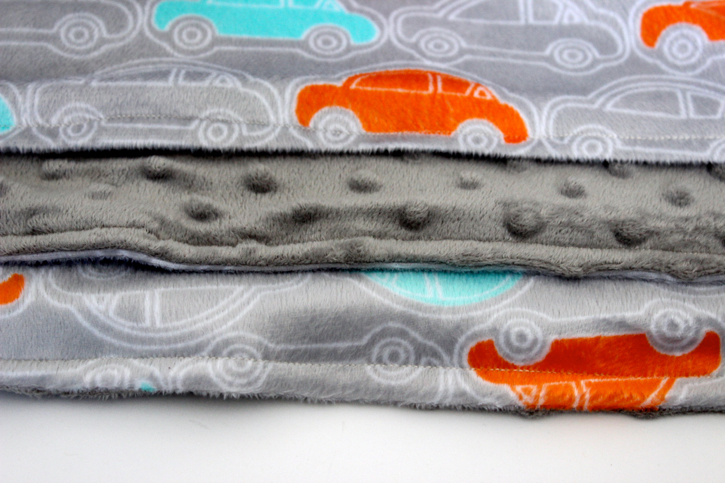
9. Topstitch around the edges leaving ¼ inch seam. Trim any leftover thread and you are good to go!
10. Fold up and go!
This blanket was so easy to make and so adorable. It will be so perfect to lay out for baby boy to use this summer and will definitely protect his soft skin! Now I just have to make sure that my other kids don’t fall in love with it and try to claim it as their own!!
This really would be the perfect gift! So if you are looking for an easy project that will be cherished… try out this double-sided minky baby blanket!!
Good luck!!
Comments & Reviews
Jaime Jeffer says
Such an adorable blanket! I have a new grandbaby coming so I will definitely make one. Can you substitute flannel instead of minky?
Thanks!
Judy says
I think you can use Minky on one side and flannel on the other. I have made a rag quilt that way. I am concerned about the blanket having attached ties. I understand the reason for the ties, but I think that could be a hazard. I would make it without the ties attached. Maybe make one long tie that mom could keep in her tote bag if she wanted to wrap it up.
Sarah says
I wouldn’t iron minky but I love your combo!!
Katie Cottingham says
Instead of the long flappy ties stitched into the sides or an unattached tie (which personally I would lose instantly) what about stitching the tire down along the flat side of the fabric, reducing how much bumpy you need to make double sided so the loose ends only extend enough to tie together when rolled. Or maybe make a little bag to stuff the roll into for ease of packing?
KWolff says
How do you keep your minky from slipping and getting “wonky” when sewn? My youngest LOVES Minky and I have used it for a couple of different projects. It will start out square when I cut it and then as I sew it shifts.
This is a cute idea and I love the idea of a tie on it.
Thanks for sharing!
Bertha Goggin says
My Mom made similar blankets in the 1960’s – so there was no Minky! For summer blankets she would use a pretty cotton, and seersucker on the other side, for winter, a pretty cotton and flannel. She also added a lace trim for girls, or piping for boys. I make them now, and I round off the corners, which makes sewing all around a lot easier, and the addition of the trim makes it easier to pull out all the seams and do the topstitching. I also make them 42″ square (width of fabric for most cotton less the selvage) – that makes them also a nice cover-up for breastfeeding Moms. My special twist is to make them with parents college fabric when it is available. Extra fun if the Alma Mater of each parent is a rival with the other, one fabric on each side!
Duck life says
The instructions you give are very specific. I like so much. thank you.
Tutuapp says
Trying to think of the perfect gift can be a daunting prospect. With so many options, it’s hard to know what would make the perfect gift for your girlfriend. It’s important to remember that the most important part of buying a gift for anyone is to make them feel like you really know them.
Showbox says
With a little consideration, you can be sure to see a happy face when she opens the box.