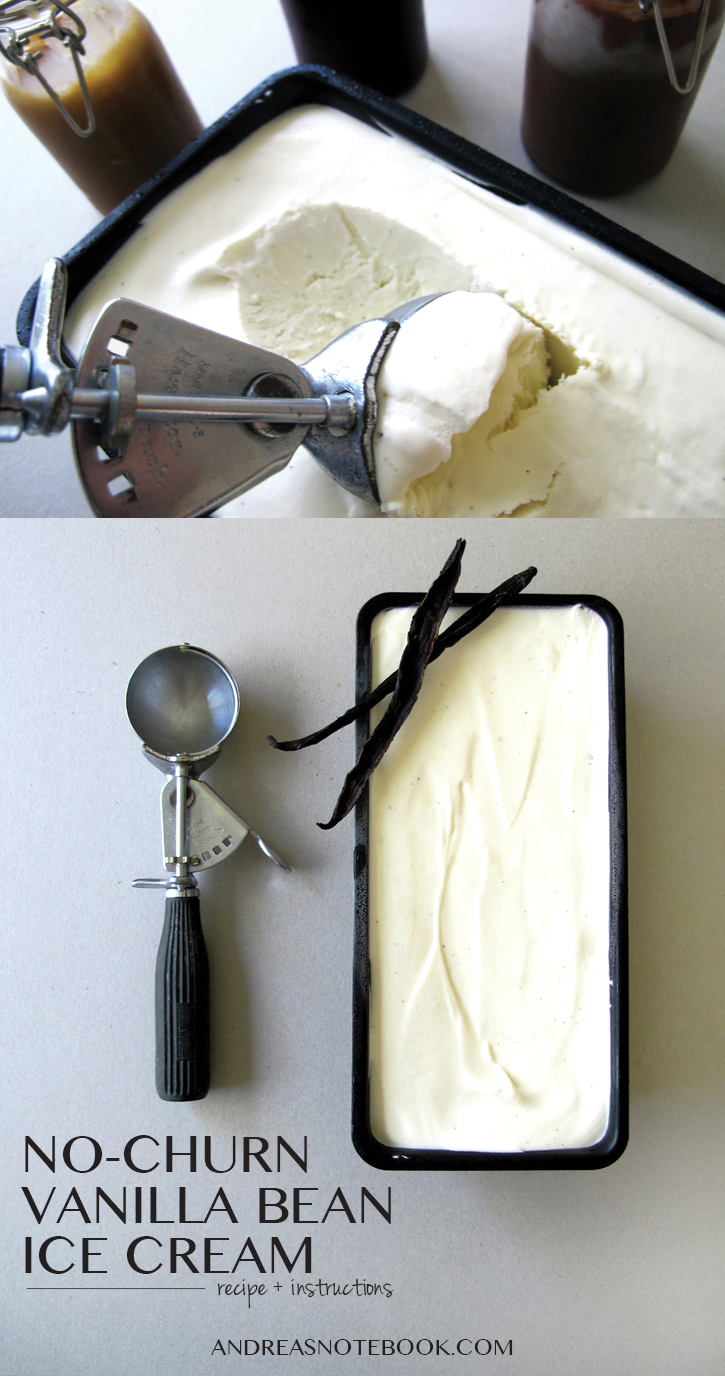
Ice cream is the ultimate summer dessert. Nothing beats it on a hot, humid day. And I love homemade ice cream. It is simple, full of flavor, and guests think you spent all day in the kitchen!
Our family does not own a ice cream mixer (we tried one but it created quite a mess and we gave it back!). So I decided to experiment with a no-churn recipe. This recipe uses just three ingredients and a mixer. No ice cream maker necessary! The result is light, fresh and creamy. In a word: delicious.
No-Churn Vanilla Bean Ice Cream
Adapted from Martha Stewart
Ingredients
- 2 cups (16 oz) heavy cream
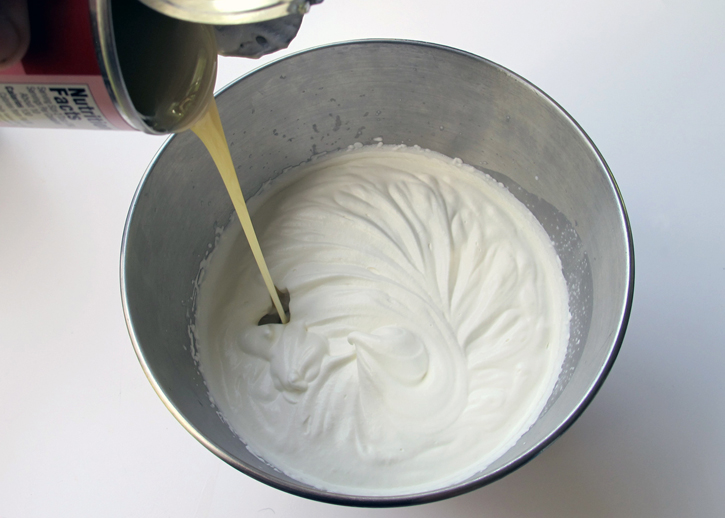
- 1 (14 oz) can sweetened condensed milk
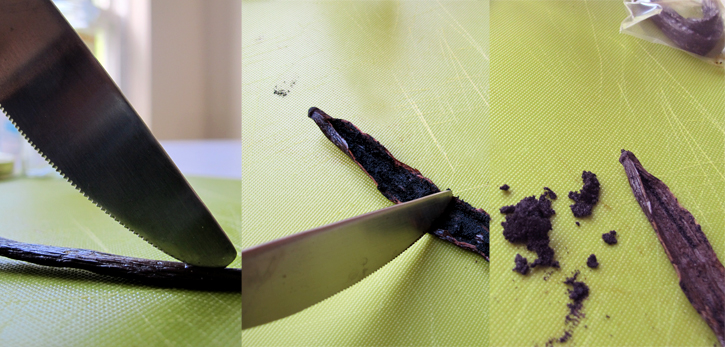
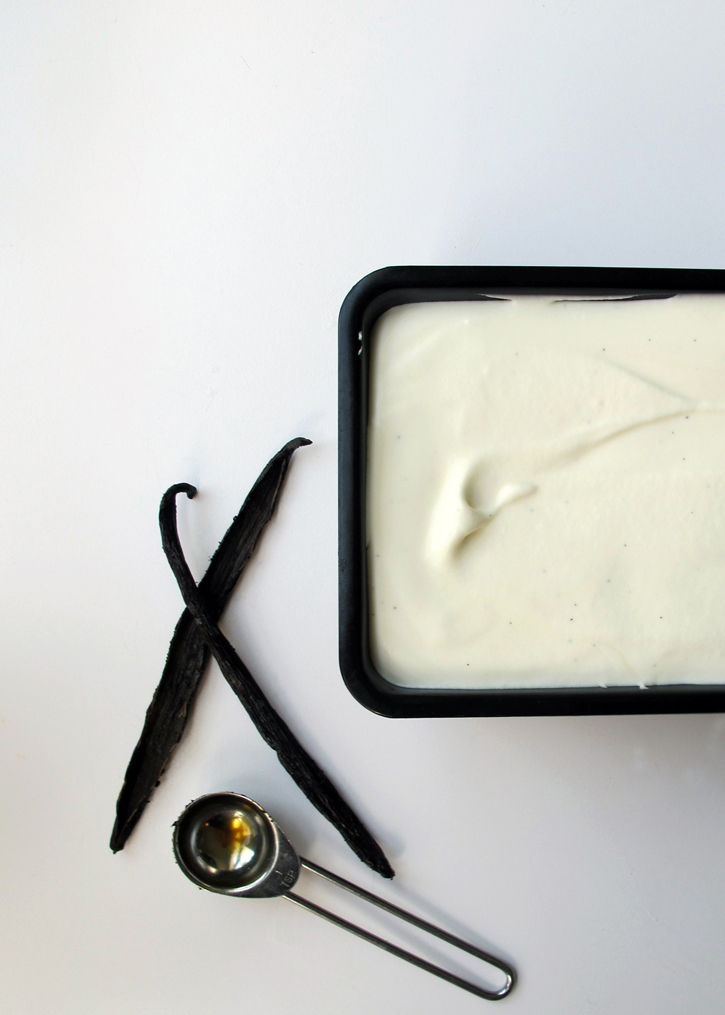
- 1 teaspoon fresh vanilla bean (about 2 pods) + 1 teaspoon vanilla extract
Directions
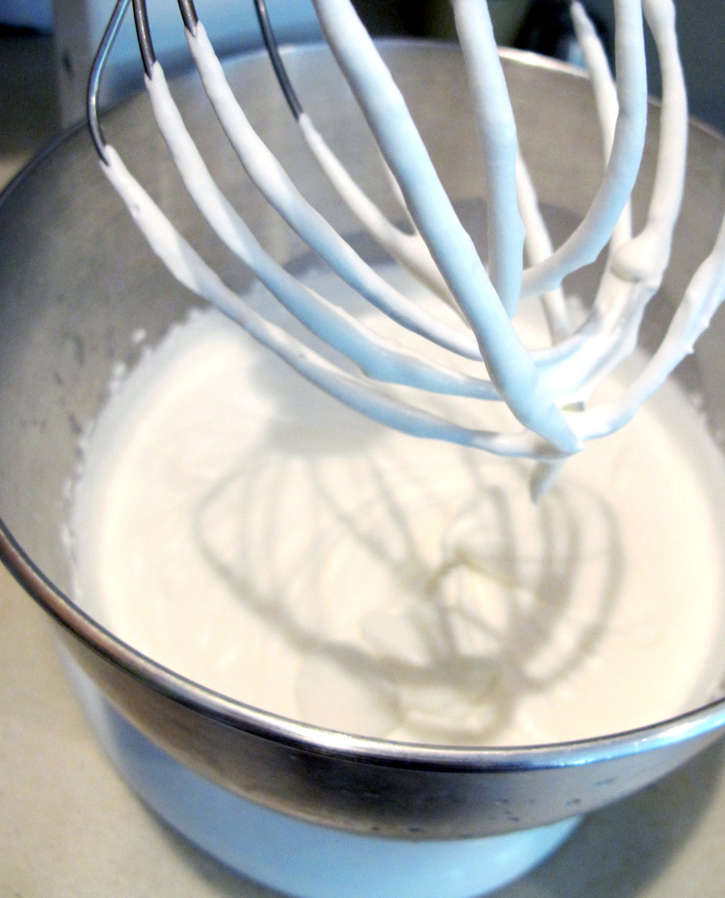
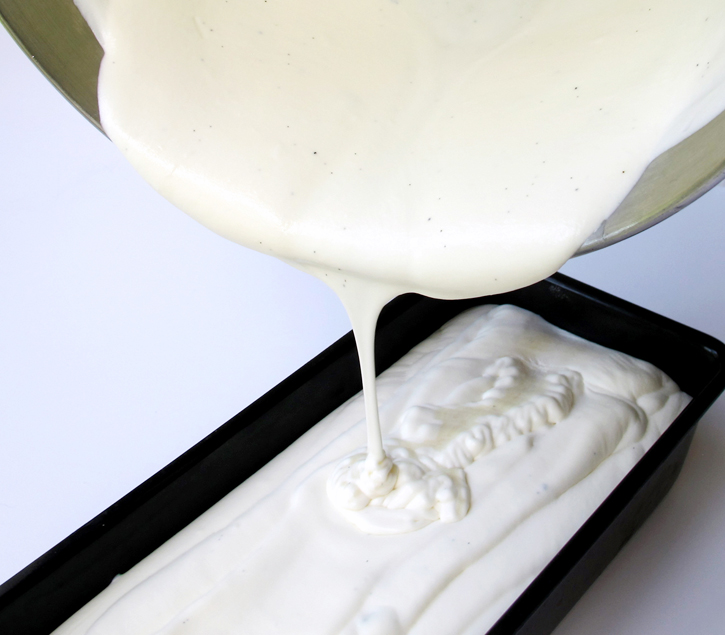
Whip whipping cream in mixer until peaks form, about 3 minutes.
Gently fold in condensed milk.
Cut open the vanilla pod, peel open and gently scrape out seeds.
Blend in the seeds from 2 pods + 1 teaspoon vanilla extract into ice cream. Pour into loaf pan. Store in freezer until firm (about 6 hours).
A few tips:
Place your mixing bowl and whisk in freezer before whipping the cream.
Pure vanilla extract can be substituted for vanilla bean, it will just lack the small flecks of black.
Toppings can easily be mixed into ice cream mixture to create new flavors, just keep in mind that water from fruit can change the consistency of the ice cream.
I hope you get the chance to make this soon! Will you create classic vanilla or branch out to a new creative flavor?

Ingredients
- 2 cups (16 oz) heavy cream
- 1 (14 oz) can sweetened condensed milk
- 1 teaspoon fresh vanilla bean (about 2 pods) + 1 teaspoon vanilla extract
Instructions
- Whip whipping cream in mixer until peaks form. Gently fold in condensed milk. Cut open vanilla pod, peel open and gently scrape out seeds. Blend in the seeds from 2 pods plus 1 teaspoon vanilla extract into ice cream. Pour into container. Freeze.

Comments & Reviews
Jenny Kim says
That is a super easy recipe, I think I might try it.
Olivia says
This is similar to other no churn ice cream recipes, but what I like about this one is that instead of blending everything together at once, you first make the whip cream into stiff peaks and then gently fold together with the sweetened condensed milk. This recipe suggests slowly folding the milk into the cream, but I find that doing it the other way around keeps the most air in the cream. Some people say no churn ice cream is too sweet, but that is easily fixed if desired by making your own sweetened condensed milk using less sugar. I prefer the quickest method which calls for powdered milk, sugar, butter, and boiling water. (I made a 24 oz batch using 2 1/2 C. Powdered milk, 1 C. Sugar, 1/2 C. Melted real butter, and 2/3 C. Boiling water. I just put the stick of real butter in the water and brought to a boil in the microwave. Just mix everything together and then chill before using in this ice-cream recipe. This ice cream recipe works great as a base for adding other ingredients or flavors. I added my ingredients to the chilled sweetened condensed milk before folding the whipped cream in so as to avoid deflating the whipped cream. It’s definitely helpful to freeze your mixing bowl, and pan in order to keep the desired texture from becoming too liquid before it has a chance to freeze. Keeping the air in the cream is the key to this recipe! It also helps to chill the heavy whipping cream before whipping it. Some people even chill their beaters or electric mixer detachable whisk. Don’t try to whip this much heavy cream by hand or your arm might sooner fall off. Use an electric mixer, beaters, food processor, blender, or anything besides a simple spoon or whisk. Otherwise, homemade ice cream might not feel worth it. I also used a heavy glass Pyrex bowl with an airtight lid instead of a loaf pan so the ice cream wouldn’t absorb any unwanted flavors from the air inside the freezer. This ice cream is fast and easy to make! The hardest part is waiting for it to freeze! It takes longer than you might expect (about 6 hrs). It also melts faster than regular ice-cream, so return it to the freezer ASAP after scooping! You can’t get the same texture back once it melts and is frozen again. Try using a warm scoop by running it under hot water, but dry it off so you don’t drip hot water into your ice cream. If all of this helps you make the best ice cream ever, then great! If this is way too complicated, then just blend all the ingredients together and freeze. It’ll probably still taste good even if it doesn’t have the desired texture. I also love using real vanilla beans or at least a high quality pure vanilla extract. It makes it more gourmet tasting.
Stacey says
Made this yesterday as my first no churn ice cream attempt. Success! Followed the recipe to the letter and the consistency is spot on — smooth, creamy and easy to scoop. The vanilla smell is strong enough that you know what flavor it is, but not overpowering when you take a bite. A perfectly balanced final product, that’s oh so pretty with those little black vanilla gems. Pairs well over warm brownies and delicious enough to stand alone. Will definitely be making again!
Rose Powers says
My mother made no churn ice cream when I was a child and I have been making it for years. I use heavy cream and regular milk – about 2 parts heavy cream to 1 part milk sugar or stevia. I use an aluminum ice cube tray without the divider. Aluminum makes the contents freeze rapidly. I just stir the ingredients together in the pan and freeze for about 3 hours. When it gets slushy, I add flavoring and anything I want like chocolate chips and freeze for another 2 hours. I do this in the afternoon so it is ready for dinner. This type of ice cream only stays firm long enough to eat. The ice cube tray is perfect for a family of three or four.
atari breakout says
Thank you for sharing this great post, I am very impressed with your post, the information given is meticulous and easy to understand. I will often follow your next post.
basketball legends says
I think this is an informative post and it is very useful and knowledgeable. therefore, I would like to thank you for the efforts you have made in writing this article.