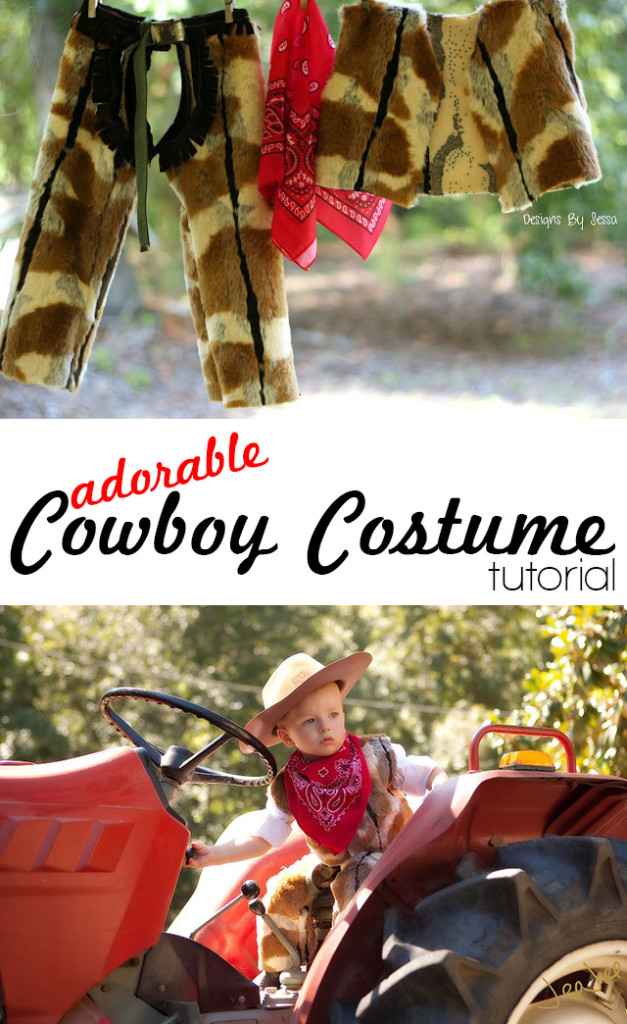
Hi Everyone! I’m Vanessa. I’m from South Carolina, and my sweet little blog is called Designs By Sessa! I blog about Jesus, sewing, and love it! I’m thankful to be a part of this fun series! Thanks, Andrea, for asking me to be a part of it!
While at Mary Jo’s I started talking to this guy that made mascot costumes for schools. He suggested that I sew the chaps onto a cloth belt. It was the BEST suggestion ever!
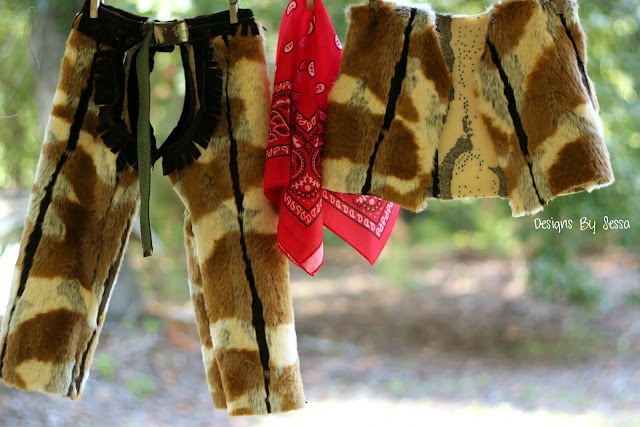
I would not say this is a beginner sewing project, but I believe no matter who you are, if you set your mind to it, you can do it! Using fake fur, suede, and a belt, manuevering it all, and the pure thickness of the project was tricky, but for me, it was worth it! Use a jeans needle if you attempt it and a longer stitch length (4.5/5), go slow with the bulky areas, and keep in mind with fur, the less you “handle” it, the less it’s going to shed!
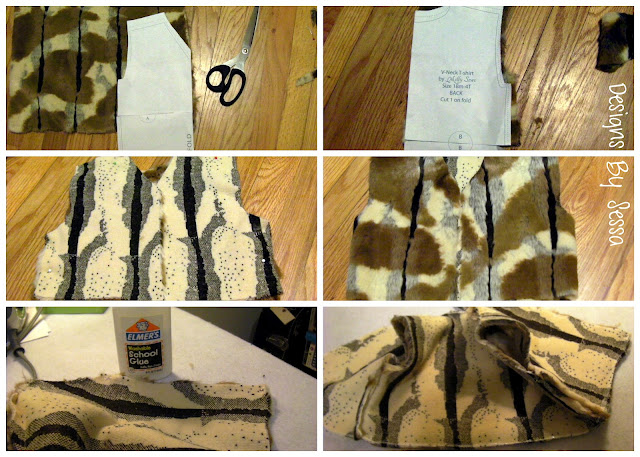
Vest: Using the Melly Sews Vintage V-neck pattern that she sent me as a gift, I cut out my vest shorter than the normal length, so it hit Cai mid-waist, and sewed the side and shoulder seams. I then used Elmer’s glue as my “fray check” because I knew I would not be washing this outfit. It worked wonders to not shed the fur. Apply the glue to the edges and let dry over night.
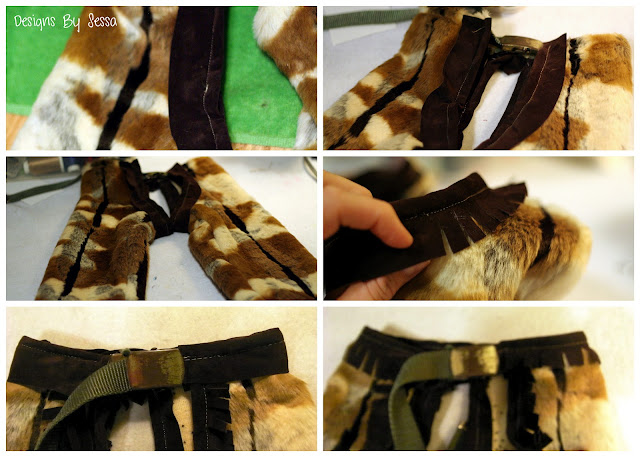
Cowboy Chaps: I did have to make my own pattern using some pants that fit him currently. There is no side seam, just the seam at the inner leg. With chaps, you leave the front and back crotch open, only sewing the inner leg seam. The Oliver + S nature walk pants would work great as a guide with a straight across waist modification, if you need a real pattern. Cut two of your pattern. Pin your belt to the top edge of your fur working around the buckle. I found it best to try the belt on and mark where it fit him best on the belt. Then pin my fur centered around my marks. Sew a straight stitch across the fur, making sure the belt is on the bottom, so the feed dogs catch it and fur won’t get in your machine. Leave 1 inch on either side to tuck your suede bias trim into. Sew the inner leg seam, and then cut 3 suede strips 2.5 by 22” or however long you need bias trim for.
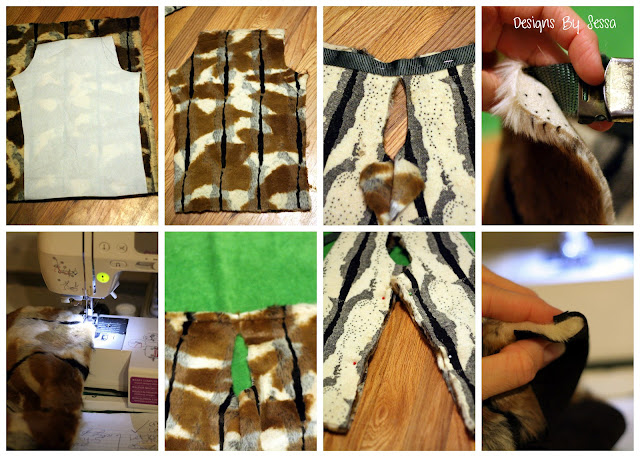
The bias trim: Cotton or jean fabric would have been easier, but I loved the look of suede, which is very difficult to sew with as trim. Due to the fact that suede is not going to fray, I just folded it around the edge of the fur and using pins, pinned it really well and sewed. I won’t lie. This was very tricky to sew with, but I enjoy a good sewing challenge! I used the trim along the inner leg openings and over the top of the belt and fur. Sewed encasing the fur edges tucking it around the 1 inch opening that we left open at the belt. Then doing the same at top edge over the belt sewing down the 1 inch opening and leg trims. I cut the trim to make it look like fringe.
And that’s “it”! The hat was from the Dollar Tree ($1!) and I hand-stamped “Cowboy Cai” on it with ink, that with the bandanas were my party favors for the kids at the party!
Thanks for having me, Andrea! I hope y’all enjoyed my fun and will at least come on over and say ‘howdy’! haha! (if you really come say howdy, you will make me laugh…so you should do it! ha!)
Comments & Reviews
Justine says
Si stinking cute!