Today we're taking a break from the Handmade Dress Up Series to show you a tutorial for making your own leather purse straps! Cheryl from Paradiso Designs sells PDF purse patterns and knows her stuff about making bags! I hope you enjoy this tutorial!
My name is Cheryl Kuczek, and I have my very own sewing pattern company called Paradiso Designs
I have to thank the very generous Andrea for allowing me to show her audience something fun, and maybe new for all you lovely sewists out there!!
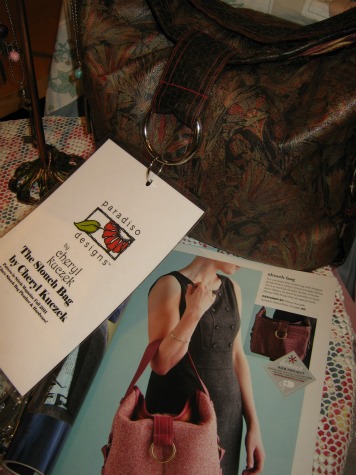
I have a lot of bag patterns that I started my company with. Some of the bags have straps that look like leather, but they are not! You may have seen another one of my creations gracing the pages of the last issue of Stitch…the Slouch Bag. Here is a picture of the very first Slouch Bag that I made with Italian pleather and Italian laminated cotton. This is a free downloadable pattern at Stitch Magazine on line….click here to get it! You can see the strap that I made using my Paradiso Designs technique!
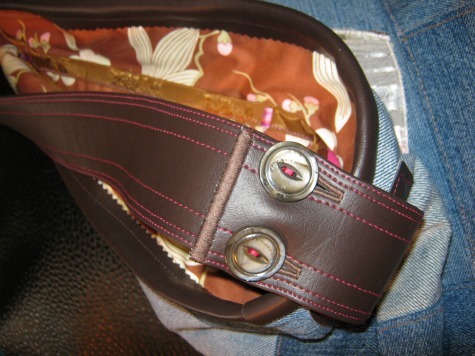
And now I am going to show you the step-by step tutorial for you!
A) Here are the straps that I make for my bags. The look like leather, they feel like leather, and they act like leather, but they are pleather/vinyl (pv).
You can buy pleather and vinyl at many fabric stores, and it is not too expensive, plus you can then give your bags that designer lok to them. The Slouch Bag looks kinda like a Marc Jacobs bag, but his bags can cost you $1200.00 or more. I think it is dandy to make your own, and look like a million bucks with your own two hands.
B) You need the proper tools….
TO SEW Pleather…you will want 110 OR 100 needles…they can be just regular, denim, leather or topstitch needles. The topstitch are great because they have a bit bigger eye of the needle, which is nice if you are sewing using one of the newer 40 weight threads which can give the appearance of a thicker thread, therefore stitch.
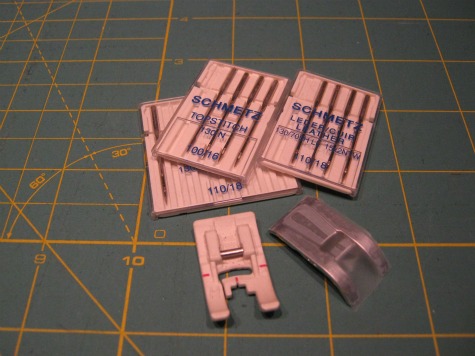
You will need a telfon foot or put a piece of scotch tale on your regular foot. These are Viking feet. The Telfon works great on most pleathers. Patent like leathers may work better with the scotch tape. I know that these machines have these feet;
- Viking has the H foot
- Bernina has the 52c or d foot that is Teflon, and the same number foot in green (non-stick) and will work on the patent like pleathers.
- Pfaff has a Telfon foot
- Brother/Babylock/White/Janome have a white plastic foot that does work on most pleathers. This foot appears to be interchangeable between Brother, Babylock, White, and Janome.
You really need to cut pleather/vinyl (p/v) with a rotary cutter and not scissors because it is very important to have a smooth straight line! I always cut my strap the entire width of the p/v. 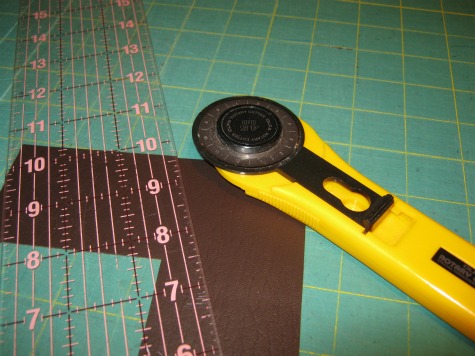
That would be around 54- 60". Just a regular strap starts at about 42".
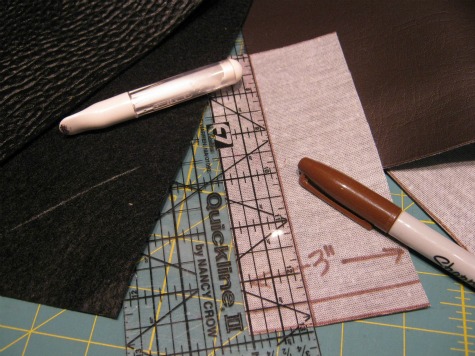
I have two of the kinds of p/v to use for straps. The brown p/v has a woven backing on it, and the black has a "felted" backing. These are perfect for being very durable and sturdy, exactly what I strap needs to last through wear and tear!
The strap starts out be 3 times its finished size! So for a 1" strap, you would start with a 3" piece wide p/v, for 1.5" a 4.5"piece would be used, etc.
Next, a line is drawn ⅓ of the way across, as you can see in this picture the back side of the 3" pleather is marked with a line 1" from one edge. Use a sharpie only in the same color as the pleather, I have seen sharpie bleed through. On the felted back, I use a roller chalk, to make the line, this one is by Clover. I love it as I cut A LOT of p/v all the time!
Finally it is now time to sew!!
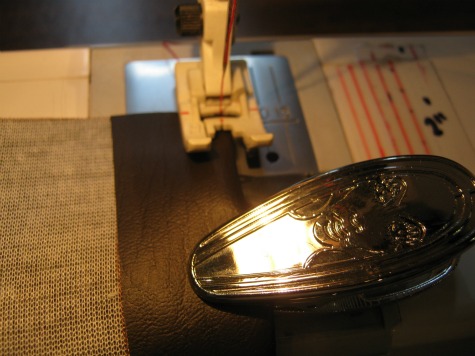
As you can see here, this is the start, fold in the edge to the drawn line, I use these nifty "Get a Grip" Clips to hold the p/v folded into place as the first row if stitching is sewn. I like to start 1/16" from the folded edge, and sew the entire length of pleather, ⅛" will work too. Here are more tips…
- Only sew in one direction, otherwise the p/v will twist.
- I leave my threads long at the beginning, and cut them at the end so I do not forget which direction I need to sew.
- Use a 3.5-5.5 stitch length as you will be going through thick stuff here…using a bigger needle and stitch will be easier to sew and will look better
- you do not need to backstitch.
This picture gives you a look at what you will have after that first row of stitching, and look at the stitching…you DO NOT want little stitches.
The second row of stitches will "catch" the other end of the pleather…as the other side is folded toward the first row of stitches. As you can see they edge is right next to the stitches, and this is what makes the edge disappear, and sew the 2nd row of stitching ⅛" away from the 1st row of stitches. 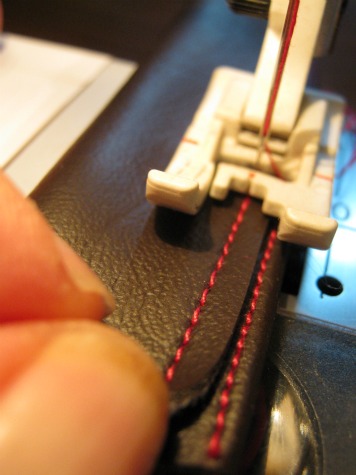
Do not pull the p/v down, or the strap will start to twist, just "fold" to the line of stitching.
If you do not have these measurement marks on your machine, you could make marks of where you must sew to get this configuration.
It is possible that you can get the line you need by moving your needle.
Ok…now turn the strap over to sew the 2 rows of stitching on the other side in exactly the same way as the first 2 rows of stitching. 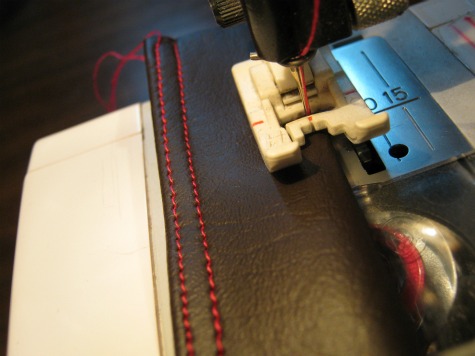
This is really pretty…think about your thread too…this thread matched with the appliqué' on this bag, and made it pop!!
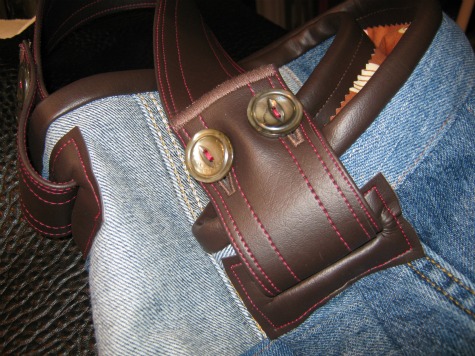
And here is the finished bag…check out the end of the straps…I like to use the same color of thread as the strap for the satin stitching of strap edge and button holes…yes they really work. 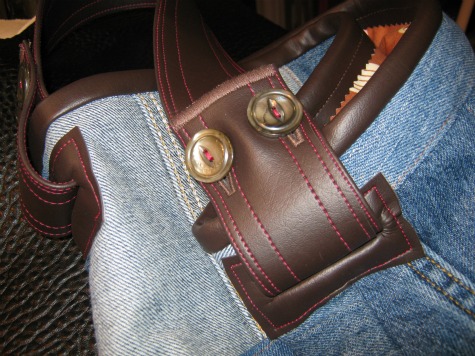
Here is another shot of the Urbanista HoBo Bag by Paradiso Designs…this pattern will be out in late November/December. Old jeans were used upcycled to create the bag outer material. Check out the p/v edging….I will do a tutorial about that next week, the cool bound like strap slot will be the week after that!!
And here is the full view of the bag!! 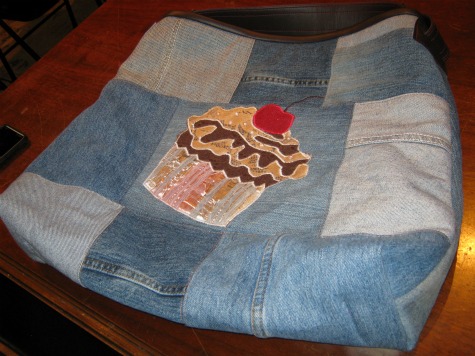
Cupcake appliqué pattern by Paradiso Designs, out in late October!!
Thank-you again Andrea for this opportunity!!
Comments & Reviews
Lisa says
Thanks so much for this tutorial! I love the leather look on the bags I make as well but have been struggling with a way to do the straps. I will certainly be trying this soon…perhaps even tonight!
nadia says
merci pour vos explication
zaza says
The pleather can handle big charges? Cause I’m always breaking my purses straps, but only the metal part that always move. So I might do my own one but I want to be sure it can handle it!
Thank for the turorial tho!
Barbara Harris says
Hi Andrea,
Great idea, thanks! The only thing I would tweak is that I usually round off the corners of the leather strips, not rounded off, just enough so that the leather corner isn’t so sharp. I love the double layering & reversibility.
Regards,
Barbara Harris
Karen says
The tutorial looks great – but I am easily confused. So I sew the first row of stitches along the first 1/3rd fold. Now in your photo you fold the other side to the first row of stitching….but I see you already have a stitched line along that other side?
So you will have a raw edge showing?
Help……..thanks
pakistan leather says
Great work one of the great tutorial i have ever seen keep it up.
Sew For says
Thanks so much for this tutorial! I love the leather look on the bags I make as well but have been struggling with a way to do the straps.
Thank for share again!
An Powell says
Hi there,
I actually saw your articles when I run a quick search on Google about Sewing and other needlecrafts.
Your website really caught my attention while I’m looking for persons who share the same interest on the Sewing community. We are running a Sewing review website and thought that dropping a link to my site will both expand my audience and improve the community of Needlecraft users.
I’m opening to the best opportunities I can get and could go an extra mile writing an awesome piece to be published on your site. To be honest, I’m really working on an article right now and I hope it could be published on your website too. I’ll make sure you’ll love it and will consider it as valuable content for your audience for its contextually relevant suggestions.
Just let me know what you think and also please let me know the options in order to drop a link and at what cost so we can discuss it right away. Okay? If you don’t accept to publish a guest post on your website, can you just edit an article related to sewing or sewing machine and drop a backlink to my website?? I would be very glad to discuss it too.
I hope to hear from you very soon. Thank you for spending time reading my email.
Have a great day!
Best regards,
An Powell
Sewing Chair says
Definitely it’s a good project. Many many thanks to sharing with us 🙂
Jon says
Thanks for sharing! I’ll try to do it myself